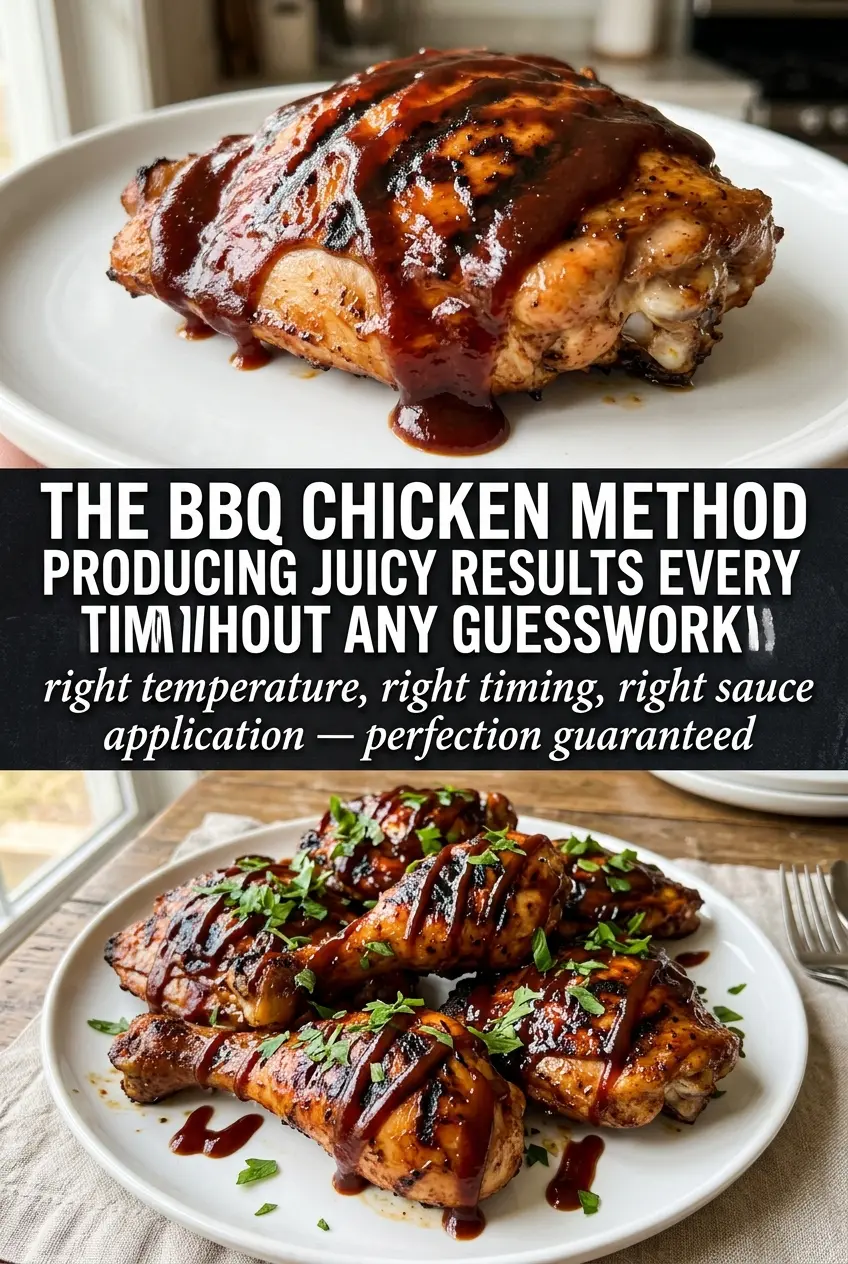
Juicy BBQ chicken earns its place in the rotation when the skin gets sticky and lacquered, the meat stays tender, and the sauce tastes smoky instead of burnt. The best versions aren’t overloaded with ingredients; they’re built on good seasoning, steady heat, and a sauce that gets brushed on at the right moment so it can cling and caramelize without turning bitter.
This method keeps the chicken over indirect heat long enough to cook it through gently, then moves it to direct heat only for the final glaze. That timing matters. If you start with sauce too early, the sugars darken before the chicken has a chance to finish, and you end up with blackened spots and dry meat.
Below, I’ll walk through the grill setup, the one small sauce tweak that makes a difference, and the easiest way to tell when the chicken is actually done. Once you’ve made it this way, it’s hard to go back to guessing.
The sauce caramelized right on the grill and the thighs stayed juicy all the way through. I used the indirect heat method and it came off perfect at 165 without any burnt spots.
Like this juicy BBQ chicken? Save it to Pinterest for the nights when you want smoky glaze, tender meat, and a no-fuss grill method that actually works.
The Part Most BBQ Chicken Gets Wrong: Sauce Goes on Late
The biggest mistake with grilled BBQ chicken is treating the sauce like a marinade. BBQ sauce usually contains sugar, and sugar burns fast over direct heat. That’s why the chicken can look done on the outside while the glaze tastes scorched and sharp.
This version keeps the chicken seasoned simply at the start, then uses the sauce in the final stretch when the meat is already nearly cooked. The indirect heat gives you time to build tenderness first. The direct heat at the end is just for color, stickiness, and that glossy finish that clings to the skin instead of sliding off.
- Indirect heat — This is what keeps the chicken juicy. The grill acts more like an oven at this stage, which lets the inside cook through before the outside gets too dark.
- Smoked paprika — A small amount gives the sauce a deeper, barbecue-stand flavor without needing a long ingredient list. It’s one of those ingredients that disappears if you use too little.
- Apple cider vinegar — The vinegar cuts the sweetness and keeps the sauce from tasting flat. Don’t skip it unless your BBQ sauce is already sharp and tangy.
What Each Ingredient Is Actually Doing Here

- Chicken pieces — Using a mix of thighs, legs, and breasts gives you different textures on the platter, and the bone-in pieces stay juicier on the grill. If you want the most forgiving results, lean harder on thighs and legs.
- Olive oil — This helps the seasoning stick and keeps the chicken from grabbing the grates too early. You don’t need much, but it makes the skin and surface brown more evenly.
- BBQ sauce — Use one you already like, because this recipe doesn’t hide a bland sauce. A thicker sauce will cling better on the grill, while a thinner one can be sharpened with the vinegar and reduced a little in the last minutes.
- Apple cider vinegar — This loosens the sauce just enough to brush on in thin, even layers. It also keeps the finished chicken from tasting one-note sweet.
How to Grill It So the Chicken Stays Juicy
Seasoning the Chicken
Pat the chicken dry first. If the surface is wet, it steams before it browns, and the seasoning slips right off. A light coat of olive oil, salt, and pepper is enough here. You want the chicken seasoned, not slick.
Building the Sauce
Stir the BBQ sauce with the apple cider vinegar and smoked paprika before you head to the grill. The sauce should taste a little brighter than you want in the bowl, because heat will soften it later. If it tastes flat now, it’ll taste flat on the plate too.
Grilling Over Indirect Heat
Place the chicken over indirect heat and close the lid. Turn it every 10 minutes so it cooks evenly and doesn’t dry out on one side. The chicken should look opaque and firming up, but not deeply browned yet. If the fire is too hot, pull it back or move the pieces farther from the flame before the outside gets ahead of the center.
Glazing and Finishing
During the last 10 minutes, brush on a generous layer of sauce and move the chicken to direct heat. Watch for the sauce to bubble and turn glossy at the edges. That’s the cue. Keep turning and basting until the internal temperature reaches 165°F and the glaze looks sticky, not wet. Let it rest for 5 minutes so the juices settle back into the meat instead of running onto the cutting board.
How to Adapt It When You Want a Different Result
Use all thighs for the juiciest version
Thighs stay moist even if your grill runs a little hot, and they handle the sauce better than breasts. If you want the safest, most forgiving BBQ chicken, build the batch around thighs and legs.
Make it dairy-free and gluten-free without changing the method
This recipe already fits both as written as long as your BBQ sauce is compliant. Check the bottle for hidden dairy, gluten-based thickeners, or malt vinegar if you need a strict version.
Turn the sauce into a spicier glaze
Add a pinch of cayenne or a spoonful of hot sauce to the BBQ mixture before grilling. That extra heat works best when the sauce already has some sweetness, because it keeps the glaze from tasting one-dimensional.
Use breasts without drying them out
Breasts need closer attention because they cook faster and dry out sooner. Keep them on the cooler part of the grill until the last few minutes, then glaze and finish them quickly over direct heat. Pull them as soon as they hit 165°F.
Storage and Reheating
- Refrigerator: Store leftovers in an airtight container for up to 4 days. The sauce will thicken and the skin will soften, but the flavor holds up well.
- Freezer: It freezes well for up to 2 months, especially if you pull the meat off the bone first. Wrap tightly or use a freezer-safe container so the sauce doesn’t pick up freezer burn.
- Reheating: Warm it covered in a 325°F oven until heated through, or reheat gently in the microwave at lower power. High heat dries out the chicken and makes the sauce separate, so go slow.
Questions I Get Asked About This Recipe
The Best Easy Juicy BBQ Chicken
Ingredients
Equipment
Method
- Pat chicken pieces (legs, thighs, breasts) dry, then season with olive oil, salt, and pepper so the surface is evenly coated. Set aside briefly so seasoning sticks.
- Mix BBQ sauce (your favorite) with apple cider vinegar and smoked paprika until smooth and evenly blended. Keep the glaze ready for brushing during the final grilling phase.
- Preheat the grill to medium heat (350-400°F) for setup that supports both indirect and direct cooking zones. Aim for steady temperature before cooking.
- Grill chicken pieces (legs, thighs, breasts) over indirect heat for 30-35 minutes, turning every 10 minutes for even browning. Look for an initial golden color and smoke as it cooks.
- During the last 10 minutes, brush generously with BBQ sauce (your favorite) and move to direct heat so the glaze starts to set and bubble. Continue to watch for caramelization and a thicker, glossier coat.
- Continue grilling and basting with BBQ sauce (your favorite) until the internal temperature reaches 165°F and the sauce is caramelized. The chicken should look deeply browned with a sticky shine.
- Let the chicken pieces (legs, thighs, breasts) rest for 5 minutes before serving to keep the juices settled. Serve once the glaze looks set on the surface.