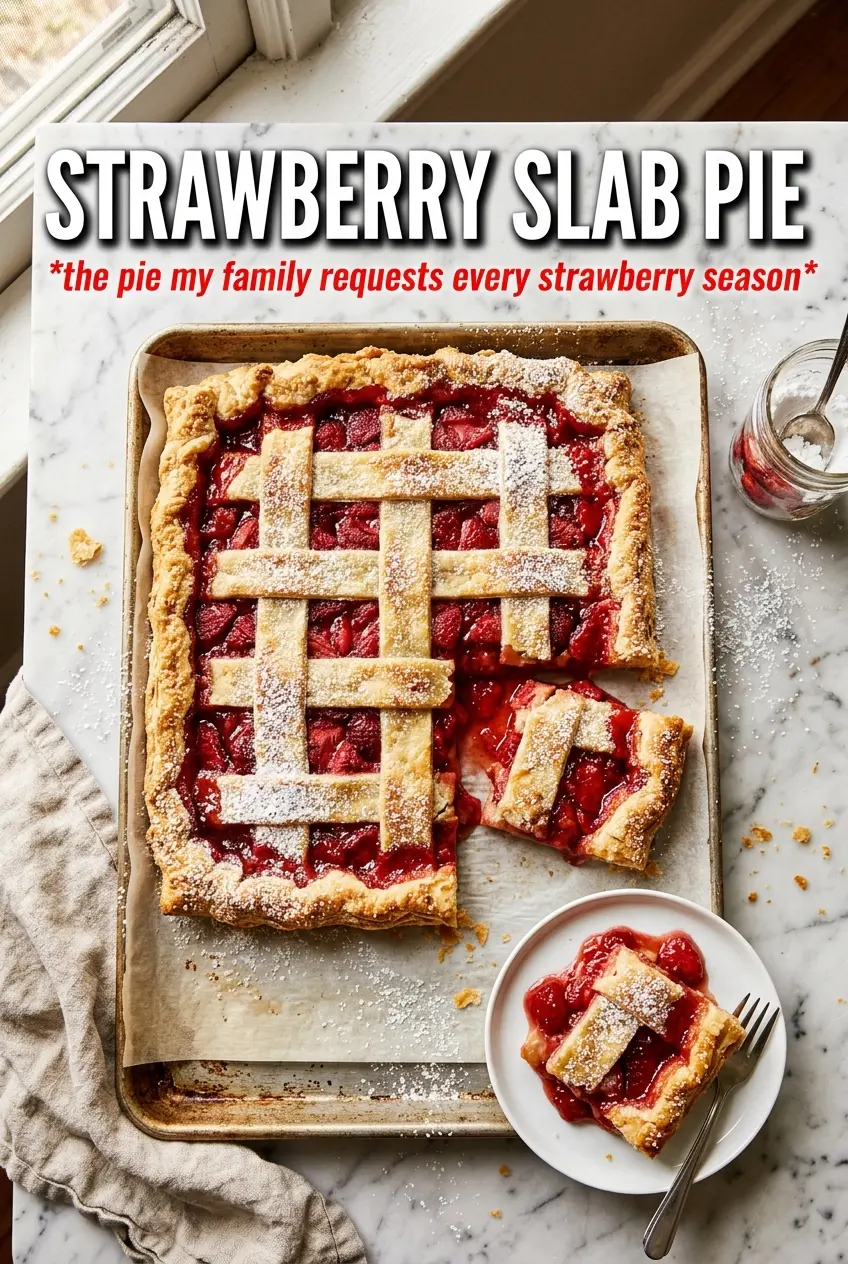
Golden pastry, juicy strawberry filling, and a lattice top that bakes up crisp instead of soggy — that’s what makes a strawberry slab pie worth putting on repeat. It feeds a crowd without the fuss of rolling out a dozen individual pies, and every square cuts cleanly enough to serve at a party without leaking all over the plate.
The key is thickening the berries before they hit the oven and giving the filling enough time to bubble at the edges. Strawberries release a lot of juice as they bake, so cornstarch does the heavy lifting here, while lemon juice keeps the filling from tasting flat and the vanilla and cinnamon round out the sweetness. A sheet pan also gives you more surface area for that crisp, browned crust everyone reaches for first.
Below, I’ve included the small details that keep the bottom crust from turning soft and the lattice from sliding into the filling. There’s also a note on the best way to cut and serve it once it’s cooled enough to hold together.
The filling set up beautifully and didn’t run everywhere when I sliced it. The crust stayed crisp on the bottom, and the strawberries tasted bright instead of overly sweet.
Save this strawberry slab pie for the next time you need a flaky, crowd-sized dessert with juicy berry filling.
The Trick to Keeping a Strawberry Slab Pie from Going Runny
The biggest problem with strawberry pie isn’t flavor. It’s juice. Strawberries break down fast in the oven, and if the filling isn’t thickened properly, you end up with a bright red puddle under the crust instead of neat, glossy slices. Cornstarch needs the filling to reach a full bubble before it does its job, so don’t pull the pie early just because the top looks browned.
The other mistake is skipping the rest. Hot fruit filling is loose filling, even when it’s fully cooked. That 30-minute cooling time isn’t cosmetic; it gives the starch time to set so the pie holds together when you cut it.
- Lattice top: It isn’t just for looks. Those gaps let steam escape, which helps the filling thicken instead of trapping moisture against the crust.
- Lemon juice: This keeps the berries tasting fresh and sharp. Without it, the filling can lean flat and sugary, especially with very ripe strawberries.
- Coarse sugar: It adds crunch and a little sparkle on top. Granulated sugar works in a pinch, but the texture won’t be as noticeable.
What Each Ingredient Is Actually Doing in This Pie
- Fresh strawberries: Use ripe berries, but not berries that are collapsing in the container. You want fruit that will soften and release juice without turning into puree. Frozen strawberries can work, but they need to be thawed and drained well or the filling will get watery.
- Cornstarch: This is the structure here. Flour won’t thicken as cleanly, and you’d need more of it to get the same set, which muddies the filling. Stir it in thoroughly so there aren’t little chalky pockets.
- Refrigerated pie crusts: These save time and bake up nicely in a slab pie, where you need enough dough to cover a big pan. If you use homemade crust, keep it cold and roll it a little thicker than you would for a standard pie so it can support the filling.
- Vanilla and cinnamon: These don’t make the pie taste like spice cake. They just deepen the strawberries so the filling tastes fuller and more rounded.
- Egg wash: This is what gives the lattice its shine and helps the coarse sugar stick. Skip it and the top bakes pale and a little dry-looking.
Building the Crust and Filling So They Bake Evenly
Pressing the Bottom Crust into the Pan
Fit the first crusts into a half-sheet pan and press the seams together where they overlap so there aren’t weak spots. Take the dough all the way up the sides of the pan; that edge helps contain the filling as it bubbles. If the crust tears, patch it with a scrap of dough and press gently — small holes turn into leaks once the berries start releasing juice.
Mixing the Strawberries with the Thickener
Stir the berries with the sugar, cornstarch, lemon juice, vanilla, and cinnamon until everything looks evenly coated and glossy. You don’t want dry clumps of cornstarch at the bottom of the bowl, because those turn into gummy pockets in the baked filling. Spread the fruit in an even layer so the pie bakes at the same rate from corner to corner.
Cutting and Laying the Lattice
Cut the second crusts into even strips and lay them over the filling without stretching the dough. If the strips are pulled tight, they shrink in the oven and snap back, which leaves thin spots. Weave them loosely and trim the edges cleanly so the rim seals against the bottom crust.
Baking Until the Filling Bubbles
Brush on the egg wash, add the coarse sugar, and bake until the crust is deep golden and the filling is bubbling at the edges. That bubbling is the signal that the cornstarch has activated. If the top browns too fast, tent it loosely with foil for the last few minutes instead of lowering the oven temperature and slowing the bake.
How to Adapt This for Different Crowds and Different Pantries
Make It Dairy-Free Without Changing the Filling
This pie is already naturally dairy-free as written, as long as your pie crusts don’t contain butter or milk solids. Check the package label if you’re using store-bought crust. If you’re making homemade crust, use a dairy-free fat you trust and keep it cold so the layers stay flaky.
Swap in a Mixed Berry Filling
Replace up to half the strawberries with blueberries or raspberries if you want a deeper berry flavor. Blueberries hold their shape a little better, while raspberries make the filling softer and more jammy. Keep the cornstarch the same, since the total amount of juice is still in the same range.
Use a Gluten-Free Crust
A good gluten-free pie crust works here because the filling is sturdy and the pan shape gives extra support. Chill the crust well before baking so it doesn’t crumble when you fit it into the sheet pan. The texture will be a little more fragile than standard dough, but the flavor still lands in the same place.
Storage and Reheating
- Refrigerator: Store covered for up to 4 days. The crust softens a little on day two, but the filling stays sliceable.
- Freezer: Freeze baked slices tightly wrapped for up to 2 months. The texture is best if you freeze individual pieces, not the whole slab.
- Reheating: Warm slices in a 300°F oven for about 10 minutes. A microwave will soften the crust and make the filling weep, so skip it if you want the pastry to stay crisp.
Answers to the Questions Worth Asking
Strawberry Slab Pie
Ingredients
Equipment
Method
- Preheat the oven to 375°F. Unroll the pie crusts and fit them into a half-sheet pan (13x18 inches), overlapping as needed and pressing to seal, then set aside the pan.
- Mix strawberries, sugar, cornstarch, lemon juice, vanilla extract, and cinnamon together. Spread the filling evenly over the crust in the pan.
- Unroll the second batch of pie crusts and cut into strips. Arrange the strips in a lattice pattern over the filling.
- Whisk the egg and water together, then brush over the pastry. Sprinkle the lattice with coarse sugar.
- Bake for 30-35 minutes at 375°F, until the crust is golden and the filling is bubbly at the edges. Cool on a wire rack for 30 minutes before cutting.