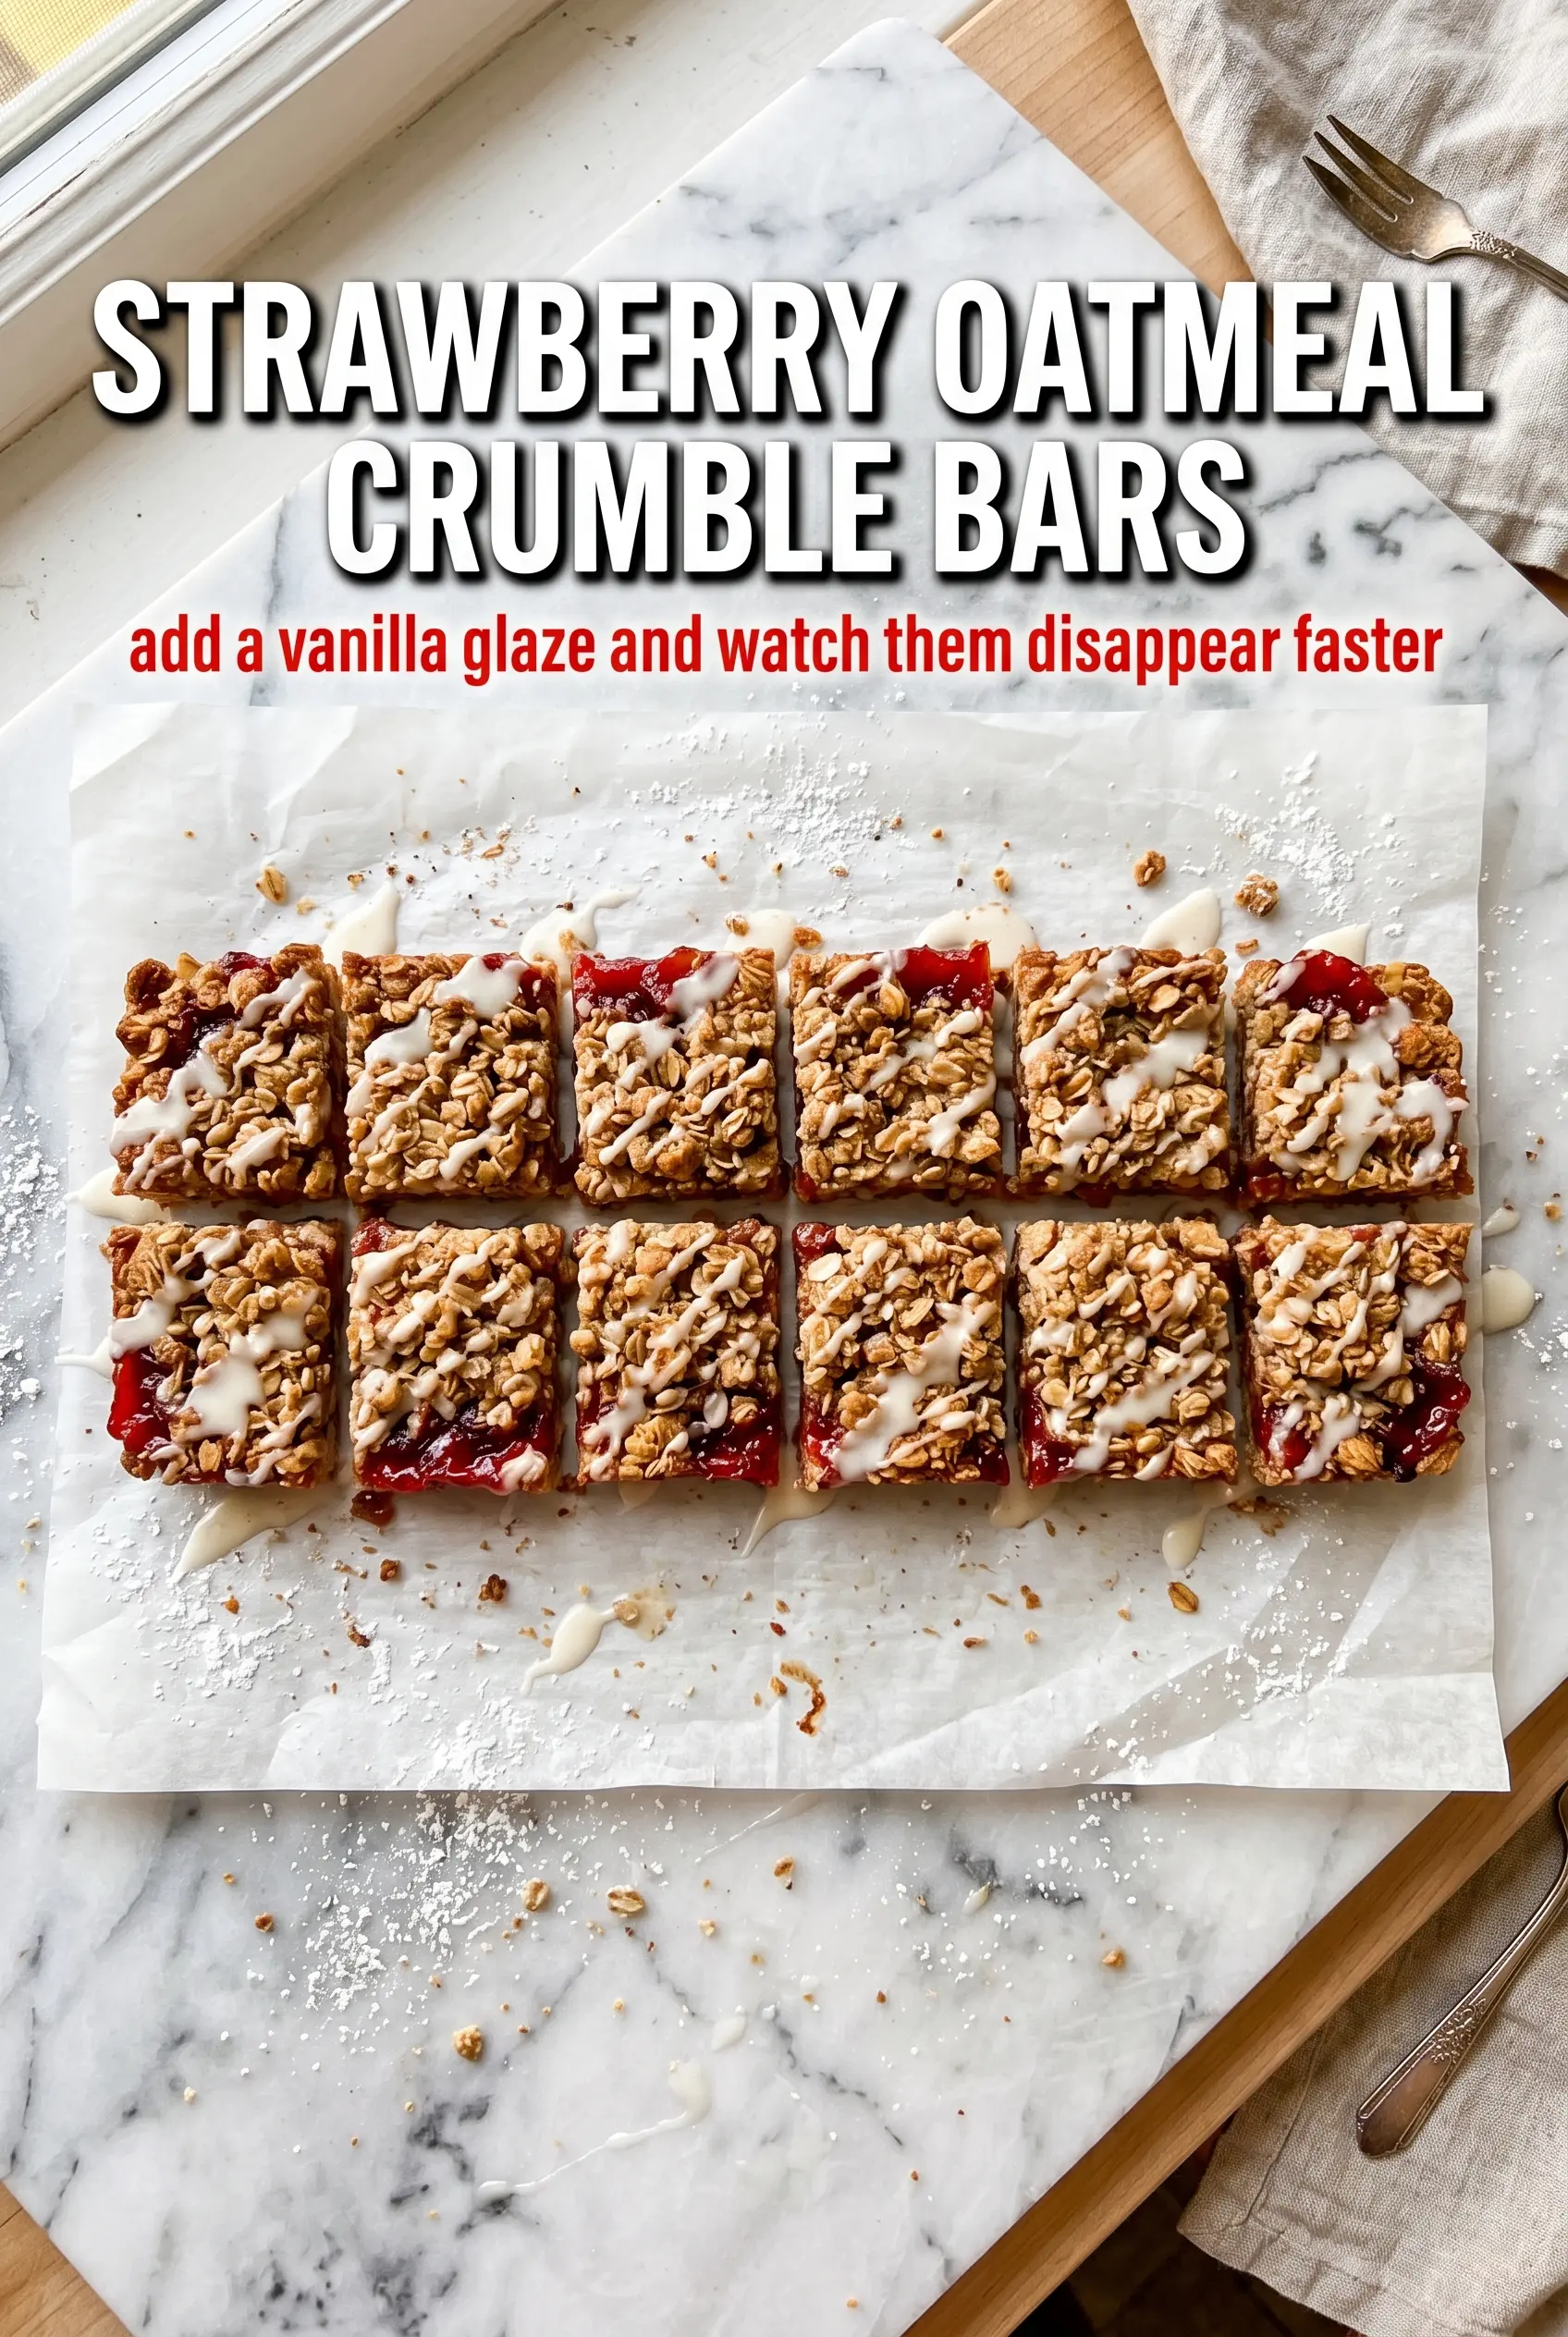
Strawberry oatmeal crumble bars hit that sweet spot between a breakfast-style bake and a dessert you can put on the table without fuss. The base stays sturdy enough to cut cleanly, while the middle turns jammy and bright, with pockets of real strawberry flavor instead of a uniform pink filling. The oatmeal topping bakes up golden and crisp at the edges, then softens just enough under the fruit to give each bite a proper crumble.
What makes this version work is the balance of moisture and structure. Fresh strawberries bring a lot of juice, so the cornstarch and the short rest after baking are doing real work here. The oats and flour create a crust that holds together without tasting dry, and the brown sugar adds a deeper, caramel note that keeps the bars from reading as just sweet fruit squares.
Below, you’ll find the one detail that keeps the filling from turning loose and runny, plus a few practical swaps if your strawberries are extra juicy or you need to make the bars a little more pantry-friendly.
The strawberry layer set up beautifully and didn’t leak all over the pan. I let them cool the full 15 minutes, and the bars sliced into neat squares with that perfect crumbly top.
Save these strawberry oatmeal crumble bars for the days when you want a jammy fruit filling and a crisp oat topping in one pan.
The Reason the Filling Stays Put Instead of Running Everywhere
The biggest mistake with fruit bars is treating the filling like pie filling and assuming the oven will take care of the rest. Strawberries release a lot of juice as they bake, and if that juice isn’t given a little help, it soaks into the base and turns the whole pan soft. Here, the cornstarch thickens the fruit just enough to hold it in place once the bars cool.
The other piece that matters is the cool-down. These bars need that 15-minute rest so the starch can finish setting and the layers can firm up enough to slice. If you cut them too soon, the filling will look loose even if the bars are technically baked through.
- Cornstarch — This is what keeps the strawberry juices from pooling at the bottom of the pan. Arrowroot can work in a pinch, but cornstarch gives the most reliable set for these bars.
- Lemon juice — It sharpens the strawberries and helps the filling taste bright instead of flat. Bottled lemon juice works, but fresh gives a cleaner finish.
- Brown sugar — It deepens the crumble and gives the base a little more chew. All granulated sugar will still work, but the bars lose some of that warm, bakery-style flavor.
- Old-fashioned oats — These hold their shape better than quick oats and give the topping a real crumble texture. Quick oats make the bars denser and a little pastier.
What Each Ingredient Is Doing in the Pan
The oat-to-flour ratio is what gives these bars their structure without making them dry. The oats bring texture and a rustic bite, while the flour binds the crust so it presses and slices cleanly. If you swap in too much oat, the base gets loose; too much flour, and the topping turns bready instead of crumbly.
Butter matters here because it coats the dry ingredients and turns that sandy mixture into a proper crumble as it bakes. Softened butter works best for mixing by hand, but it should still hold its shape. If it’s melting at the bowl, the topping will pack down too tightly and bake into a heavy layer instead of a crisp one.
Key note: Slice the strawberries evenly so they soften at the same rate. Big chunks stay watery longer, while very thin slices can collapse into jam before the bars are fully baked.
Building the Layers So the Crumble Bakes Up Right
Making the Oat Mixture
Stir the oats, flour, sugars, baking powder, and salt together first so the leavening and seasoning are evenly dispersed. Then cut in the softened butter until the mixture looks like damp crumbs that hold together when squeezed. If you keep mixing past that point, the butter starts clumping and the top bakes up dense instead of crumbly.
Pressing the Base
Use about half the oat mixture and press it firmly into the parchment-lined pan. Firm pressure matters because this layer is what keeps the bars from falling apart when you lift them out. If it’s packed too loosely, the filling sinks into it and the bottom turns soft.
Setting the Strawberry Layer
Toss the sliced strawberries with sugar, lemon juice, and cornstarch until every piece looks lightly coated. Spread the fruit evenly over the base so there aren’t thick pockets that bake wetter than the rest. The filling should look glossy, not soupy; if liquid is already collecting in the bowl, let the strawberries sit for a minute, then spoon them in more carefully.
Finishing the Top and Baking
Scatter the remaining crumble over the fruit and press it down lightly with your fingertips so it clings in a few places without becoming a solid lid. Bake until the top is deeply golden and you can see the strawberry filling bubbling at the edges. That bubbling is the sign the cornstarch has activated, so don’t pull the pan too early just because the top looks done.
Make It Gluten-Free with a 1:1 Flour Blend
Swap the all-purpose flour for a good 1:1 gluten-free baking blend that includes xanthan gum. The bars will still slice well, though the crumble will be a little more delicate and less chewy than the original.
Use Frozen Strawberries When Fresh Aren’t Available
Frozen strawberries work, but don’t thaw them first or they’ll flood the filling with extra liquid. Toss them straight from the freezer with the sugar, lemon juice, and cornstarch, then add a few extra minutes of bake time if the center still looks loose.
Make Them Dairy-Free
Replace the butter with a firm plant-based butter block, not a soft tub spread. You want something that behaves like butter when cut into the dry ingredients, or the topping can bake up greasy and flat.
Add a Little Extra Crunch
Stir 1/2 cup chopped pecans or sliced almonds into the crumble before assembling the bars. The nuts toast as the bars bake and add a sharper crunch that plays nicely against the soft strawberry center.
Storage and Reheating
- Refrigerator: Store in an airtight container for up to 5 days. The topping softens a little after day one, but the flavor stays good.
- Freezer: These freeze well. Wrap individual bars tightly and freeze for up to 2 months, then thaw in the fridge so the filling doesn’t weep.
- Reheating: Eat them cold, room temperature, or warm them briefly in a low oven. The biggest mistake is microwaving too long, which makes the strawberry layer loose and the crumble soggy.
Questions I Get Asked About This Recipe
Strawberry Oatmeal Crumble Bars
Ingredients
Equipment
Method
- Preheat oven to 350°F and line a 9x13 baking dish with parchment paper, leaving an overhang for easier lifting. This prevents sticking and helps the bars lift out in one piece.
- Combine old-fashioned oats, all-purpose flour, granulated sugar, brown sugar, baking powder, and salt in a large bowl. Mix until evenly distributed so the crumble bakes uniformly.
- Cut in softened butter until the mixture resembles coarse crumbs. Keep going until no large butter lumps remain and the texture looks sandy with bigger oat bits.
- Press half of the oatmeal mixture firmly into the prepared baking dish. Press down tightly so the bottom layer holds together when sliced.
- Combine fresh strawberries, granulated sugar, lemon juice, and cornstarch in a bowl. Stir until coated and glossy, and the cornstarch is evenly mixed in.
- Spread the strawberry filling evenly over the base layer. Cover all the way to the edges for consistent fruit in every bar.
- Spread the remaining oatmeal mixture over the strawberries and press gently. Light pressure helps the topping adhere while still leaving a crumbly finish.
- Bake for 30-35 minutes at 350°F until the top is golden brown. Look for a crisp, browned crumble and bubbling fruit around the edges.
- Allow to cool for 15 minutes before cutting into bars. Letting it rest firms the filling so squares stay neat.
- Dust with powdered sugar before serving. Add it right before serving for a bright, bakery-style finish.