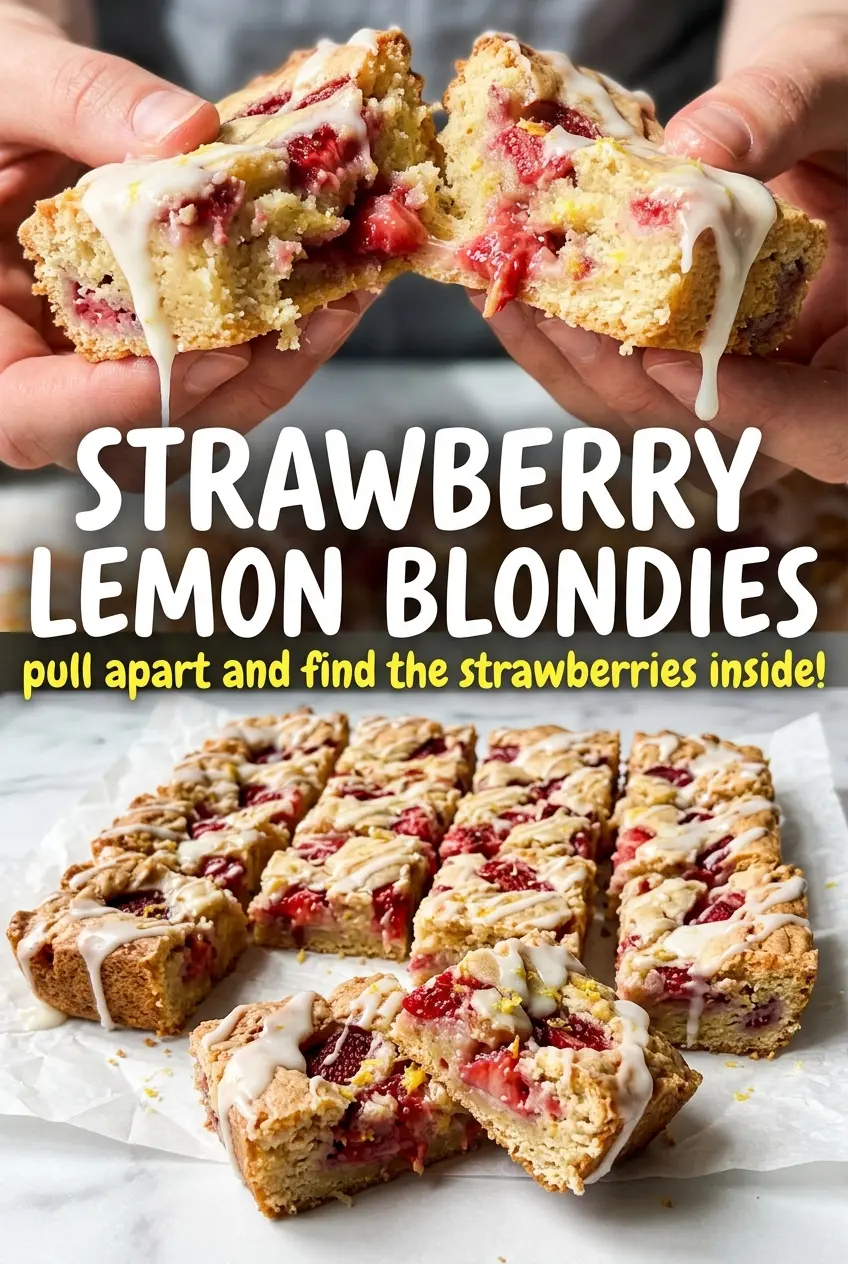
Chewy strawberry lemon blondies land in that sweet spot between a cookie bar and a cake bar, with a soft middle, lightly crisp edges, and little bursts of jammy fruit in every bite. The lemon keeps them from tasting heavy, and the brown sugar gives the crumb a warm, caramel note that plays beautifully against the bright glaze on top.
The trick is keeping the batter thick enough to hold the strawberries without turning the bars wet. Fresh berries need to be chopped small and folded in gently at the end, and the blondies need to come out when the center still has a few moist crumbs on the tester. That last bit matters more than the clock, because overbaking is what takes these from tender to dry.
Below, you’ll find the small details that make these bars behave the way they should, from controlling berry moisture to glazing them at exactly the right time. If you’ve ever had blondies bake up gummy in the middle or lose their shape when sliced, this version is built to avoid both problems.
The blondies baked up thick and chewy, and the strawberries stayed in little pockets instead of melting into the batter. I also liked that the lemon glaze set enough to slice clean squares without getting sticky everywhere.
Save these chewy strawberry lemon blondies for the next time you want a bright fruit bar with a soft center and a lemon glaze that actually sets.
The Reason Strawberry Blondies Stay Chewy Instead of Turning Wet
Fruit bars fail for one of two reasons: the batter is too loose, or the fruit gives off too much juice during baking. Strawberries bring both a soft texture and a lot of moisture, which is why these blondies need a sturdy base and a quick hand once the berries go in. The brown sugar helps keep the crumb chewy, while the flour ratio gives the batter enough structure to hold the fruit without collapsing.
The other thing that matters here is bake time. Blondies keep cooking in the pan after they come out, so pulling them when the center still has a few crumbs on the tester is what keeps them tender. If you wait for a completely clean toothpick, the edges will be fine and the middle will be dry by the time they cool.
- Use softened butter, not melted butter. Creaming it with the sugars traps air and gives the bars a lighter chew.
- Chop the strawberries small. Big pieces sink, bleed more juice, and make slicing messy.
- Fold the berries in at the very end. Stirring too much breaks them down and streaks the batter pink.
- Let the bars cool before glazing and cutting. Warm blondies are fragile, and the glaze slides off instead of sitting in a neat layer.
What the Lemon Zest and Brown Sugar Are Doing Here
Brown sugar is the backbone of the texture. It brings moisture and that slightly caramel note blondies need, and there isn’t a substitute that gives the same chew. You can swap in all granulated sugar in a pinch, but the bars will bake up drier and more cookie-like.
Lemon zest does the heavy lifting on flavor because it carries the bright oils that lemon juice can’t give on its own. The juice adds tang, but too much liquid can loosen the batter, so the zest is what gives these bars their citrus punch without sacrificing structure. Fresh strawberries are worth using here; frozen berries release too much water and usually leave the center soft in the wrong way.
- Butter — Use unsalted butter if that’s what you keep on hand, but let it soften first. Cold butter won’t cream properly and the batter won’t hold as much air.
- Flour — All-purpose flour keeps the crumb tender. A gluten-free 1:1 blend works too, but expect a slightly more delicate slice.
- Powdered sugar glaze — This sets into a thin, crackly finish that balances the soft bars. If you use less lemon juice, the glaze gets thicker and more opaque; more juice makes it thin and drippy.
Building the Batter and Baking It at the Right Moment
Creaming the Butter and Sugars
Beat the butter, brown sugar, and granulated sugar until the mixture looks pale and fluffy, not just combined. That extra air helps the blondies rise without becoming cakey. If the butter is too cold, the mixture stays sandy; if it’s melted, the bars bake dense and greasy.
Adding the Citrus and Egg
Mix in the egg, vanilla, lemon zest, and lemon juice until the batter looks smooth and glossy. The lemon juice goes in small enough to boost the flavor without thinning the mixture too much. If the batter looks slightly curdled at this stage, keep going as long as the dry ingredients haven’t been added yet.
Folding in the Dry Ingredients and Strawberries
Stir the flour, baking soda, and salt in just until the streaks disappear, then fold in the strawberries with a light hand. Overmixing develops too much gluten and makes blondies tough. If the batter seems thick, that’s right; it should hold its shape in the pan instead of pouring like cake batter.
Baking Until the Center Still Has a Few Crumbs
Spread the batter evenly in the pan and bake until the top is set and the edges are lightly golden. Start checking at 22 minutes. A toothpick inserted in the center should come out with a few moist crumbs, not wet batter. Pull the pan early rather than late, because the bars finish setting as they cool.
Make Them a Little More Tart
Add an extra half teaspoon of lemon zest to the batter if you want the citrus to stand up more sharply against the strawberries. It won’t change the texture, just the brightness, and it works best if your berries are very ripe and sweet.
Dairy-Free Version
Use a plant-based butter stick with a firm texture, not a tub spread, so the batter still creams properly. The flavor will be slightly less rich, but the bars still bake up chewy and the glaze works the same way.
Gluten-Free Swap
A good 1:1 gluten-free flour blend can replace the all-purpose flour here. The bars will be a little more tender and may need an extra minute or two in the oven, but the lemon and strawberry flavor still comes through clearly.
Storage and Reheating
- Refrigerator: Store in an airtight container for up to 4 days. The strawberries soften a bit, but the bars stay moist.
- Freezer: Freeze sliced blondies without glaze, wrapped well, for up to 2 months. Thaw at room temperature and glaze after thawing for the cleanest finish.
- Reheating: These are best served at room temperature. If you want them slightly warm, heat a slice for just 8 to 10 seconds in the microwave so the glaze doesn’t melt off and the crumb stays soft.
Answers to the Questions Worth Asking
Strawberry Lemon Blondies
Ingredients
Equipment
Method
- Preheat the oven to 350°F and grease an 8x8 inch baking pan so the batter releases cleanly.
- Cream together softened butter, brown sugar, and granulated sugar until light and fluffy, about 2-3 minutes, then scrape down the bowl.
- Beat in the egg, vanilla extract, lemon zest, and lemon juice until smooth and glossy.
- Whisk all-purpose flour, baking soda, and salt in a separate bowl, then pour into the wet mixture.
- Fold the dry ingredients into the wet ingredients just until combined, stopping when no dry streaks remain for a tender crumb.
- Fold in the chopped fresh strawberries until evenly distributed with visible pieces.
- Spread the batter into the prepared 8x8 inch pan and bake at 350°F for 22-25 minutes until a toothpick comes out with just a few crumbs.
- Cool the blondies for 15 minutes so the glaze sets without melting into the surface.
- Whisk powdered sugar with lemon juice and lemon zest until smooth, thick, and pourable.
- Drizzle the glaze over the cooled blondies, then cut into squares once the drizzle firms up.