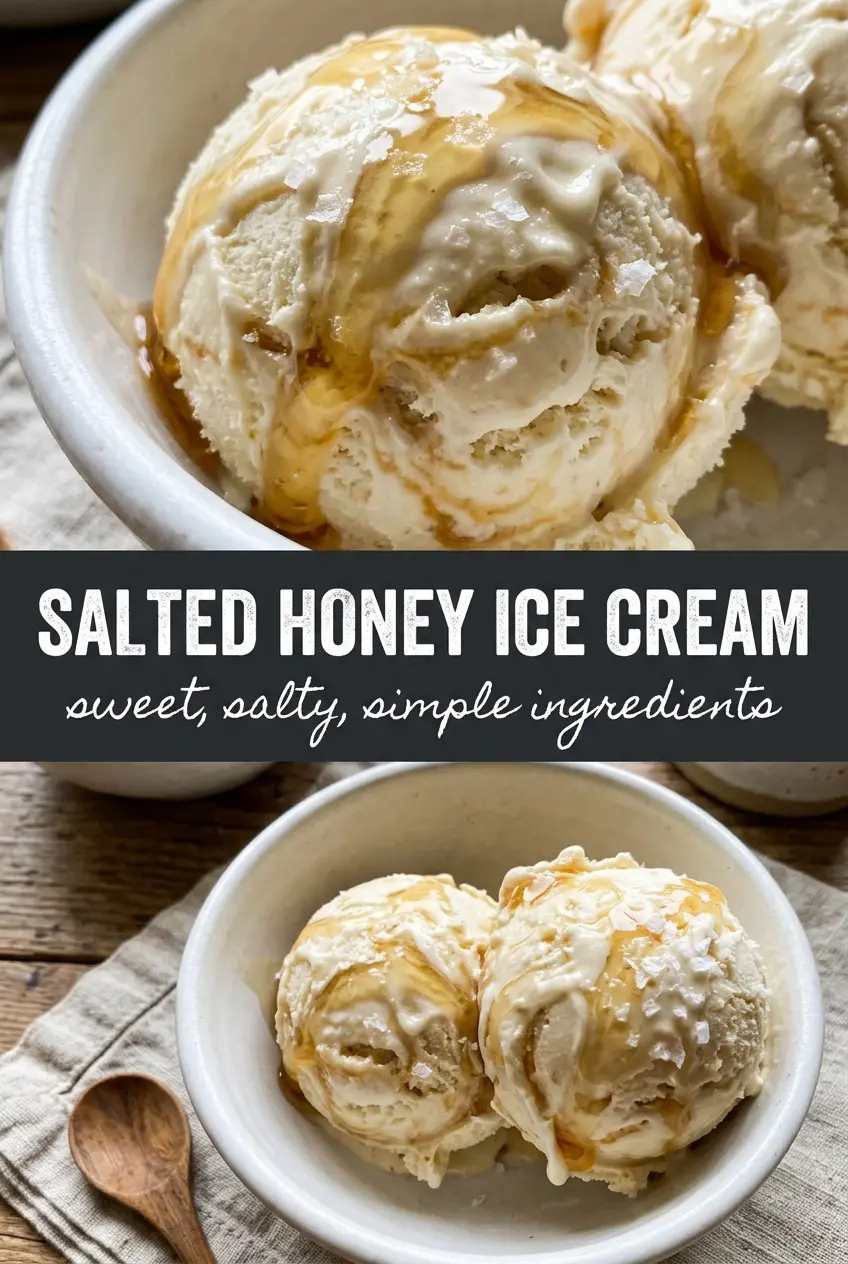
Salted honey ice cream lands in that rare sweet spot between familiar and unexpected. The honey turns the custard deep gold and brings a floral note that plain sugar can’t touch, while the salt keeps each bite from reading one-note or cloying. What you get is a scoop that tastes rich, clean, and a little elegant without needing any fancy add-ins.
The key is treating the honey like part of the custard base, not a stir-in at the end. Warming it with the cream and milk helps it dissolve fully, so the finished ice cream churns smooth instead of grainy. The egg yolks give the base body, and cooking the custard to the right temperature keeps it thick enough to freeze creamy without turning eggy.
Below, I’ve included the small details that matter most here: which honey gives the best flavor, how to keep the custard silky, and how to finish each bowl so the salt actually lifts the honey instead of overpowering it.
The custard turned out unbelievably smooth, and the honey flavor stayed front and center instead of getting lost. I loved the little pinch of flaky salt on top — it made each spoonful taste richer, not saltier.
Save this salted honey ice cream for the nights when you want a honey-forward dessert with a clean salty finish.
The Custard Needs Gentle Heat, Not Guesswork
Ice cream bases break when the heat climbs too fast. With honey in the mix, that risk goes up a little because honey is already thick and fragrant, and it can make the custard seem farther along than it is. The real goal is 175F: thick enough to coat a spoon, not so hot that the yolks curdle.
If you’ve ever ended up with little scrambled bits in the strainer, the heat was the problem, not the whisk. Keep the burner at medium-low and stir constantly, scraping the corners of the pan where custard likes to hide and overcook first. The base is ready when it looks glossy and lightly nappé, and a finger leaves a clean trail across the back of the spoon.
What the Honey and Salt Are Really Doing Here

- Honey — Use a good wildflower or clover honey here, because the flavor is front and center. A darker, stronger honey will taste more pronounced; a very mild honey will give a softer, cleaner finish. Don’t swap in corn syrup or maple syrup and expect the same result — they change both the flavor and the way the custard freezes.
- Egg yolks — These give the ice cream its body and that dense, custardy texture. Whole eggs won’t ruin the recipe, but the texture will be less plush. Whisk the yolks before adding the hot dairy so they temper evenly and don’t seize.
- Heavy cream and whole milk — The cream provides richness, while the milk keeps the base from becoming too heavy. I wouldn’t use low-fat milk here; the finished ice cream will ice over more quickly. If you need a dairy-free version, full-fat canned coconut milk can work, but the flavor shifts noticeably and the set will be a little softer.
- Sea salt and flaky sea salt — The fine sea salt in the base balances the honey from the inside, and the flaky salt at the end gives you those little bright hits on top. Skip table salt if you can; it reads sharper and less clean. The finishing salt matters most when the ice cream is fully frozen, because it wakes up the honey right before each bite.
Churning the Base Until It Tastes Like Ice Cream, Not Custard
Warming the Dairy
Heat the cream, milk, and honey together until the mixture is steaming and the honey has fully dissolved. You don’t want a boil; you want enough heat to blend everything into one smooth base. If you still see honey sitting in streaks on the bottom of the pan, keep stirring and give it another minute.
Tempering the Yolks
Whisk the hot dairy into the yolks in a slow stream so the eggs warm gradually. If you pour it in all at once, the yolks can curdle before they ever reach the pan again. Once tempered, return everything to the saucepan and stir constantly so the custard thickens evenly.
Cooking to the Right Thickness
Cook over medium-low heat until the custard reaches 175F and lightly coats a spoon. Stop there. Going past that point makes the base taste eggy and raises the chance of a grainy finish after churning. If you don’t have a thermometer, watch for the custard to steam steadily and hold a clear trail when you drag a finger across the back of the spoon.
Straining, Chilling, and Churning
Strain the custard, then stir in the vanilla and sea salt while it’s still warm enough to melt everything smoothly. Set the bowl over an ice bath and cool it completely before refrigerating; warm custard churns poorly and stays too loose in the machine. After at least 4 hours in the fridge, churn until the texture looks like soft-serve and the machine starts to drag slightly at the end.
Swap the Honey, Change the Mood
Wildflower honey gives the most layered flavor, while clover honey tastes lighter and cleaner. Buckwheat honey will make the ice cream much darker and more assertive, which can be great if you want a deeper, almost molasses-like edge.
Dairy-Free Version with Coconut Milk
Use full-fat coconut milk in place of the cream and whole milk, but expect a softer set and a faint coconut note. The custard won’t taste as neutral or as rich as the original, but the honey still comes through clearly. Chill it thoroughly before churning, because coconut-based ice creams need every bit of cold they can get.
Extra-Salty Finish
If you love a sharper sweet-salty contrast, keep the salt in the base as written and finish each scoop with a few extra flakes right before serving. That last hit of salt cuts through the cold fat and makes the honey taste brighter. Don’t bury it under too much salt or the dessert loses its balance.
Storage and Reheating
- Refrigerator: Store the churned ice cream in a sealed container in the freezer, not the fridge, for up to 2 weeks at best texture. After that, it can get icy around the edges.
- Freezer: It freezes well, but press parchment or wax paper directly on the surface before sealing to keep ice crystals down.
- Reheating: Let it sit at room temperature for 5 to 10 minutes before scooping. If it’s rock hard, the freezer was probably too cold or the base wasn’t fully chilled before churning.
Answers to the Questions Worth Asking
Salted Honey Ice Cream
Ingredients
Equipment
Method
- Heat the heavy cream, whole milk, and good-quality honey in a saucepan over medium-low heat until steaming and the honey dissolves completely, about 5 minutes; the mixture should look uniformly golden with no honey streaks.
- Slowly whisk the hot cream mixture into the egg yolks in a steady stream, then pour everything back into the saucepan; the custard should thicken slightly as you stir.
- Cook over medium-low heat, stirring constantly, until the custard reaches 175F, about 10 minutes; the surface should coat a spoon and look glossy.
- Strain the custard, then stir in the vanilla extract and sea salt and cool completely over an ice bath, about 10 minutes; the texture should turn smooth and pourable.
- Refrigerate at least 4 hours until very cold; the custard should feel chilled throughout with no warmth when you touch the bowl.
- Churn in an ice cream maker according to the manufacturer’s instructions; the mixture should become thick and resemble soft-serve.
- Freeze until firm, then finish each serving with a pinch of flaky sea salt; the top should show visible salt flakes against the golden ice cream.