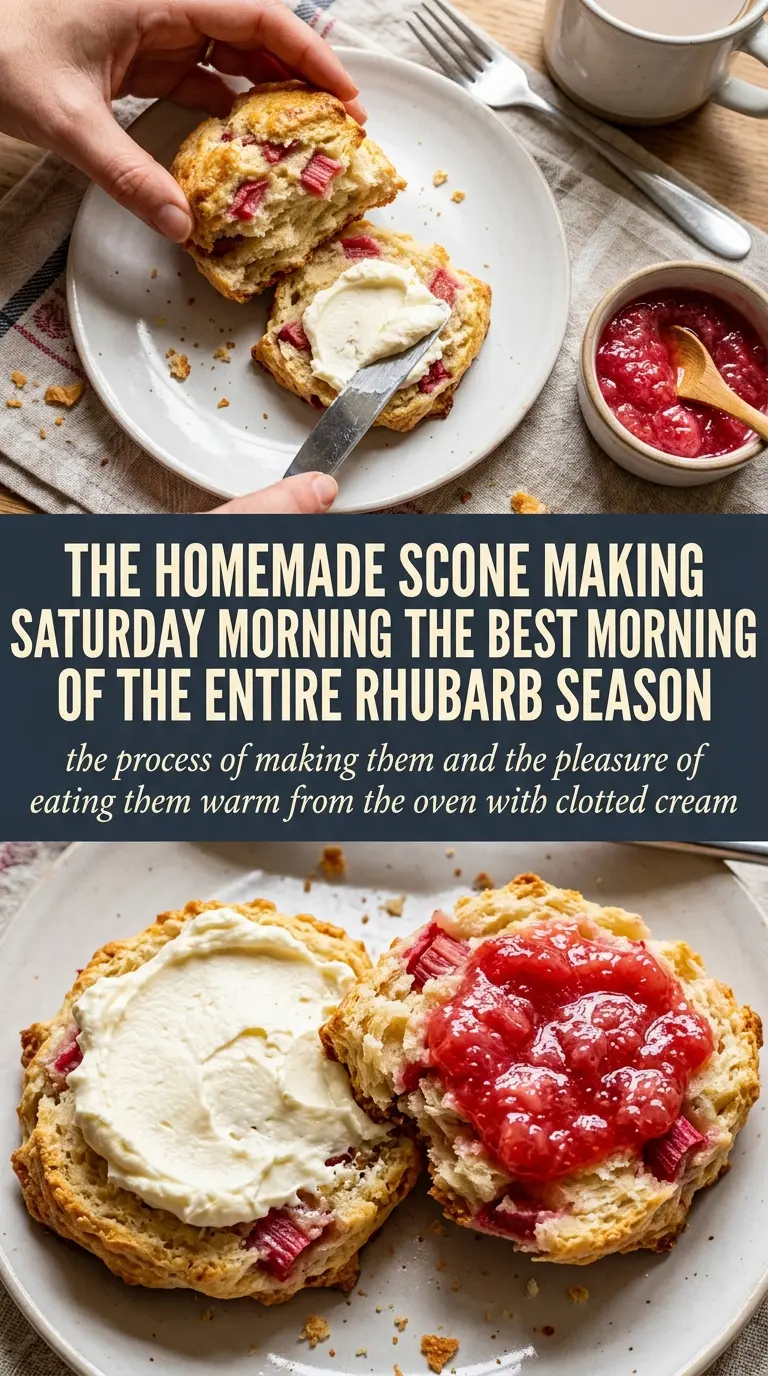
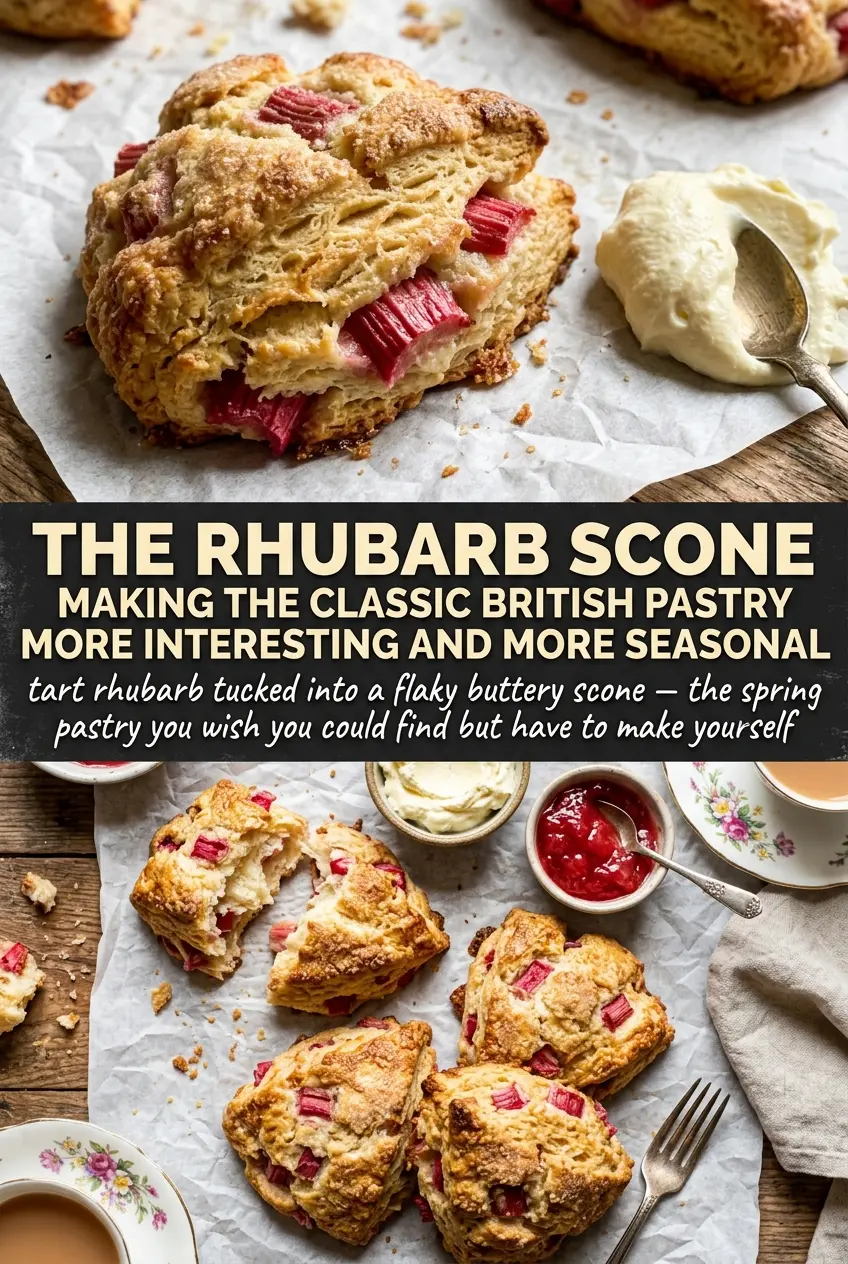
Rhubarb scones bake up with crisp, golden edges, a tender middle, and little pink pockets of fruit that turn pleasantly jammy in the oven. The best ones don’t taste heavy or cupcake-like. They stay distinctly scone-like: flaky, crumbly at the edges, and just rich enough to want another bite with butter or clotted cream.
What makes this version work is the balance. Cold butter gets cut into the flour so the scones rise with layers instead of turning dense, and the rhubarb is diced small enough to soften without blowing apart the dough. A little sugar rounds out the sharpness of the fruit, while cream and egg add richness without making the dough wet. The glaze goes on warm scones, which lets it settle into a thin sweet finish instead of sitting on top in a sticky shell.
Below, you’ll find the small details that matter most: how to keep the butter cold, how to tell when the dough is mixed enough, and what to change if your rhubarb is especially tart or you want to make them ahead.
The rhubarb stayed in little jammy pockets and the scones actually rose into neat wedges. I was worried they’d be too tart, but the glaze balanced everything perfectly.
Save these rhubarb scones for the mornings when you want flaky British tea scones with a pink, tart-sweet center.
The Trick to Keeping Rhubarb from Turning the Dough Wet
Rhubarb brings a lot of moisture, and that’s where scones often go wrong. If the fruit is too large or the dough gets worked too long, the scones spread, lose their lift, and bake up bready instead of flaky. Dicing the rhubarb finely helps it soften in the oven without tearing through the dough, and tossing it into the flour mixture gives each piece a light coating that helps manage the moisture.
The other thing that matters is restraint. Once the cream mixture goes in, stir just until the dough holds together. If you keep mixing to smooth out every rough patch, the butter warms up and the scones stop rising in clean layers. A shaggy dough is the right place to stop.
What the Butter, Cream, and Glaze Are Each Doing Here
- Cold butter — This is what gives the scones their lift and flaky edges. Cut it in until you have pea-size bits and a few larger flakes left behind; that uneven texture turns into steam pockets in the oven. If the butter starts to soften while you’re working, chill the bowl for 10 minutes before adding the liquid.
- Heavy cream — Cream adds richness and tenderness without thinning the dough too much. Milk will work in a pinch, but the scones will be less plush and a little drier. Keep it cold for the best texture.
- Egg — The egg helps bind the dough and gives the crumb a more tender, cohesive bite. Without it, the scones can be a bit more rustic and crumbly, which isn’t bad, just different.
- Fresh rhubarb — Fresh is the right choice here because it softens into tart, soft-edged pieces that still hold some structure. Frozen rhubarb sheds more liquid and can make the dough muddy unless you thaw, drain, and pat it dry first.
- Powdered sugar glaze — The glaze adds sweetness and a soft finish that plays well against rhubarb’s sharp edge. Keep it thin enough to drizzle; if it gets too thick, it sits on top instead of sinking slightly into the warm tops.
Cut, Chill, and Bake Before the Dough Has Time to Warm Up
Cut the butter into the dry ingredients
Whisk the flour, sugar, baking powder, and salt first, then work in the cold butter until the mixture looks sandy with a few larger butter pieces still visible. Those larger pieces matter. They melt during baking and create the little flaky layers that separate a good scone from a dense one. If the mixture starts to look greasy or pasty, the butter has warmed too much, and the scones won’t rise as high.
Bring the dough together without overmixing
Stir the cream, egg, and vanilla together, then add them to the flour mixture and fold just until the dough comes together. It should look a little rough and uneven. That’s fine. Overmixing develops the gluten and makes the scones chewy instead of tender, which is the fastest way to lose that soft, crumbly bite.
Shape for a clean rise
Turn the dough onto a floured surface and pat it into an 8-inch circle instead of rolling it hard. Pressing keeps the layers a little looser, while aggressive rolling compresses the dough and can squeeze out the air pockets you want in the oven. Cut into wedges with a sharp knife or bench scraper and move them to the baking sheet without dragging the edges through the flour.
Bake until the tops are set and the edges are golden
Bake at 400°F until the tops are puffed and the edges have turned a deep golden color, about 16 to 18 minutes. The centers should no longer look wet, but they should still feel tender when pressed lightly. If they go too far, the rhubarb will dry out and the crumb gets tight. Drizzle the glaze over warm scones so it melts slightly and settles into the ridges.
How to Adapt These Rhubarb Scones Without Losing the Texture
Dairy-Free Version
Use a firm plant-based butter and unsweetened full-fat coconut cream or a thick oat-based cream in place of the dairy. The texture will still be tender, but the flavor shifts a little lighter and less rich. Keep everything cold, because dairy-free fats soften fast and can make the dough spread.
Gluten-Free Swap
A 1:1 gluten-free baking blend can work here if it already includes xanthan gum. The scones will be a little more delicate and less layered, so handle the dough gently and don’t add extra flour unless it’s too sticky to shape. Let them cool fully before moving them, since they firm up as they sit.
Extra Tart Rhubarb
If your rhubarb is especially sharp, add 1 to 2 extra tablespoons of sugar to the dough or lean into a slightly thicker glaze. Don’t cut back the baking powder to compensate. The acidity of rhubarb won’t ruin the rise, but underbaking to preserve tartness will leave the centers doughy.
Make-Ahead Dough
Shape and cut the scones, then chill them on the baking sheet for up to 24 hours before baking. This actually improves the texture because the butter firms back up. If you bake from cold, add a minute or two in the oven rather than waiting for them to warm up first.
Storage and Reheating
- Refrigerator: Store in an airtight container for up to 3 days. They’ll soften a little as the glaze absorbs into the tops.
- Freezer: Freeze baked scones, unglazed if possible, for up to 2 months. Wrap them well so they don’t pick up freezer smell, then glaze after reheating for the best finish.
- Reheating: Warm in a 300°F oven for about 8 to 10 minutes. The common mistake is using the microwave, which turns the crumb rubbery and melts the glaze into a sticky patch.
Answers to the Questions Worth Asking
Rhubarb Scones
Ingredients
Equipment
Method
- Preheat oven to 400°F and line a baking sheet with parchment paper.
- Whisk together flour, sugar, baking powder, and salt, then cut in cold butter until the mixture looks crumbly with small bits of butter visible.
- Toss rhubarb with the flour mixture until evenly coated.
- Whisk together heavy cream, egg, and vanilla extract, then add to the dry ingredients and stir until just combined.
- Turn dough onto a floured surface, pat into an 8-inch circle, and cut into 8 wedges.
- Place scones on the prepared sheet and bake for 16-18 minutes, until golden.
- Mix powdered sugar and milk until smooth, then drizzle over warm scones so the glaze sets lightly.