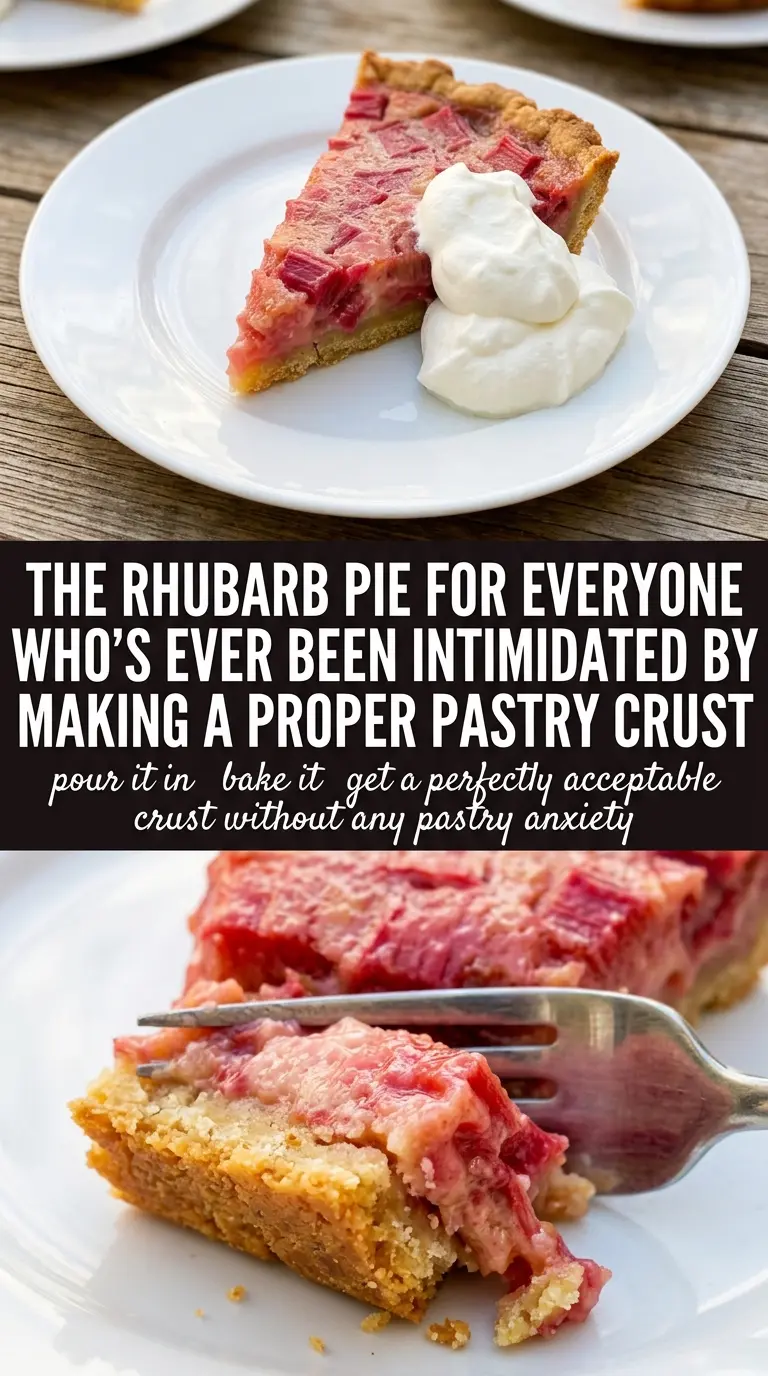
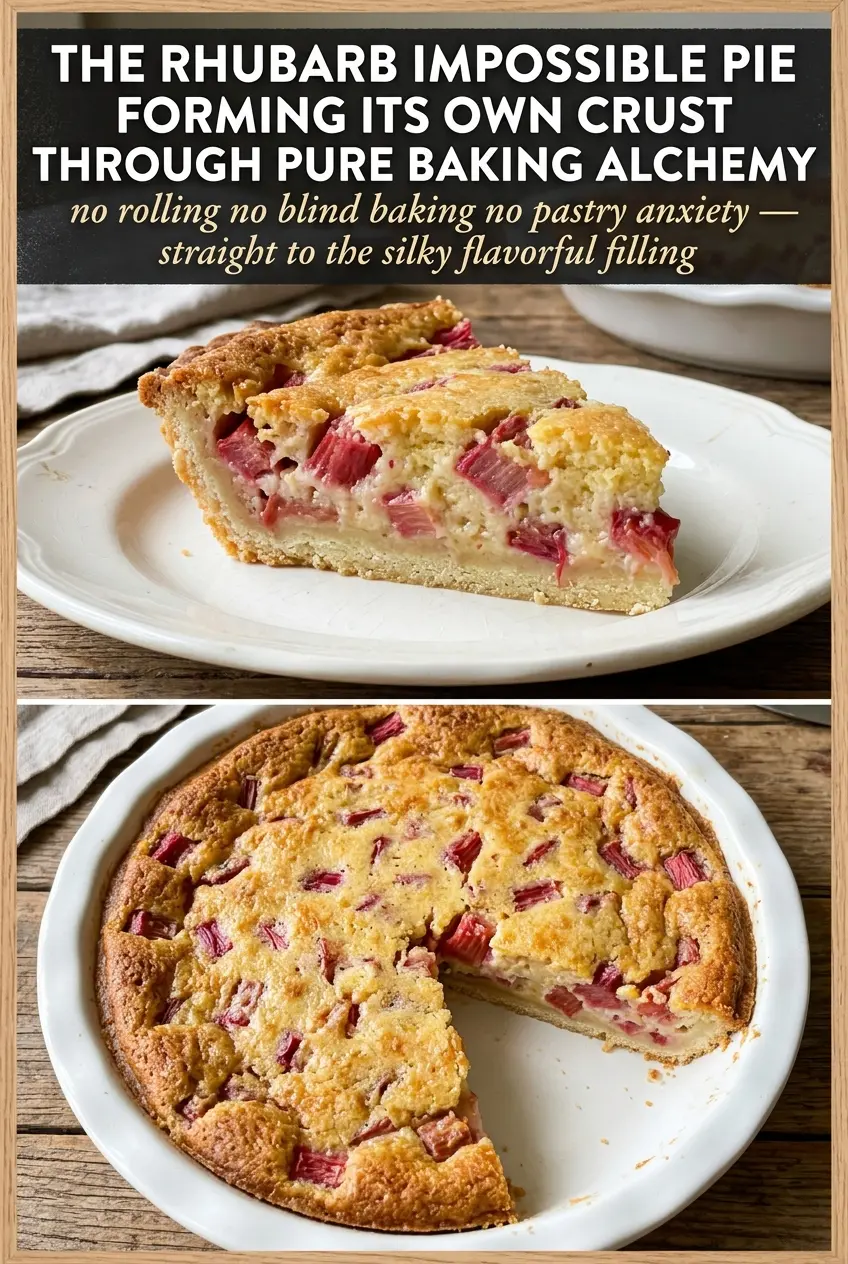
Rhubarb impossible pie comes out with a custardy top, a tender self-made crust on the bottom, and tart pink rhubarb tucked through every slice. It bakes into one of those old-fashioned desserts that looks like you spent a lot more time on it than you did, which is exactly why it earns a place in the regular dessert rotation.
The magic here is in the batter. Flour, eggs, milk, and melted butter get blended until smooth and poured over the rhubarb, and during baking the flour settles and firms up into that soft bottom layer while the eggs set the filling. The trick is not to overthink the texture before it goes in the oven — the batter should be loose and thin, almost like a very heavy cream mixture.
Below, I’ll walk through the one detail that keeps this pie from slicing too early, what the ingredients are actually doing, and a few ways to adapt it if your rhubarb is extra tart or you need to work with what’s already in the pantry.
The pie set up with that perfect custard middle and a real crust on the bottom, and the rhubarb stayed bright instead of turning mushy. I chilled it overnight and the slices came out clean.
Pin this rhubarb impossible pie for a self-crusting dessert with tart fruit and a golden custard finish.
The Pie Sets on Its Own Only If You Let the Batter Stay Loose
Impossible pie fails when people try to make the batter behave like a standard pie filling. It isn’t one. The flour needs to float through the liquid long enough to sink and form that soft crust layer while the eggs set around the rhubarb. If the mixture gets too thick before baking, the bottom turns dense instead of tender and self-crusting.
The other mistake is cutting it hot. Right out of the oven, the center can still look a little soft even when the pie is done, and that’s normal. It needs the full cooling time for the custard to finish setting. Slice too early and you’ll lose the clean layers that make this dessert worth baking.
- Don’t whisk by hand for this one — a blender gives the smoothest batter and keeps small flour lumps from hiding in the custard.
- Use a deep-dish pie plate — the batter is thin and the filling rises as it bakes, so a shallow pan can bubble over.
- Fresh rhubarb matters — frozen rhubarb can work, but it should be thawed and very well drained so extra water doesn’t thin the custard.
- Golden top, set center — the pie is done when the top looks lightly browned and the center has just a slight wobble, not a sloshy middle.
What Each Ingredient Is Doing in the Pan
- Rhubarb — this is the whole point of the pie. It softens in the oven but keeps enough structure to give you little tart bursts in each slice. Dice it evenly so it bakes at the same rate.
- Sugar — rhubarb needs it. The amount here balances the tartness without making the pie candy-sweet, but if your stalks are especially sharp, don’t cut the sugar much or the custard can taste flat.
- Eggs — they set the filling and help create the pie’s custardy texture. There isn’t a real swap for them here; this dessert depends on that structure.
- Butter — melted butter gives richness and helps form that soft bottom layer. Use real butter, not a substitute, if you want the classic impossible pie texture.
- Milk — this loosens the batter so it can pour over the fruit and bake into a smooth custard. Whole milk gives the best finish, but 2% works if that’s what you keep on hand.
- Flour — this is the ingredient that becomes the hidden crust. All-purpose flour is the right choice because it gives enough structure without turning gummy.
- Vanilla — it rounds out the rhubarb and softens the eggy note from the custard. Use real vanilla extract if you can; it adds warmth that makes the pie taste finished.
Baking the Custard So the Bottom Crust Forms Properly
Preparing the Pan and Fruit
Grease a 9-inch deep-dish pie plate well, then spread the diced rhubarb in an even layer across the bottom. That even layer matters because any mound of fruit can stay watery in the center while the edges overbake. If your rhubarb pieces are huge, cut them smaller so they soften at the same pace as the custard sets.
Blending the Batter Smooth
Blend the sugar, eggs, melted butter, milk, flour, vanilla, and salt until the batter looks completely smooth and thin. You’re looking for a pourable mixture with no streaks of flour at the bottom or sides of the blender. If you leave clumps behind, they bake up as little flour pockets instead of disappearing into the custard.
Baking Until the Top Is Set
Pour the batter over the rhubarb and bake at 350°F for 40 to 45 minutes. The pie is ready when the top is golden and the center barely jiggles when you tap the pan. If the middle still looks loose and shiny, give it more time; underbaking is what keeps the crust from forming cleanly.
Cooling for Clean Slices
Let the pie cool completely for at least 2 hours before slicing. That resting time is what finishes the set and turns the soft custard into neat wedges instead of spoonfuls. Serve it chilled or at room temperature, but don’t rush it while it’s warm if you want that classic slice.
How to Adapt This Pie When You Need a Different Finish
Make it gluten-free with a 1:1 baking blend
A good cup-for-cup gluten-free flour blend can replace the all-purpose flour, and the pie will still set into a custardy self-crust. Choose a blend that already contains xanthan gum if possible, since that helps mimic the structure the flour normally gives.
Use frozen rhubarb when fresh isn’t available
Thaw the rhubarb first and drain it very well before spreading it in the pan. Frozen fruit carries extra moisture, and if you skip the draining step the pie can bake up looser and take longer to set in the center.
Dial back the tartness without losing the rhubarb
If your rhubarb is especially sharp, add another 2 to 3 tablespoons of sugar, but don’t slash the sugar heavily. The sweetness here isn’t just for taste; it balances the fruit so the custard reads as dessert instead of a sour baked pudding.
Swap in half-and-half for a richer slice
Replacing the milk with half-and-half gives the filling a slightly richer, more dessert-like texture. The pie will still bake the same way, but the custard comes out a little silkier and a touch more tender.
Storage and Reheating
- Refrigerator: Store covered for up to 4 days. The custard firms up in the fridge, which actually makes slicing easier.
- Freezer: It freezes, but the texture softens a bit after thawing. Wrap individual slices tightly and thaw overnight in the refrigerator for the cleanest result.
- Reheating: Serve chilled or let slices sit at room temperature. If you want it warm, use low heat only for a few minutes; high heat can make the custard weep and turn the texture grainy.
Questions I Get Asked About This Recipe
Rhubarb Impossible Pie
Ingredients
Equipment
Method
- Preheat the oven to 350°F and grease a 9-inch deep-dish pie plate.
- Spread the diced fresh rhubarb evenly over the bottom of the pie plate.
- Combine sugar, eggs, melted butter, milk, all-purpose flour, vanilla extract, and salt in a blender and blend until smooth.
- Pour the batter over the rhubarb; it will be thin, but it will thicken and self-crust as it bakes.
- Bake for 40-45 minutes at 350°F, until the top is golden and the center is set.
- Cool completely for at least 2 hours before slicing.
- Serve chilled or at room temperature.