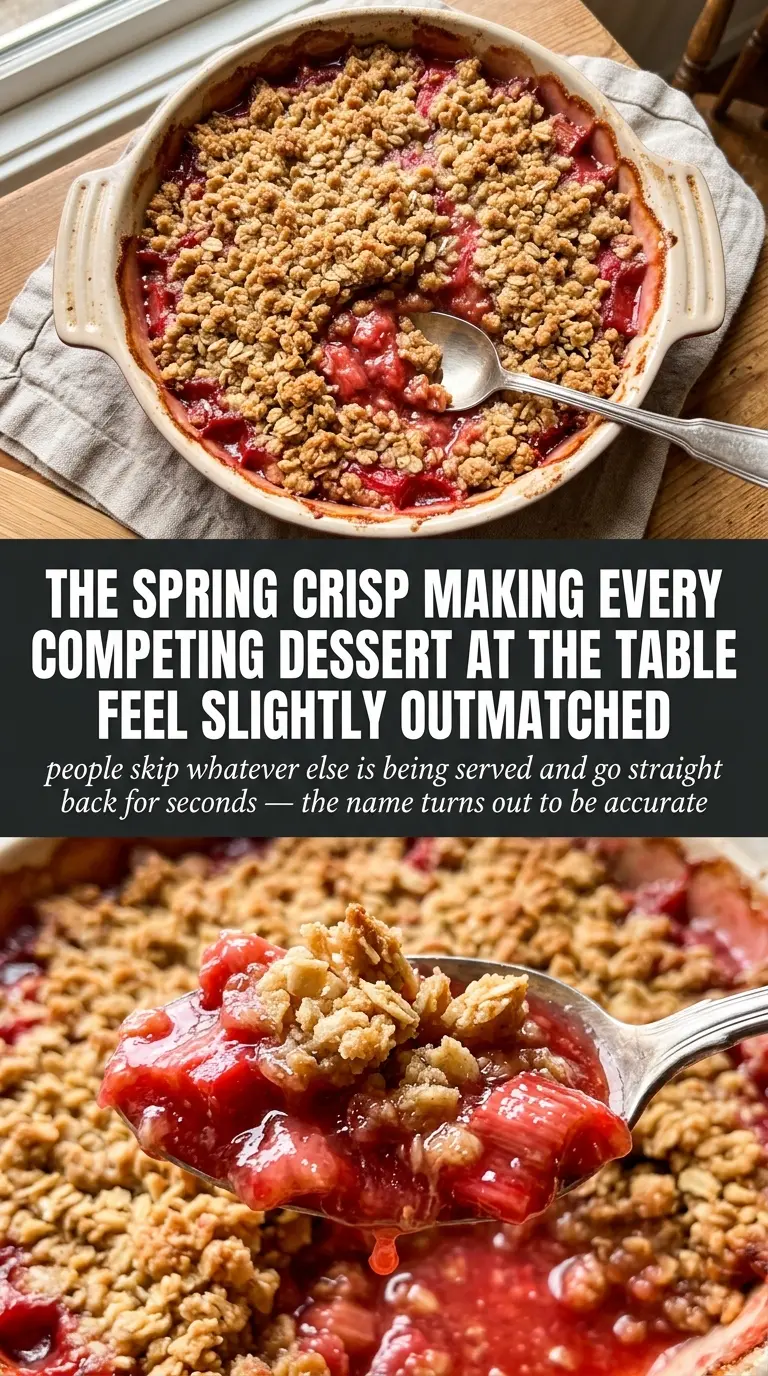
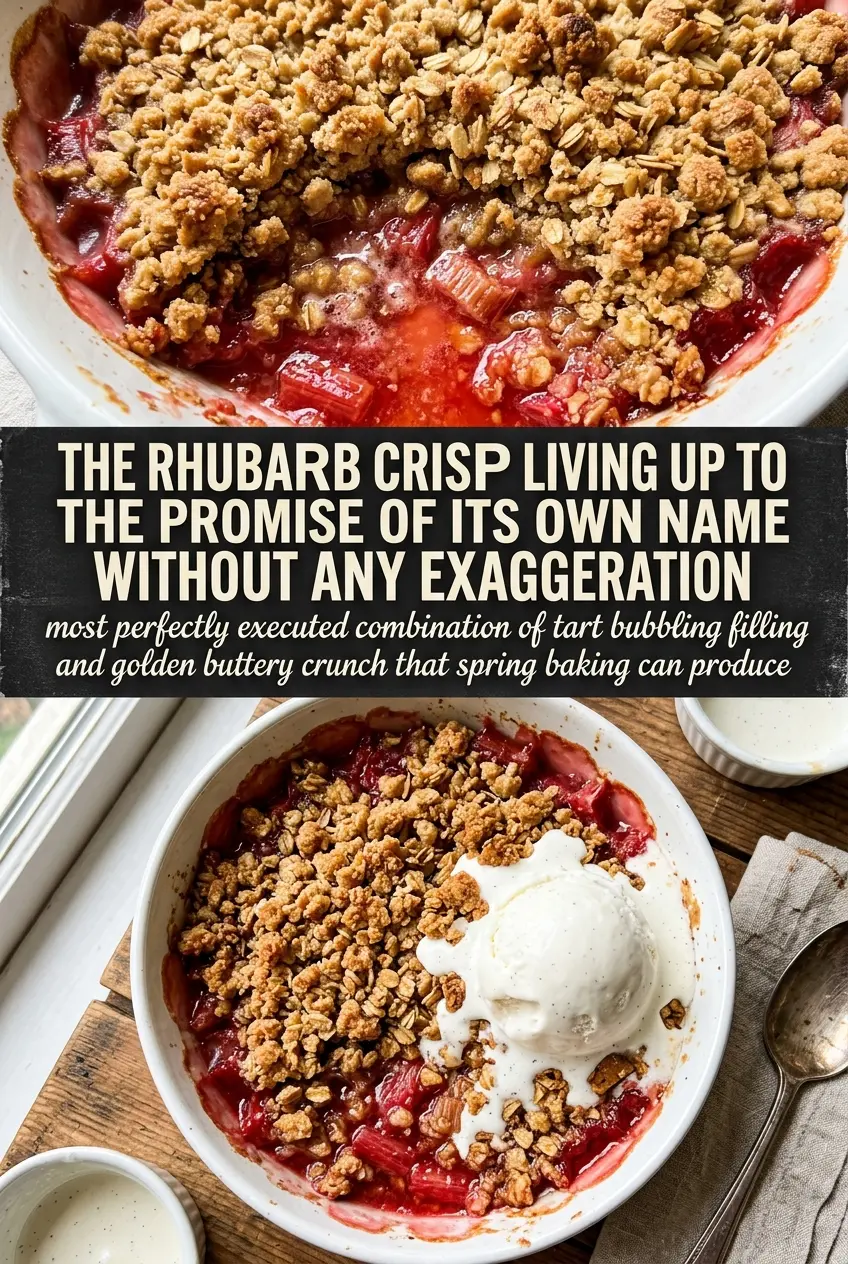
Golden oat topping and tender sweet-tart rhubarb are what make a great crisp worth repeating, and this version gets the balance right. The fruit softens into a bubbling, jammy layer while the topping bakes into thick, craggy clumps that hold onto every spoonful. It’s the kind of dessert that tastes like it took more effort than it did, which is exactly why it disappears fast.
The filling stays bright because the rhubarb is tossed with enough sugar to draw out juices, plus a little flour to thicken those juices into a spoonable sauce instead of a runny puddle. Melted butter in the topping gives you those dense, golden clusters without needing to cut cold butter into the dry ingredients. Once you know how to keep the filling from getting watery and the topping from baking up sandy, this dessert becomes dependable.
Below, I’ve included the detail that matters most for crisp success: how to tell when the topping is done before the fruit overcooks. I’ve also added a few smart swaps and make-ahead notes so you can work with what’s in your kitchen and still get a crisp that tastes bakery-worthy.
The topping baked up thick and crunchy instead of sandy, and the rhubarb turned perfectly soft without falling apart. I served it with vanilla ice cream and the pan was scraped clean.
Save this rhubarb crisp for the next time you want a buttery oat topping and sweet-tart fruit in one pan.
The Reason Most Rhubarb Crisps Turn Watery Before They Turn Golden
Rhubarb gives up a lot of liquid as it bakes, and that’s where many crisps go wrong. If the filling isn’t thickened before it goes into the oven, the fruit steams in its own juice and the topping can’t brown properly on top of that wet layer. The small amount of flour in this recipe gives those juices enough structure to turn glossy and spoonable instead of thin and soupy.
The other thing that matters is the pan. A 9×13-inch dish gives the filling enough surface area for the topping to bake through evenly instead of staying pale and soft in the center. Bake until the filling is bubbling hard around the edges and through the middle; that bubbling tells you the flour has actually thickened the fruit.
What the Oats, Sugar, and Melted Butter Are Doing Up Top
- Fresh rhubarb — Use firm stalks and trim away any leaves completely. Fresh rhubarb keeps its shape better than frozen here, which matters because frozen rhubarb tends to release extra water and soften too fast.
- All-purpose flour — This does two jobs: it thickens the filling and helps the topping bake into a sturdier crumble. If you skip it in the filling, the juices stay loose and pool at the bottom.
- Old-fashioned oats — These give the topping its chunky, nubbly texture. Quick oats can work in a pinch, but they make the topping softer and less defined.
- Brown sugar — Brown sugar brings a deeper caramel note that stands up to rhubarb’s sharpness. Light brown sugar is fine; dark brown sugar will make the topping taste a little richer and more molasses-heavy.
- Melted butter — Melted butter is what creates those thick, buttery clusters without any pastry cutting. Let it cool for a minute before mixing so it coats the dry ingredients evenly instead of turning greasy.
- Vanilla, cinnamon, and nutmeg — These round out the fruit without overpowering it. Vanilla softens the edge of the rhubarb, while the spices give the topping a warm finish that tastes complete.
How to Build the Crisp So the Top Stays Crunchy
Coating the Rhubarb First
Toss the rhubarb with sugar, flour, and vanilla until every piece looks lightly coated. That coating matters because it starts drawing out the fruit’s juice right away, which is what lets the filling thicken evenly in the oven. Spread it in the dish in an even layer so the bake stays consistent from edge to center. If the fruit is piled in a mound, the middle cooks unevenly and the topping can end up pale in the center.
Mixing the Topping Without Overworking It
Stir the oats, flour, brown sugar, cinnamon, nutmeg, and melted butter until everything is evenly moistened and clumps start to form. You want a rough, damp crumble, not a paste. If the mixture looks sandy and dry, it needs a little more stirring; if it looks greasy, the butter was too hot or the mix sat too long before going on the fruit. Spoon it over the rhubarb in an even layer, then leave it alone so the topping can bake into craggy clusters.
Baking Until the Filling Is Active, Not Just Warm
Bake at 375°F until the top is deep golden and the fruit is bubbling hard all over, not just at the edges. That vigorous bubbling is your signal that the filling has thickened enough to set as it cools. If you pull it when the topping looks golden but the filling is only barely moving, the juices will stay thin. Let it rest for 10 minutes before serving so the fruit settles and doesn’t run across the plate.
Three Ways to Adjust This Crisp Without Losing the Good Part
Make it with strawberries for a softer, sweeter filling
Replace up to 2 cups of the rhubarb with sliced strawberries. The berries soften the tart edge and create a juicier filling, so keep the flour in place and bake until the center is actively bubbling. The result is less sharp and more jammy, but the crisp still tastes balanced.
Use gluten-free oats and flour for a gluten-free dessert
Swap the all-purpose flour in both the filling and topping for a cup-for-cup gluten-free baking blend, and use certified gluten-free oats. The topping stays crunchy and the filling thickens about the same, though the crumble may bake up a little more delicate.
Make it dairy-free with plant-based butter
Use a solid dairy-free butter stick that behaves like real butter when melted. The topping will still clump and brown, but very soft spreads can make it greasy instead of crisp. Choose one with a neutral flavor so the rhubarb stays front and center.
Make it ahead for easy entertaining
Assemble the filling and topping separately up to 1 day ahead, then keep them covered in the refrigerator. Add the topping just before baking so it stays crumbly instead of soaking into the fruit. This is the best way to keep the top crunchy.
Storage and Reheating
- Refrigerator: Cover and refrigerate for up to 4 days. The topping softens a bit, but the flavor holds well.
- Freezer: Freeze baked crisp for up to 2 months in a tightly wrapped dish. Thaw overnight in the refrigerator before reheating.
- Reheating: Warm in a 325°F oven until heated through and the topping perks back up, about 15 to 20 minutes. The mistake to avoid is the microwave, which turns the crumble soft and makes the fruit weep.
Answers to the Questions Worth Asking
Irresistible Rhubarb Crisp
Ingredients
Equipment
Method
- Preheat the oven to 375°F and butter a 9x13-inch baking dish.
- Toss the fresh rhubarb with sugar, flour, and vanilla extract, then spread the mixture evenly in the prepared dish.
- Combine old-fashioned oats, all-purpose flour, brown sugar, melted butter, cinnamon, and nutmeg, stirring until the mixture looks evenly coated.
- Spread the oat mixture evenly over the rhubarb so it forms a thick layer of topping.
- Bake for 40-45 minutes at 375°F until the topping is deep golden and the filling is bubbling vigorously (watch for active bubbling around the edges).
- Let the crisp cool for 10 minutes so the filling sets slightly before slicing and serving.
- Serve warm with vanilla ice cream.