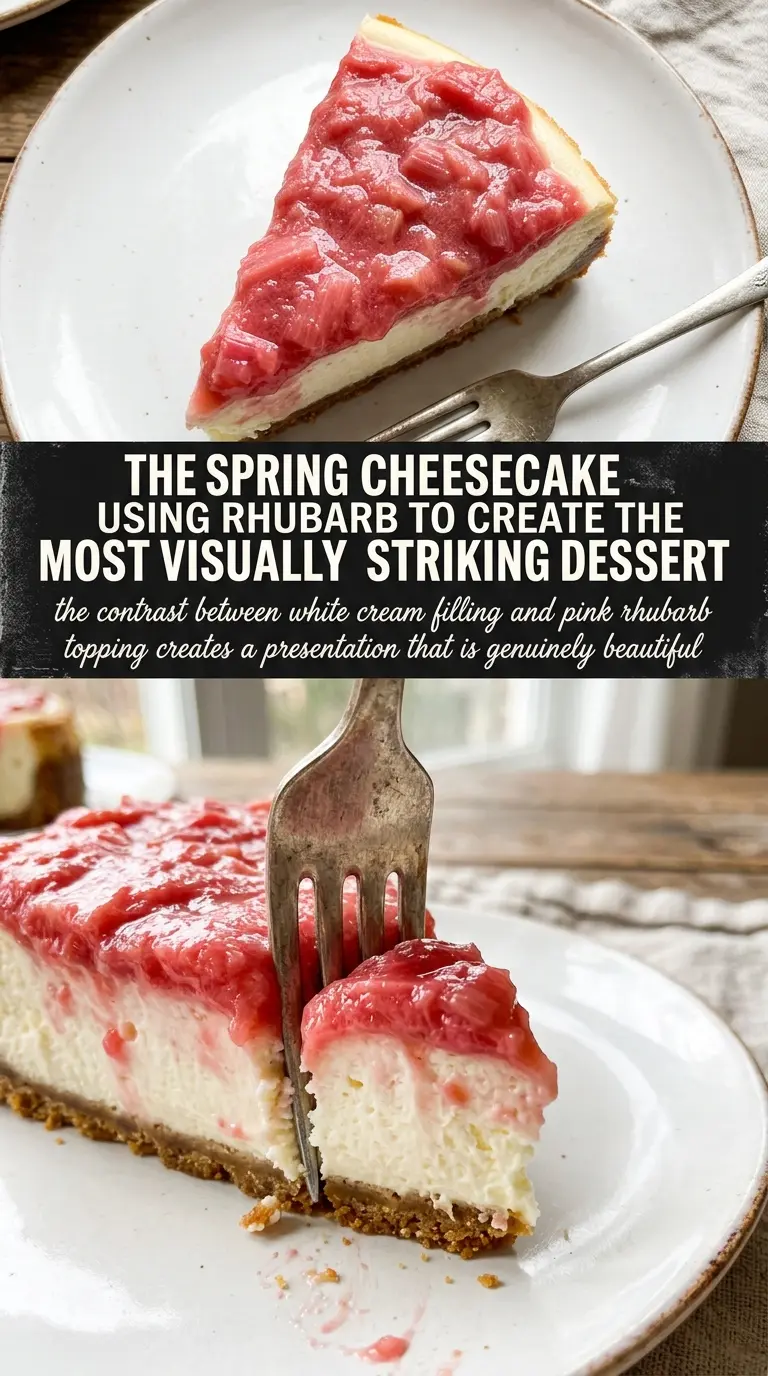
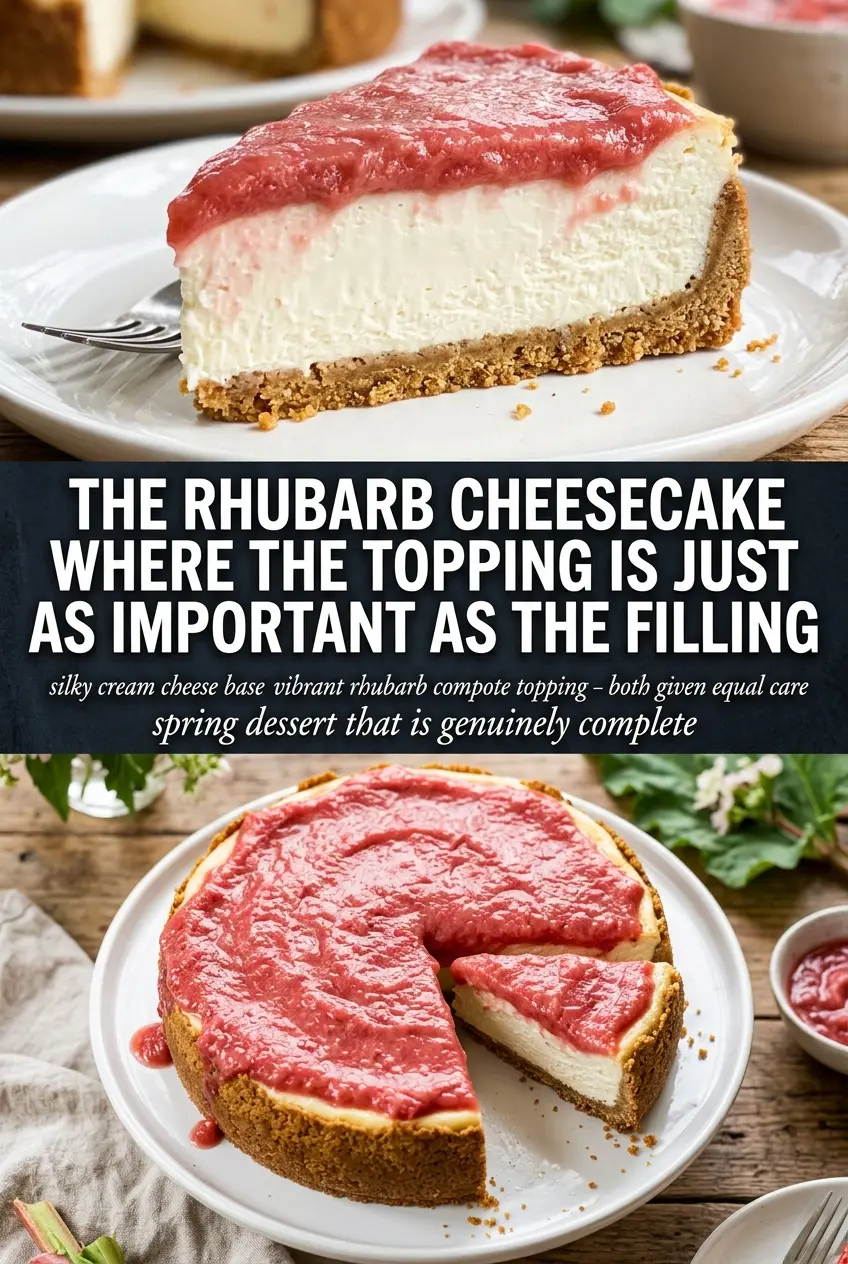
Creamy cheesecake and bright rhubarb are one of those pairings that stop tasting like separate parts and start tasting like a single, balanced dessert. The filling stays smooth and rich, the crust brings a buttery crunch, and the rhubarb topping cuts through all that richness with a tart, glossy finish that keeps each bite clean instead of heavy.
What makes this version work is the contrast in texture and temperature. The cheesecake bakes in a water bath, which helps the center set gently instead of cracking or turning grainy, and the long chill gives it that dense, sliceable body people expect from a proper cheesecake. The rhubarb topping is cooked separately so it stays vivid and sharp, then thickened just enough to drape over the top without running off the plate.
Below you’ll find the timing that keeps the filling from overbaking, the rhubarb cue that tells you when the topping is ready, and a few smart swaps if you need to adjust the crust or make the dessert ahead.
The filling baked up smooth with no cracks, and the rhubarb topping set into this glossy layer that stayed put when I sliced it. I chilled it overnight and the texture was perfect the next day.
Love the creamy cheesecake and glossy rhubarb topping? Save this Rhubarb Cheesecake for the next time you want a make-ahead dessert that slices cleanly and looks elegant on the table.
The Water Bath Is What Keeps the Center Silky, Not Dense
Cheesecake cracks for two main reasons: it bakes too hot, or it bakes too fast. The water bath solves both problems by surrounding the pan with steady, gentle heat, which lets the eggs set without tightening into a rubbery layer. That slow bake is what gives you a smooth slice instead of a dry, chalky one.
Wrapping the springform pan in foil matters more than people think. If water sneaks into the crust, the bottom goes soggy and the whole dessert loses its clean texture. Bake until the edges look set and the center still has a slight wobble when you tap the pan. That wobble is your cue to stop, not a sign that it needs more time.
- Room-temperature cream cheese — Cold cream cheese leaves little lumps behind, even after a long beat. Let it soften fully so the batter turns smooth before the eggs go in.
- Sour cream — This keeps the filling tangy and soft without thinning it out. Full-fat sour cream gives the best texture here.
- Eggs one at a time — Adding them slowly helps the batter emulsify. If you dump them all in at once, the mixture is more likely to turn loose and bake unevenly.
What Each Layer Is Doing in the Final Slice
- Graham cracker crumbs — These give you the classic buttery base that stands up to the filling. If you want a slightly deeper flavor, use a mix of graham crumbs and finely crushed digestive biscuits.
- Butter and sugar in the crust — The butter binds the crumbs, and the sugar helps the crust bake into a firmer, more structured layer. Press it down firmly so it doesn’t crumble when you slice.
- Fresh rhubarb — Fresh rhubarb gives the topping its sharp, clean bite and pretty pink color. Frozen rhubarb works in a pinch, but it releases more liquid, so you may need a little extra simmer time before it thickens.
- Cornstarch — This is what turns the topping from runny compote into a spoonable glaze. Mix it with a little water before adding it to the hot fruit so it disperses evenly and doesn’t clump.
Building the Cheesecake Without Overmixing the Filling
The Crust Goes in First and Needs a Short Bake
Mix the graham crumbs, melted butter, and sugar until every crumb looks evenly moistened, then press it firmly into the bottom of the springform pan. A flat-bottomed measuring cup helps pack it down evenly, which keeps the crust from falling apart later. Bake it for 10 minutes so it sets before the filling goes in; a raw crust can turn sandy under the cheesecake.
Beat the Filling Until Smooth, Then Stop
Start with the cream cheese and sugar and beat until the mixture looks creamy with no visible lumps. Add the eggs one at a time and mix only until each one disappears, then blend in the sour cream and vanilla. If you keep beating after the eggs go in, you’ll whip in too much air, and that can lead to cracks or a puffed center that sinks as it cools.
Bake Until the Edges Hold and the Middle Still Moves
Pour the filling over the crust and set the pan in the water bath, then bake until the outer edge looks firm and the center gives a gentle wobble. Don’t wait for the whole top to look set, because cheesecake finishes cooking as it cools. When it comes out, turn off the oven, crack the door, and let it sit for an hour so the temperature drops slowly instead of shocking the filling.
Cook the Rhubarb Topping Until It Thickens Cleanly
Simmer the rhubarb, sugar, and water until the pieces break down and soften. Once the cornstarch slurry goes in, cook it just until the mixture turns glossy and thick enough to coat a spoon. If you stop too soon, it will run off the cake; if you boil it too hard after thickening, it can turn cloudy and lose that bright, jewel-like finish.
Ways to Adjust the Crust, Filling, or Topping Without Losing the Balance
Gluten-Free Crust
Use certified gluten-free graham-style crumbs or finely crushed gluten-free cookies in the same amount. The texture stays very close to the original as long as you still mix it with melted butter and press it firmly before baking.
Lower-Sugar Version
You can reduce the sugar in the filling by about 1/4 cup and in the topping by a few tablespoons, but don’t cut it too far. Sugar does more than sweeten here; it helps the cheesecake bake with a softer texture and gives the rhubarb topping enough body to taste balanced instead of aggressively tart.
Berry-Rhubarb Topping
Swap out 1 cup of the rhubarb for strawberries or raspberries if you want a softer, sweeter topping. The fruit will still thicken the same way, but the flavor turns rounder and less sharp, and the color deepens into a richer pink.
Storage and Reheating
- Refrigerator: Keep the cheesecake covered for up to 5 days. The crust softens a little under the topping, but the flavor stays excellent.
- Freezer: Freeze the cheesecake without the rhubarb topping for the best texture. Wrap slices tightly and freeze for up to 2 months, then thaw overnight in the refrigerator.
- Reheating: Cheesecake is best served cold or just slightly cool, not reheated. If it has been frozen, thaw it fully in the fridge first so the filling doesn’t turn watery and the crust doesn’t separate.
Answers to the Questions Worth Asking
Rhubarb Cheesecake
Ingredients
Equipment
Method
- Preheat oven to 325°F and wrap the outside of a 9-inch springform pan with foil to help prevent water from seeping in.
- Mix graham cracker crumbs, melted butter, and sugar, then press the mixture into the bottom of the pan.
- Bake the crust for 10 minutes until set, then remove from the oven.
- Beat cream cheese and sugar until smooth.
- Add eggs one at a time, mixing after each addition until incorporated.
- Mix in sour cream and vanilla extract until the batter looks creamy and fully combined.
- Pour the filling over the crust.
- Bake in a water bath for 55-65 minutes until the edges are set but the center jiggles slightly.
- Turn off the oven and let the cheesecake cool inside with the door cracked for 1 hour.
- Refrigerate the cheesecake for at least 6 hours so it firms up for slicing.
- Simmer rhubarb, sugar, and water until the rhubarb is tender.
- Stir cornstarch (mixed with water) into the simmering rhubarb and cook until thickened.
- Cool the topping, then spread it over the chilled cheesecake before serving.