Crispy-edged corn, creamy cotija, and a squeeze of lime make these Mexican Street Corn Cups the kind of side dish that disappears before the main course gets much attention. The hot corn brings sweetness and a little smoke, while the cool cheese mixture clings to every kernel and turns each bite into a mix of char, tang, and creaminess. Served warm in small cups or corn husks, it feels street-food casual in the best way.
The key is letting the corn stay in the pan long enough to pick up real color. If it only gets warmed through, the cups taste flat. A cast iron skillet helps, but any wide pan that lets the kernels spread out will work. The other piece that matters is the topping: cotija gives the salty, crumbly finish that makes this dish taste like Mexican street corn instead of just corn with sauce.
Below, I’ve included the timing cues that keep the corn from turning soggy, plus a few smart swaps if you need to work with what’s in the fridge.
The corn got those perfect charred spots in the skillet, and the cotija mixture stayed creamy without running all over the bowl. I kept sneaking bites before dinner was even on the table.
Save these Mexican Street Corn Cups for the nights when you want smoky corn, creamy cotija, and fresh lime in one fast side.
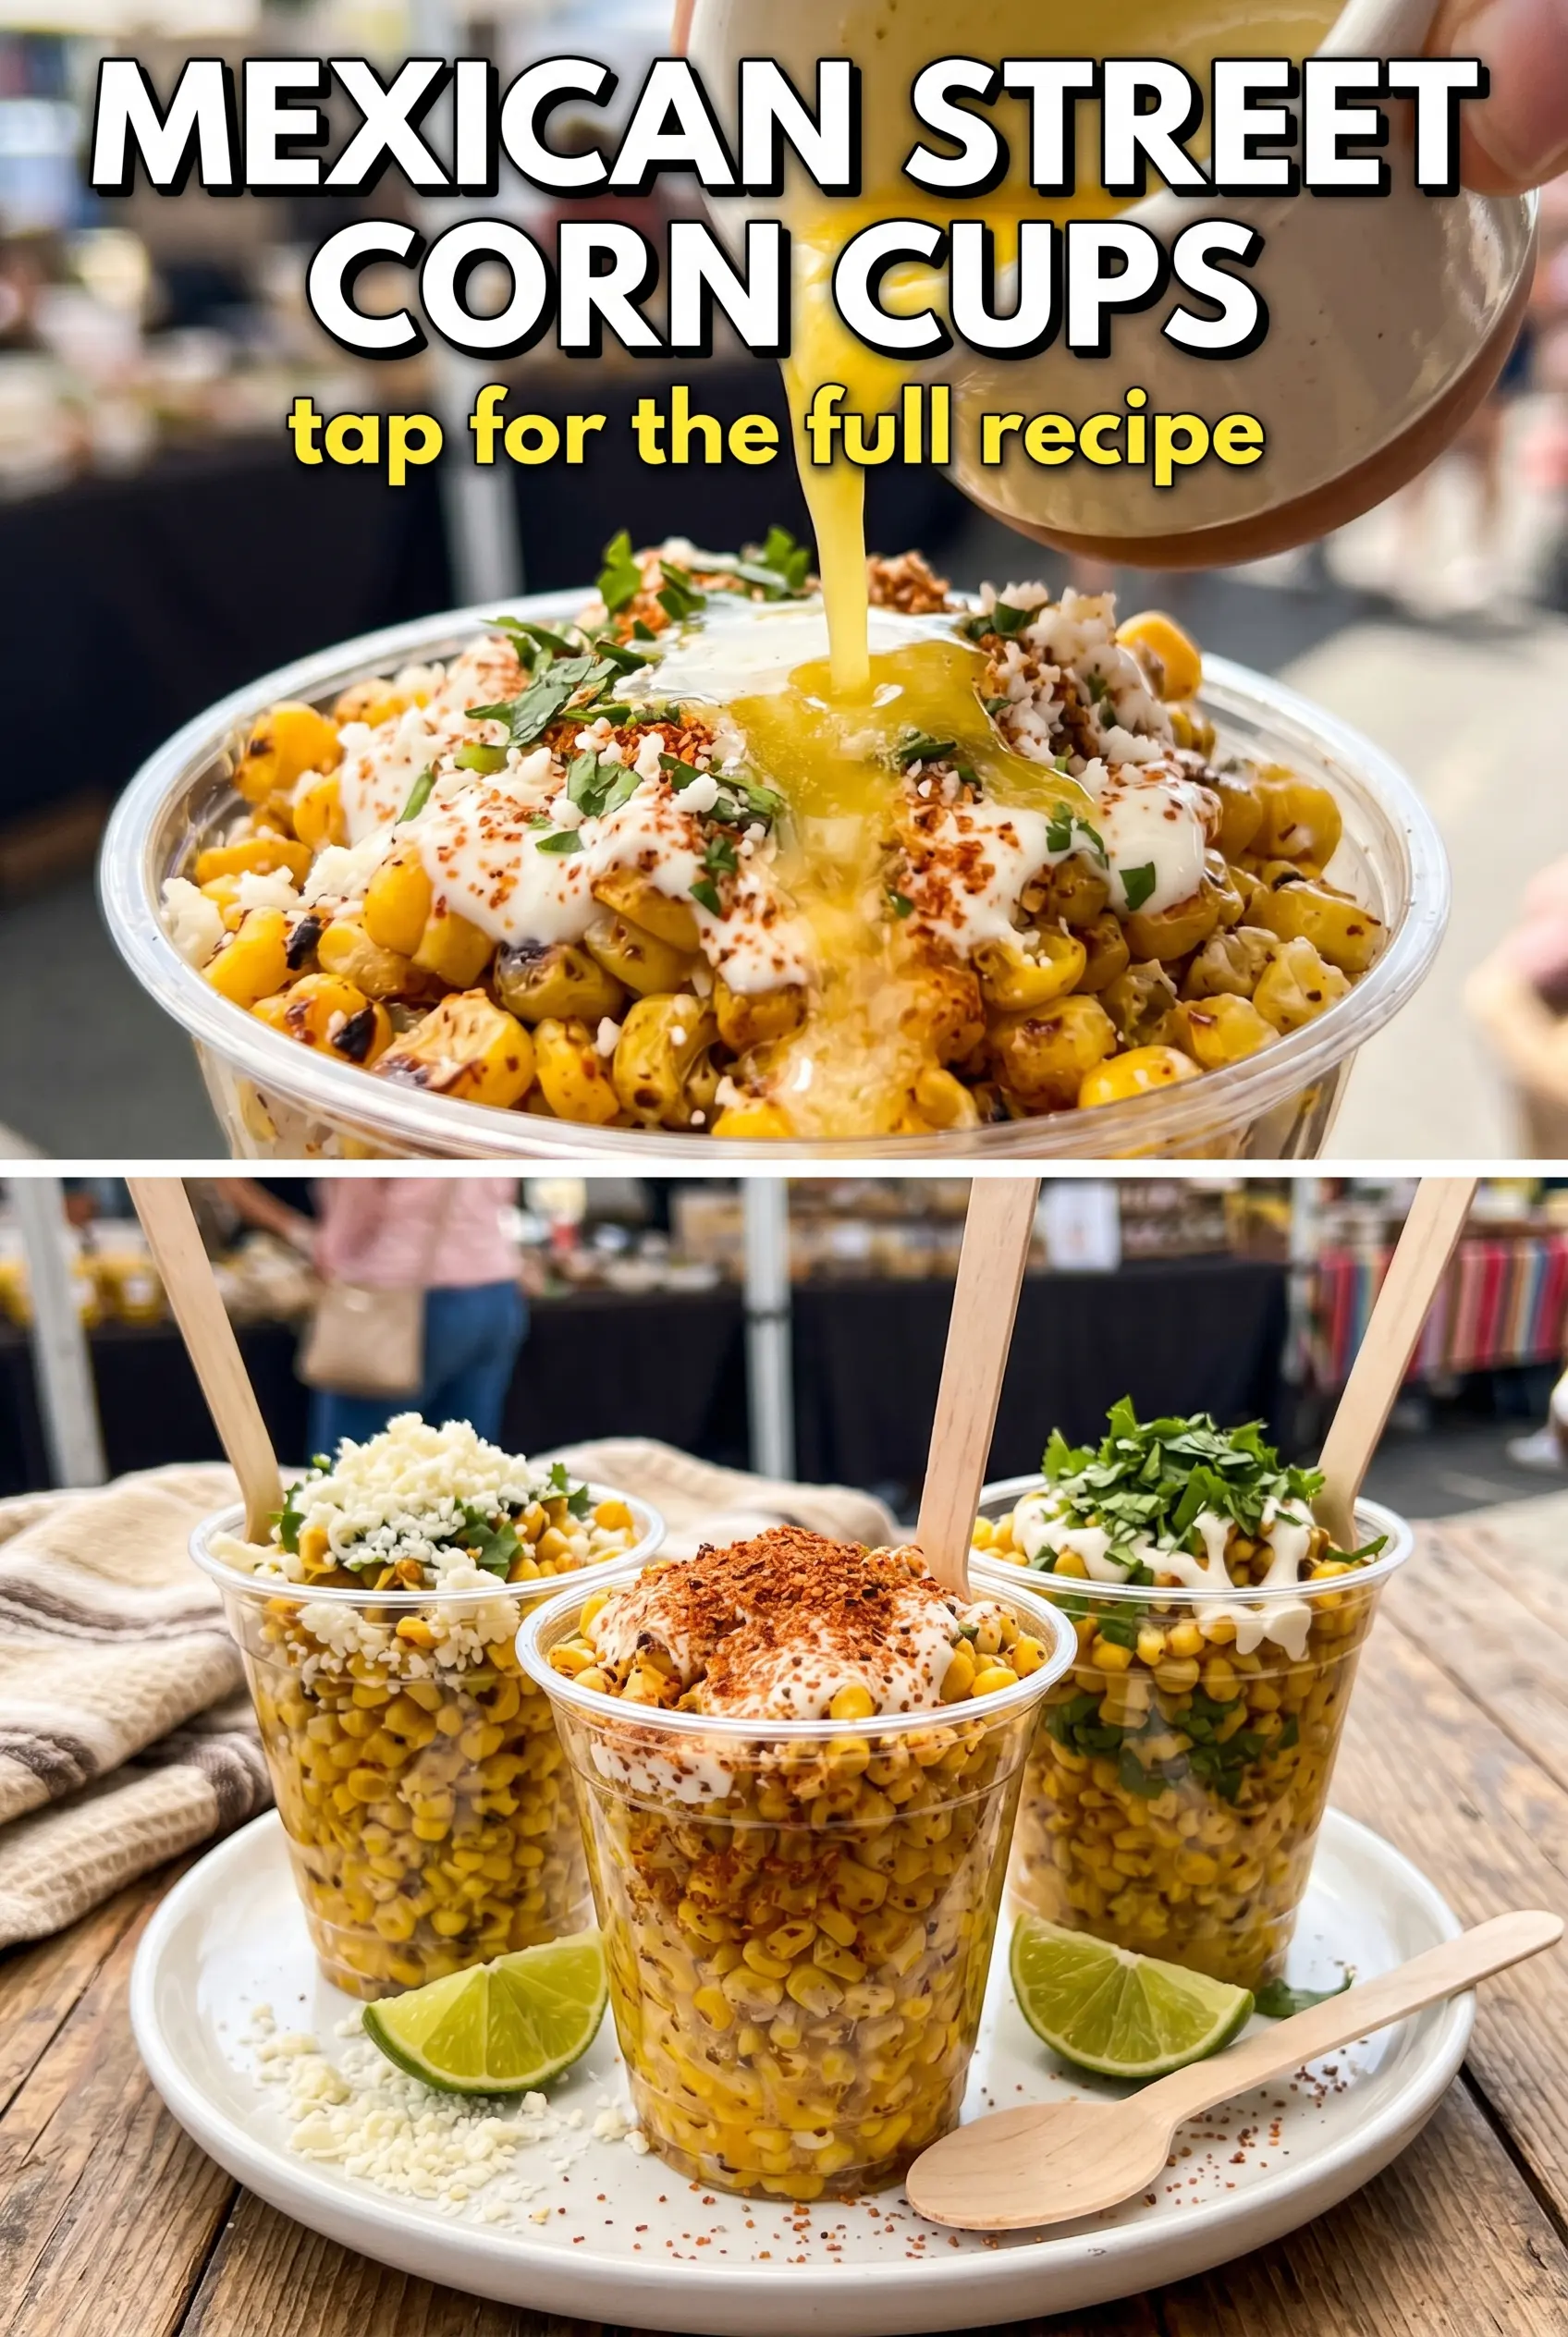
The Char on the Corn Is What Keeps This from Tasting Flat
Most corn cup recipes fall apart because the kernels never get enough contact with the pan. They steam, turn pale, and the whole dish tastes one-note. Here, the corn needs time in a hot skillet so some kernels blister while others stay tender and sweet. That mix of textures is what makes the finished cups taste lively instead of soft.
Use a wide pan and don’t crowd it if you can avoid it. The butter helps the corn brown, but the real payoff comes from patience: let the kernels sit long enough to pick up color before stirring again. If the pan starts smoking hard, lower the heat a touch. You want deep golden spots, not scorched bits that turn bitter.
What the Cotija Mixture Is Doing Besides Adding Cheese
- Cotija — This is the salty, crumbly piece that gives the dish its street-corn finish. Feta is the closest substitute if you can’t find cotija, but it’s sharper and a little wetter, so use a lighter hand.
- Mayonnaise — It binds the cheese mixture into something spoonable and helps it cling to the corn. Greek yogurt works in a pinch, though the topping will taste tangier and a little less rich.
- Lime — The juice cuts through the butter and mayo so the cups don’t feel heavy. Use fresh lime here; bottled juice tastes dull and misses the bright edge that pulls the whole dish together.
- Cilantro and garlic — These keep the topping from tasting like plain dairy. Chop the cilantro finely so it blends through the mixture, and mince the garlic small enough that you get flavor without raw chunks.
Building the Corn Cups So They Stay Crisp
Cutting and Charring the Corn
Run a sharp knife down each cob to remove the kernels, then heat the butter in a cast iron skillet or large heavy pan over medium-high heat. Add the corn and stir occasionally, but not constantly; the kernels need a little time in direct contact with the pan to brown. After about 12 to 15 minutes, you should see golden edges and a few darker charred spots. If the pan gets crowded, the corn steams and you lose that roasted flavor.
Mixing the Cotija Topping
Combine the cotija, mayonnaise, cilantro, garlic, chili powder, salt, and pepper in a bowl until the mixture is thick and spoonable. It should hold together without looking runny. If it seems loose, add a little more cheese instead of more mayo. That keeps the topping creamy without sliding off the corn as soon as it hits the bowl.
Assembling and Serving Warm
Spoon the charred corn into small bowls or corn husks, then top with the cheese mixture and a fresh squeeze of lime. Serve it warm so the corn stays glossy and the topping softens just enough to melt into the kernels. If you wait too long, the corn loses its heat and the contrast between the warm base and cool topping gets muddy.
How to Adapt These Corn Cups for Different Tables
Dairy-Free Version
Swap the butter for olive oil or a dairy-free butter, and replace the cotija-mayo topping with a dairy-free mayo mixed with a little extra lime and chili powder. You’ll lose the salty crumble of cotija, but the result still gives you that creamy, tangy street-corn feel.
Using Frozen Corn Instead of Fresh
Frozen corn works when fresh ears aren’t in season. Thaw it first and pat it dry so the skillet can brown it instead of steaming it, then cook it a little longer to drive off extra moisture. The flavor will be slightly less sweet, but the char still gives the dish plenty of character.
Turning It Into a Heartier Side
Add black beans, diced avocado, or a spoonful of cooked rice to the serving cups if you want something that eats more like a light lunch. The beans add bulk and a little earthiness, while avocado softens the heat from the chili powder. Keep the lime at the end so the extra ingredients don’t dull the brightness.
Storage and Reheating
- Refrigerator: Store the corn and topping separately for up to 3 days. The corn will soften a bit, but it reheats well if you keep the topping off until serving.
- Freezer: The charred corn freezes better than the dairy topping. Freeze the cooled corn in a sealed container for up to 2 months, then make the cheese mixture fresh when you’re ready to serve.
- Reheating: Rewarm the corn in a skillet over medium heat until hot. Don’t microwave it in the bowl with the topping already on top, or the corn goes soggy and the mayo can separate.
Answers to the Questions Worth Asking
Mexican Street Corn Cups
Ingredients
Equipment
Method
- Cut corn kernels from the cob using a sharp knife. Aim for even kernel sizes so they char at the same rate.
- Heat a cast iron skillet over medium-high heat. Add melted butter and corn kernels, stirring occasionally until kernels char and become golden, about 12-15 minutes, and keep the pan hot for better browning.
- Combine cotija cheese, mayonnaise, chopped cilantro, minced garlic, chili powder, salt, and pepper in a bowl. Stir until the mixture looks thick and creamy with no dry cheese pockets.
- Divide charred corn among four small bowls or corn husks. Top each serving with the cheese mixture and squeeze fresh lime juice over the top right before eating, and serve warm for the best crispy edges.