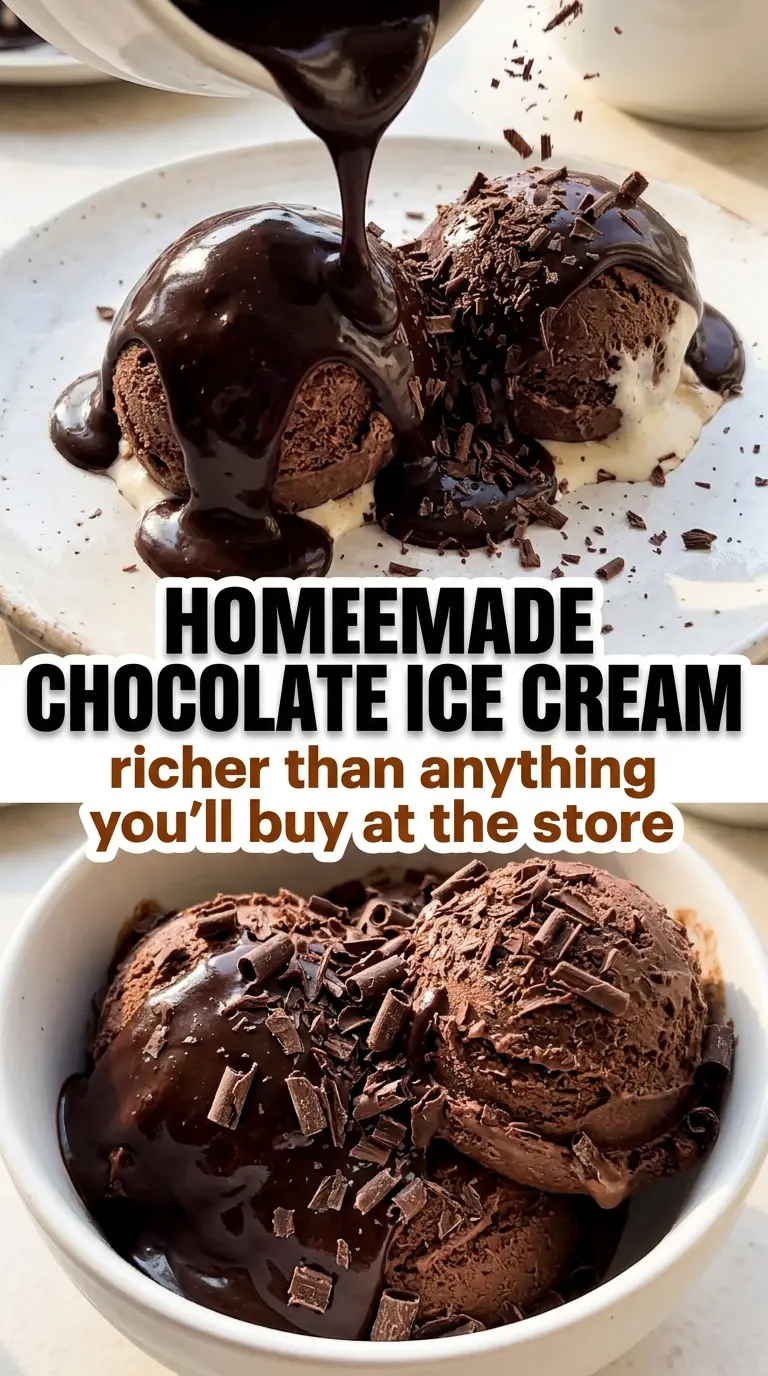
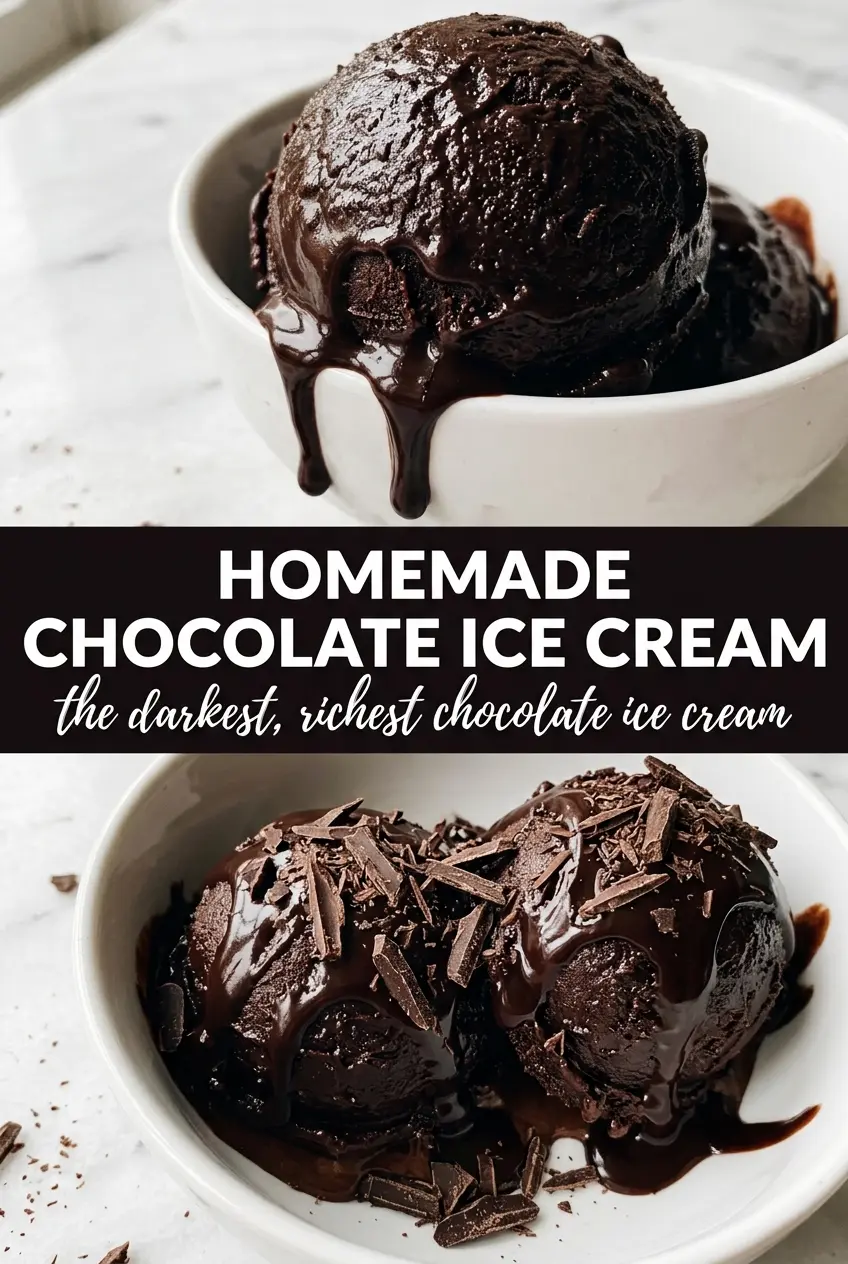
Deep chocolate ice cream should taste dark, smooth, and just a little luxurious, with a custard base that melts cleanly instead of going icy on the tongue. This version gives you that dense, velvety scoop that holds its shape for a second before it softens, the kind of texture that makes a bowl feel special without being fussy. The cocoa brings the first wave of flavor, then the chopped dark chocolate pushes it into real chocolate territory instead of the flat sweetness you get from a lot of homemade versions.
The trick is building the base with both cocoa powder and melted chocolate, then cooking it like a custard so it sets up with body. If you skip that step or rush the heat, the ice cream tastes thinner and freezes harder. The egg yolks give you richness and that silky mouthfeel, while the ice bath and long chill keep the churned ice cream smooth instead of grainy.
Below, I’ll walk through the small details that make a big difference here — especially how to keep the custard from scrambling and how to judge when the base is ready for the freezer.
The custard came out silky and the chocolate flavor was deep, not overly sweet. I churned it after an overnight chill and it froze up with that dense scoopable texture I always want from homemade ice cream.
Save this dark, fudgy homemade chocolate ice cream for the nights when you want a dense custard-style scoop with real chocolate depth.
The Part That Keeps Chocolate Ice Cream Smooth Instead of Grainy
Chocolate ice cream goes wrong when the base gets too hot too fast or when the cocoa never fully hydrates before chilling. Cocoa powder needs whisking into the sugar first so it disperses evenly; otherwise it can stay dusty and throw off the texture. The dark chocolate adds fat and body, but it still needs gentle heat. Once the custard is on the stove, steady stirring is what keeps the egg yolks from setting into little bits.
The finished base should coat the back of a spoon and leave a clean line when you drag a finger through it. If it looks thin, it hasn’t cooked enough to freeze into that dense, scoopable texture. If it starts to look speckled or curdled, the heat was too high. Pull it off the burner right away and whisk hard for a few seconds before straining.
What the Cocoa, Chocolate, and Yolks Are Each Doing Here
- Unsweetened cocoa powder — This gives the ice cream its deep chocolate base and that almost black color. Dutch-process cocoa makes it darker and smoother, but natural cocoa works too. The important part is whisking it with some of the sugar before heating so it doesn’t clump.
- Dark chocolate — This is what makes the flavor taste full and round instead of one-note. Use a bar you’d actually eat on its own; chopped chocolate melts cleaner than chips and gives you a silkier custard.
- Heavy cream and whole milk — Cream brings richness, while the milk keeps the base from turning into a brick in the freezer. You can swap in a little half-and-half in a pinch, but the texture won’t be quite as plush.
- Egg yolks — These are what turn the base into custard ice cream. They add body and a softer finish, which matters here because chocolate alone can freeze hard.
- Vanilla and salt — Vanilla rounds out the chocolate, and salt keeps the sweetness from flattening out. Don’t skip the salt; even that small amount makes the chocolate taste darker.
Cooking the Custard Without Scrambling the Eggs
Warming the Chocolate Base
Start by whisking the cocoa with part of the sugar before it goes into the saucepan. That little step keeps the cocoa from floating on top in dry pockets. Warm the cream and milk over medium heat just until steaming, not boiling, then add the chopped chocolate and whisk until the mixture looks glossy and completely smooth. If you see undissolved bits, keep whisking off the heat for another few seconds instead of cranking the burner higher.
Tempering the Yolks
Whisk the yolks with the remaining sugar until they look lighter in color and slightly thickened. Then pour in the hot chocolate mixture in a slow stream while whisking constantly. That gradual add-in brings the yolks up to temperature without turning them into scrambled eggs. If you dump in the hot liquid all at once, the outside of the yolks sets too fast and you’ll get little cooked flecks in the finished ice cream.
Cooking to the Right Thickness
Return everything to the saucepan and cook over medium-low heat, stirring constantly with a spatula or wooden spoon. You’re looking for a custard that lightly coats the back of the spoon and reaches 175°F. The moment it starts to thicken, the change can happen fast, so stay close to the stove. If the custard stops moving easily in the pan or begins to steam hard, the heat is too high and the texture will turn grainy.
Straining, Chilling, and Churning
Strain the custard through a fine mesh sieve to catch any tiny bits of cooked egg. Stir in the vanilla and salt, then cool it over an ice bath until it’s no longer warm to the touch. That full chill matters because an ice cream base that goes into the machine warm won’t churn as smoothly and can end up icy. Refrigerate it at least 4 hours or overnight, then churn until it looks like soft-serve before freezing it until firm.
How to Adapt This Dark Chocolate Ice Cream for Different Kitchens
Make It Extra Dark
Swap the cocoa for Dutch-process cocoa and use a 70% to 85% dark chocolate bar. The flavor turns deeper and less sharp, with a color that reads almost espresso-black in the bowl. This works best if you like a more grown-up, less sweet chocolate ice cream.
Dairy-Free Version
Use full-fat canned coconut milk in place of the cream and whole milk, then keep the same yolk custard method. The ice cream will taste a little coconut-forward and won’t be quite as neutral, but it still churns into a rich scoop. Pick a dairy-free dark chocolate that melts smoothly and doesn’t contain added milk solids.
No Ice Cream Maker
Freeze the chilled base in a shallow pan and stir it every 30 to 45 minutes for the first few hours. You won’t get the exact same airy texture, but you’ll break up the ice crystals enough to keep it scoopable. This method works best if the custard is fully chilled first, because a warm base sets up unevenly.
Storage and Reheating
- Refrigerator: The base can sit covered in the fridge for up to 2 days before churning. After freezing, keep the ice cream in an airtight container with parchment pressed on top to limit ice crystals.
- Freezer: It freezes well for about 2 weeks with the best texture in the first few days. After that, it starts to pick up more ice and the flavor dulls a bit.
- Reheating: Let it stand at room temperature for 5 to 10 minutes before scooping. Don’t microwave the whole container unless you want melted edges and a hard center.
Questions I Get Asked About This Recipe
Homemade Chocolate Ice Cream
Ingredients
Equipment
Method
- Whisk unsweetened cocoa powder with 1/4 cup granulated sugar, then whisk in heavy cream and whole milk in a saucepan. Heat over medium, whisking, until steaming.
- Add the finely chopped dark chocolate to the hot cream mixture and whisk until fully melted and smooth.
- Whisk egg yolks with the remaining 1/2 cup granulated sugar until pale.
- Slowly whisk the hot chocolate cream into the egg yolks to temper them, then return the mixture to the saucepan.
- Cook over medium-low heat, stirring constantly, until the custard coats the back of a spoon, about 175°F (visual cue: a clear line stays when you run a finger through the coating).
- Strain the custard through a fine mesh sieve into a bowl, then stir in vanilla extract and salt.
- Cool completely by setting the bowl over an ice bath for fast chilling, stirring occasionally until no longer warm.
- Refrigerate at least 4 hours or overnight until thoroughly chilled.
- Churn in an ice cream maker according to the manufacturer’s directions, then freeze until firm.