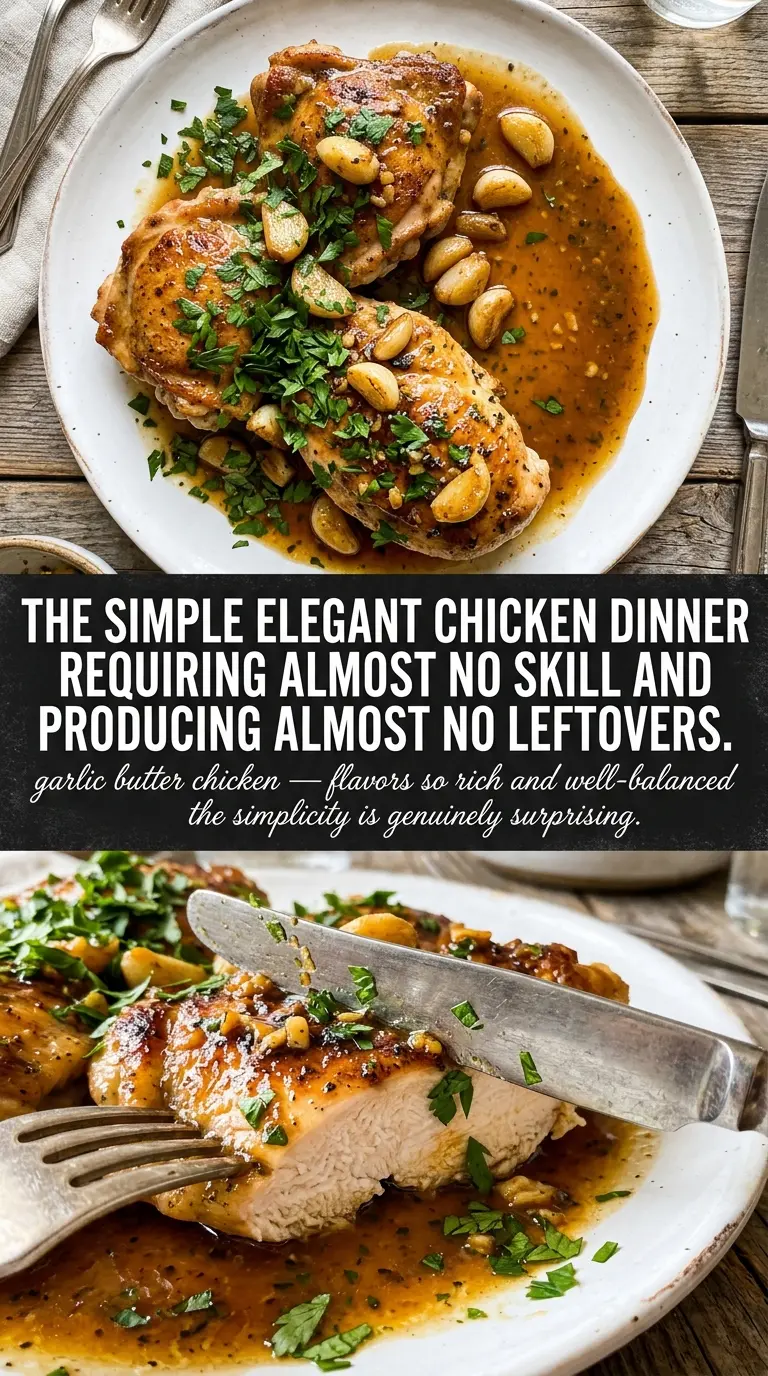
Golden, pan-seared chicken breasts coated in garlicky butter sauce have a way of disappearing fast, especially when the skillet sauce is just thin enough to spoon over bread but rich enough to cling to every bite. This version keeps the chicken juicy by searing it first and finishing it in the sauce instead of cooking it all the way in butter, which is the difference between tender slices and dried-out chicken.
The other thing that matters here is the order. The chicken builds flavor in the pan, the garlic blooms in the butter just long enough to turn fragrant, and the broth lifts all those browned bits off the skillet before they can burn. A little lemon at the end keeps the sauce from tasting heavy, and the parsley gives it a clean finish instead of a flat, one-note butter pan sauce.
Below, I’ll walk through the one place people usually go wrong with garlic butter chicken, which substitutions actually work, and how to keep the sauce silky instead of greasy. If you’ve ever wanted a skillet chicken dinner that looks like you fussed far more than you did, this is the one to keep close.
The sauce came together in the same skillet and stayed silky after I added the broth. The chicken was golden outside and still juicy in the middle, and my husband kept dipping bread into the pan until it was clean.
Save this garlic butter chicken for the night you want a skillet dinner with golden chicken, plenty of garlic, and a pan sauce worth bread-dipping.
The Part That Keeps the Chicken Juicy Instead of Stringy
Chicken breasts go dry when they’re rushed on high heat the whole way through. The better move is to sear them hard enough to build a deep golden crust, then let the sauce finish the job. That way the outside gets color without forcing the inside to overcook while you wait for the pan sauce to come together.
The other trap is crowding the skillet. If the chicken sits too close together, it steams instead of sears, and you lose the browned bits that give the sauce its backbone. Give each breast enough space to sit flat against the pan, and don’t move it until it releases easily.
- Chicken breasts — Boneless breasts cook quickly and soak up the garlic butter sauce well, but they need even thickness. If one side is much thicker, pound it lightly so the whole piece finishes at the same time.
- Butter — This is where the sauce gets its body and gloss. Use real butter here; the flavor matters, and margarine won’t give you the same richness or finish.
- Chicken broth — The broth loosens the browned bits and turns the butter into a spoonable sauce instead of greasy pan drippings. Low-sodium broth gives you more control over the salt level.
- Lemon juice — Don’t skip it. A small amount at the end cuts through the butter and wakes everything up. Add it gradually so the sauce stays balanced instead of sharp.
What Each Ingredient Is Actually Doing in Garlic Butter Chicken
- Protein (quality, proper thickness) — Good quality protein tastes better. Even thickness ensures even cooking.
- Seasoning (bold, distributed throughout) — Don’t be shy with salt and pepper. Quality seasoning elevates everything.
- Oil or fat (protective and flavorful) — The fat helps develop crust and carries flavors. Use generously.
- Heat management (appropriate temperature for the protein) — Too high and the outside burns before the inside cooks. Too low and it steams.
- Technique (sear, then finish based on thickness) — Proper technique creates flavor. Sear for crust, then cook through gently.
- Aromatics and seasonings (garlic, herbs, spices) — These add complexity and depth. Distribute them throughout the cooking process.
- Resting time (let it rest before serving) — Resting allows juices to reabsorb. This keeps the protein moist and tender.
- Optional: finishing sauce or glaze — A light sauce adds richness without overwhelming. Apply at the very end.
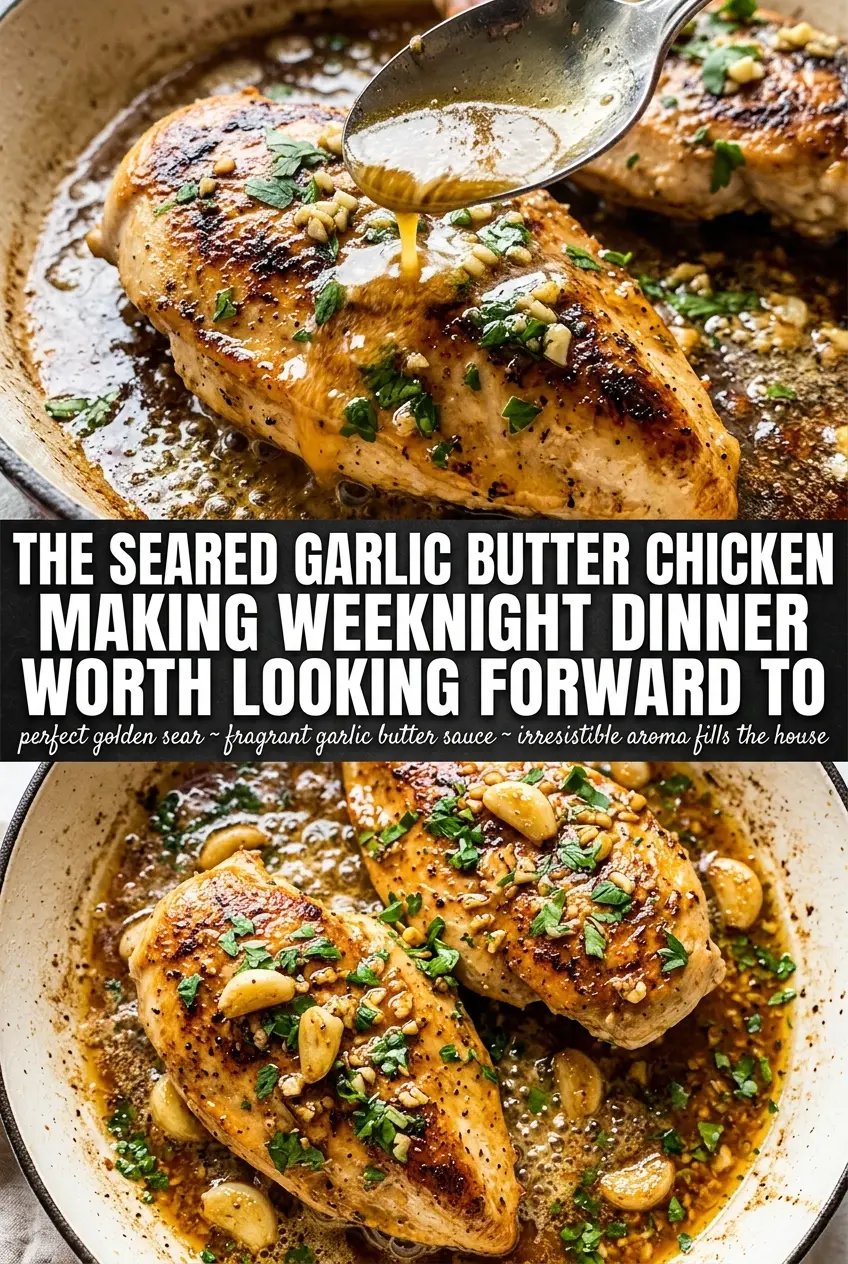
Building the Sauce in the Same Skillet Without Burning the Garlic
Searing the Chicken
Season the chicken generously, then add it to hot olive oil and leave it alone until a crust forms. You’re looking for deep golden edges and a surface that lifts cleanly from the pan; if it sticks, it needs another minute. Pull it off at 165°F, or a little under if you plan to give it a short finish in the sauce, because overcooking starts here, not at the end.
Blooming the Garlic in Butter
Turn the heat down before the garlic goes in. Butter and garlic can go from fragrant to bitter in a flash, especially in a hot skillet with browned fond underneath. Stir constantly and stop as soon as the garlic smells sweet and savory, not toasted.
Turning the Fond Into Sauce
Pour in the broth and scrape the bottom of the skillet with a wooden spoon so every browned bit dissolves into the sauce. Those bits are flavor, and if they stay stuck to the pan, the sauce tastes thin and incomplete. Let it simmer just long enough to reduce slightly; if it boils hard, the butter can separate and the garlic can turn harsh.
Finishing With Lemon and Parsley
Return the chicken to the skillet and spoon the sauce over the top so it picks up the garlic and herbs. Add the lemon juice at the end, a little at a time, until the sauce tastes bright but still buttery. Parsley goes in last so it stays fresh and green instead of fading into the heat.
How to Change Garlic Butter Chicken Without Breaking the Sauce
Make it dairy-free with olive oil and a little more broth
You can replace the butter with more olive oil, but the sauce will taste lighter and less silky. Add an extra splash of broth and keep the heat low so the garlic still blooms without turning bitter. You’ll lose some richness, but the chicken stays flavorful and the skillet sauce still works.
Use chicken thighs for a juicier result
Boneless thighs stay more forgiving than breasts and handle a little extra simmering without drying out. They take a few more minutes to cook through, but they bring a deeper, richer chicken flavor that works well with the butter and garlic.
Make it gluten-free without changing the method
This recipe is naturally gluten-free as written as long as your chicken broth is certified gluten-free. That small label check matters because broth is one of the easiest places for hidden gluten to sneak in.
Storage and Reheating
- Refrigerator: Store leftovers in an airtight container for up to 3 days. The sauce will thicken as it chills.
- Freezer: You can freeze it, but the butter sauce may separate a bit when thawed. Freeze in a sealed container for up to 2 months if needed.
- Reheating: Warm gently in a covered skillet over low heat with a splash of broth or water. High heat dries out the chicken fast and can make the sauce look broken before it tastes hot.
Questions I Get Asked About This Recipe
Garlic Butter Chicken
Ingredients
Equipment
Method
- Season the chicken breasts generously with salt and pepper.
- Heat olive oil in a large skillet over medium-high heat, then sear the chicken for 6-7 minutes per side until golden and cooked through to 165°F.
- Remove the chicken and set aside.
- Reduce the heat to medium, then add the butter and garlic to the skillet and cook for 1-2 minutes until fragrant.
- Add chicken broth and dried thyme, scraping up any browned bits, then simmer for 2-3 minutes.
- Return the chicken to the pan and spoon the sauce over top.
- Add lemon juice to taste and sprinkle fresh parsley over the chicken, then serve immediately.