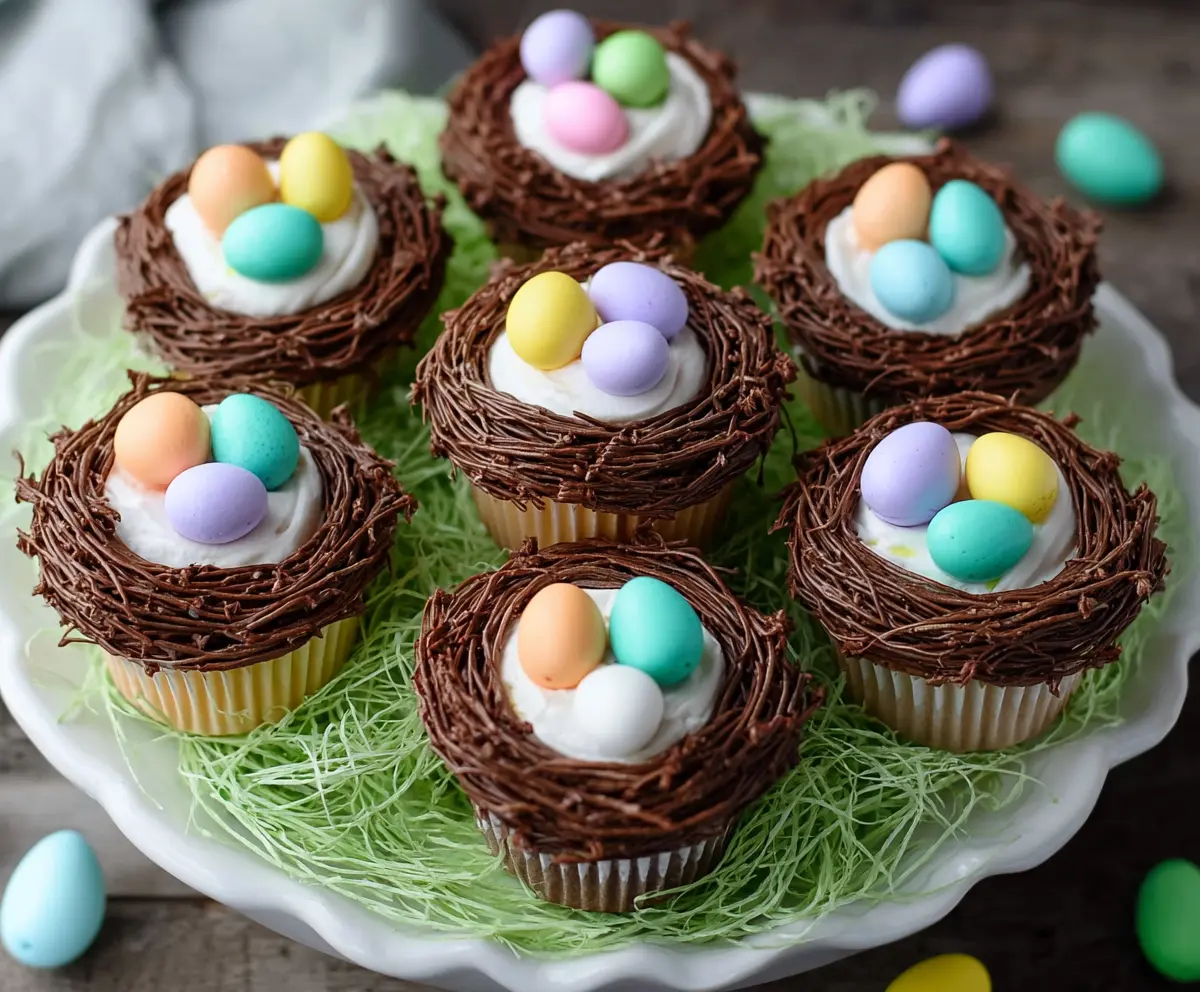
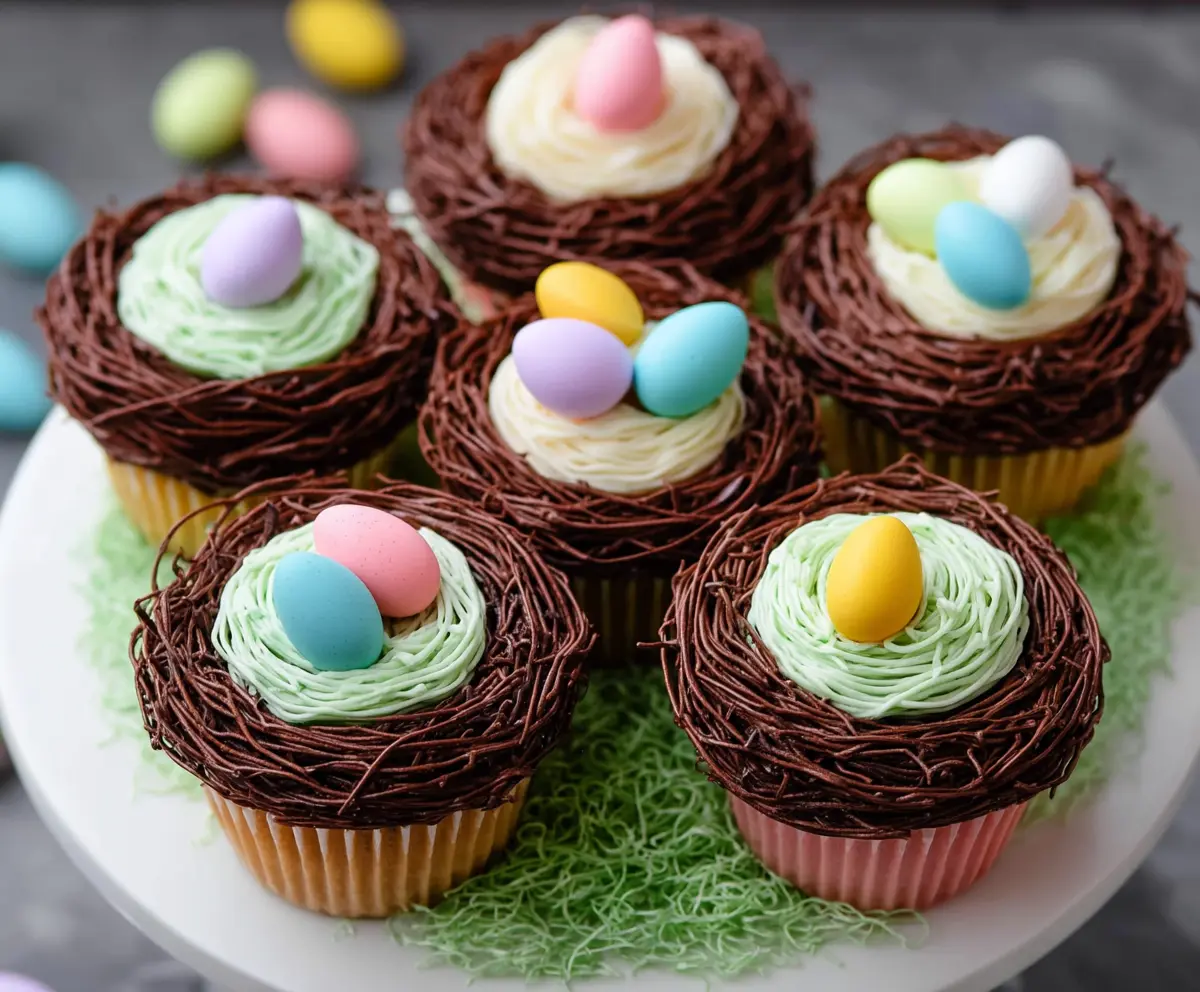
These Easter Egg Nest Cupcakes are as cute as they are delicious! Soft chocolate cupcakes are topped with fluffy frosting and decorated with colorful candy eggs. Perfect for a spring celebration!
Whenever I make these, they disappear in no time. They’re fun to decorate, and I always let my kids join in. Plus, who can resist a cupcake that looks like a nest? 🐣
Ingredients & Substitutions
All-purpose Flour: This is the base for your cupcakes. If you’re looking for a gluten-free option, you can try a gluten-free all-purpose flour blend. I’ve found that these blends work well in most recipes.
Unsalted Butter: Choose unsalted to control the overall saltiness. If you’re short on butter, coconut oil or vegetable oil can work in a pinch, although it may change the flavor slightly.
Granulated Sugar: This adds sweetness and integrity to your cupcakes. For a healthier option, try using coconut sugar or a sugar substitute designed for baking.
Whole Milk: It adds moisture. You can use any milk you prefer, such as almond milk or oat milk. Just keep in mind that it may slightly alter the taste of your cupcakes.
Chocolate Frosting/Ganache: For the nest effect, you can use store-bought chocolate frosting or make your own. If you like dark chocolate, consider using dark chocolate ganache for a richer flavor.
How Do You Get Fluffy Cupcakes Every Time?
Getting fluffy cupcakes is all about how you mix the ingredients and measure the flour. When creaming the butter and sugar, do it well until light and fluffy. This incorporates air, which helps your cupcakes rise. Remember, don’t overmix once you add the flour and milk; mix just until combined.
- Whisk dry ingredients well to ensure even distribution of baking powder and salt.
- Beat the butter and sugar until it’s light and fluffy—this is crucial!
- Alternate adding the flour mix and milk, starting and ending with flour to keep the batter from becoming too dense.
How to Make Easter Egg Nest Cupcakes
Ingredients You’ll Need:
For The Cupcakes:
- 1 1/2 cups all-purpose flour
- 1 1/2 tsp baking powder
- 1/4 tsp salt
- 1/2 cup unsalted butter, softened
- 1 cup granulated sugar
- 2 large eggs
- 2 tsp vanilla extract
- 1/2 cup whole milk
For The Frosting:
- 1 cup unsalted butter, softened
- 4 cups powdered sugar
- 2 tsp vanilla extract
- 3-4 tbsp milk or heavy cream
For Decoration:
- 1 cup chocolate frosting or chocolate ganache (for the nest)
- Mini candy-coated chocolate eggs (pastel colors)
How Much Time Will You Need?
This delightful recipe will take about 30 minutes for preparation and 20 minutes for baking, plus time to cool. Overall, set aside about 1 to 1.5 hours to get everything ready, including decorating your cupcakes.
Step-by-Step Instructions:
1. Preheat Oven and Prepare Pan:
First, get your oven heating to 350°F (175°C). While it warms up, line a 12-cup muffin tin with cupcake liners to make for easy clean-up later.
2. Prepare the Cupcake Batter:
In a medium bowl, whisk together the flour, baking powder, and salt. In a larger bowl, beat the softened butter and granulated sugar together until the mixture is light and fluffy—this will take about 3-5 minutes. Then, add the eggs one by one, making sure to mix well after each addition. Finally, stir in the vanilla extract.
3. Combine Ingredients:
Next, alternately mix the flour mixture and the milk into the butter mixture, starting with the flour and ending with it as well. Be careful to mix just until everything is combined; you don’t want to overdo it!
4. Bake the Cupcakes:
Now, scoop the batter into the prepared cupcake liners until they’re about two-thirds full. Pop them in the oven and bake for 18-20 minutes. They’re done when a toothpick inserted into the center comes out clean. Once baked, let them cool completely on a wire rack.
5. Make the Buttercream Frosting:
While the cupcakes are cooling, let’s make the frosting! In a large bowl, beat the softened butter until it’s creamy. Gradually add the powdered sugar, about one cup at a time, mixing well after each addition. Stir in the vanilla extract and 3 tablespoons of milk or cream, beating until smooth and fluffy. If needed, add a little more milk to achieve your desired spreading consistency.
6. Frost the Cupcakes:
Once your cupcakes are cool, use a spatula to spread a generous dollop of the white buttercream frosting on top of each cupcake, creating the base of the “nest.”
7. Create the Chocolate Nest:
Now, take a piping bag fitted with a multi-opening grass or hair piping tip and fill it with chocolate frosting or ganache. Pipe it around the edges of the white frosting in circular motions to create a nest-like appearance.
8. Decorate with Candy Eggs:
To finish off your cupcakes, place 3-4 mini pastel candy eggs in the center of each chocolate nest you’ve piped on top. They’ll add that festive touch!
9. Serve and Enjoy:
Finally, arrange your beautiful Easter Egg Nest Cupcakes on a platter, lined with green shredded paper or edible grass, for a delightful presentation that’s perfect for your Easter celebration!
These cupcakes look like charming little bird nests, complete with colorful eggs. Enjoy making and sharing them with friends and family!
Can I Use a Different Type of Sugar?
Absolutely! While granulated sugar is preferred for this recipe, you can use brown sugar for a deeper flavor. Just keep in mind that brown sugar may give your cupcakes a slightly denser texture and moister crumb.
Can I Make the Cupcakes in Advance?
Yes, you can! Bake the cupcakes a day or two ahead of time and store them in an airtight container at room temperature. Frost them on the day of serving to keep the buttercream fresh and fluffy.
What If I Don’t Have Chocolate Frosting?
No worries! You can easily make your own chocolate ganache by melting chocolate with heavy cream. Simply heat the cream until it’s hot but not boiling, then pour it over chopped chocolate and stir until smooth. Let it cool until it thickens before piping.
How to Store Leftover Cupcakes?
Store any leftovers in an airtight container at room temperature for up to 2 days. If you want them to last longer, refrigerate them for up to a week, but note that the texture might change slightly when chilled.