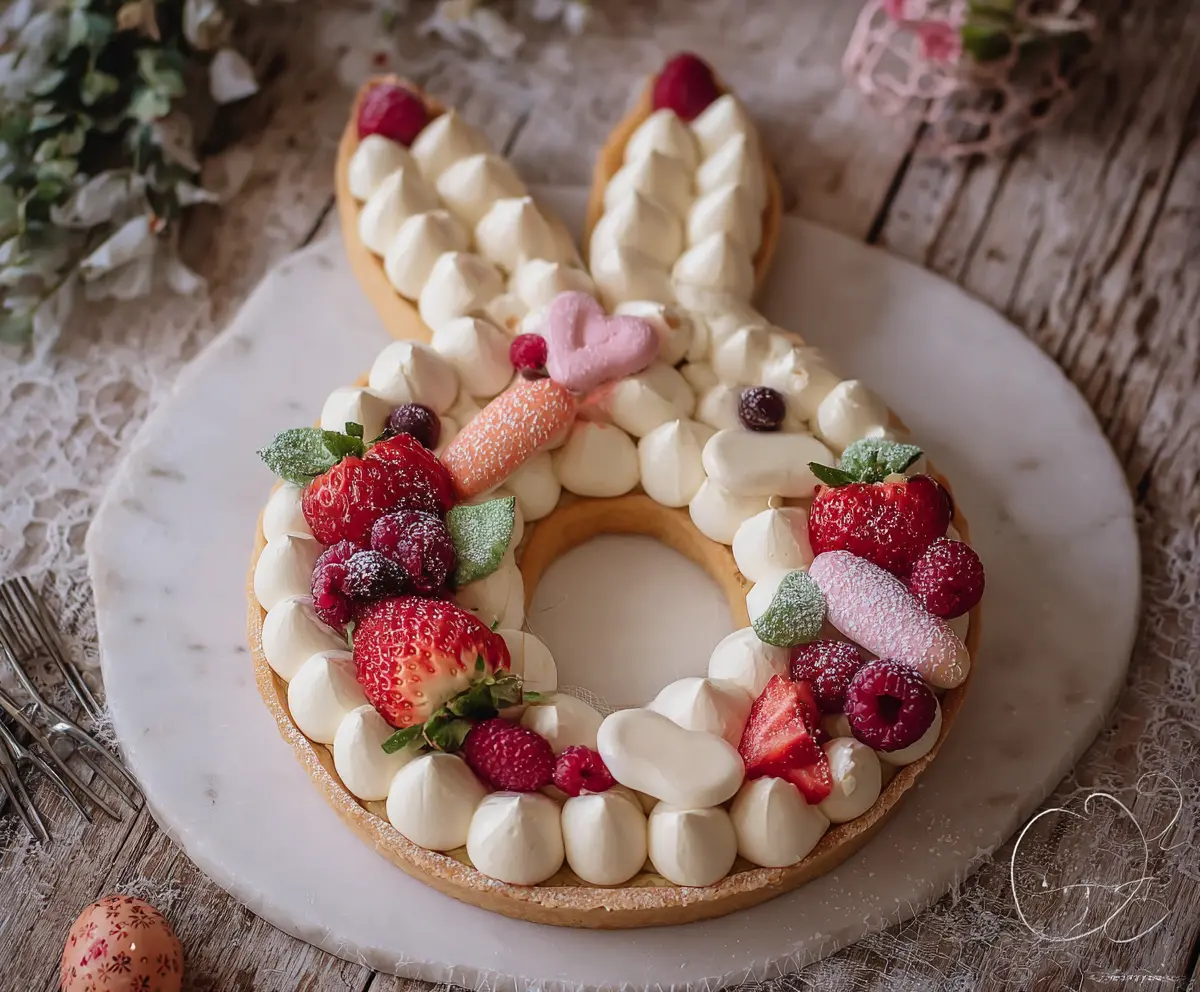
This Easter Bunny Cream Tart is a fun and festive treat that kids and adults will love. With a creamy filling and a cute bunny design, it’s perfect for spring celebrations!
Making this tart is a joy! You simply whip up the filling, decorate with fresh fruit or chocolate, and you have a lovely dessert. I enjoy slicing into it and seeing everyone’s smiles! 🐰💖
Ingredients & Substitutions
All-Purpose Flour: This is the base for the tart. If you’re gluten-free, you can swap it with a gluten-free flour blend. Just make sure it includes a binding agent like xanthan gum for the best texture.
Unsalted Butter: Cold and cubed butter gives the crust a nice flaky texture. If you’re dairy-free, consider using a vegan butter alternative that can be found at most grocery stores.
Mascarpone Cheese: This rich cheese adds creaminess. You can also use cream cheese, but it will have a tangier flavor. Another option is ricotta cheese if you’re looking for something lighter.
Heavy Cream: Whipping cream works perfectly here. If you want a lighter option, consider using coconut cream for a dairy-free alternative, but remember it might change the flavor slightly.
Fresh Berries: I used strawberries, raspberries, and blueberries for color and freshness. Don’t hesitate to replace them with seasonal fruits like peaches or kiwi if you prefer!
How Do I Perfectly Combine My Tart Dough Without Overworking It?
The key to a tender tart is not overworking the dough. When mixing butter with flour, stop as soon as you reach a coarse crumble. Add the egg and gently combine until a dough forms. Remember, less is more here!
- Use a food processor for quick mixing; it helps control over-mixing.
- After forming the dough into a disk, chill it well. This makes rolling easier and keeps the butter solid for a flakier crust.
How to Make an Easter Bunny Cream Tart
Ingredients You’ll Need:
For the Tart Base:
- 250g all-purpose flour
- 125g unsalted butter, cold and cubed
- 100g powdered sugar
- 1 large egg
- 1 tsp vanilla extract
- Pinch of salt
For the Cream Filling:
- 250g mascarpone cheese
- 250ml heavy cream (whipping cream)
- 100g powdered sugar
- 1 tsp vanilla extract
For Decoration:
- Fresh strawberries, halved
- Fresh raspberries
- Fresh blueberries
- Edible mint leaves
- Pink and white marshmallows or meringue shapes (carrot and heart shape)
- Powdered sugar for dusting
How Much Time Will You Need?
This delightful Easter Bunny Cream Tart will take about 1 hour of prep time and around 20-30 minutes to bake. Make sure to set aside some extra time for chilling the tart base for at least an hour before you put it all together. In total, you’re looking at about 2 hours before it’s ready to serve.
Step-by-Step Instructions:
1. Prepare the Tart Base:
Start by mixing the flour, powdered sugar, and salt in a large bowl or food processor. If using a food processor, add the cold, cubed butter and pulse it with the flour mixture until it looks like coarse crumbs. If you’re mixing by hand, rub the butter into the dry ingredients using your fingers. Next, add the egg and vanilla extract and mix until the dough starts to come together. Remember, don’t overwork it! Form the dough into a disk, wrap it in plastic wrap, and let it chill in the fridge for at least 1 hour.
2. Shape and Bake Tart Base:
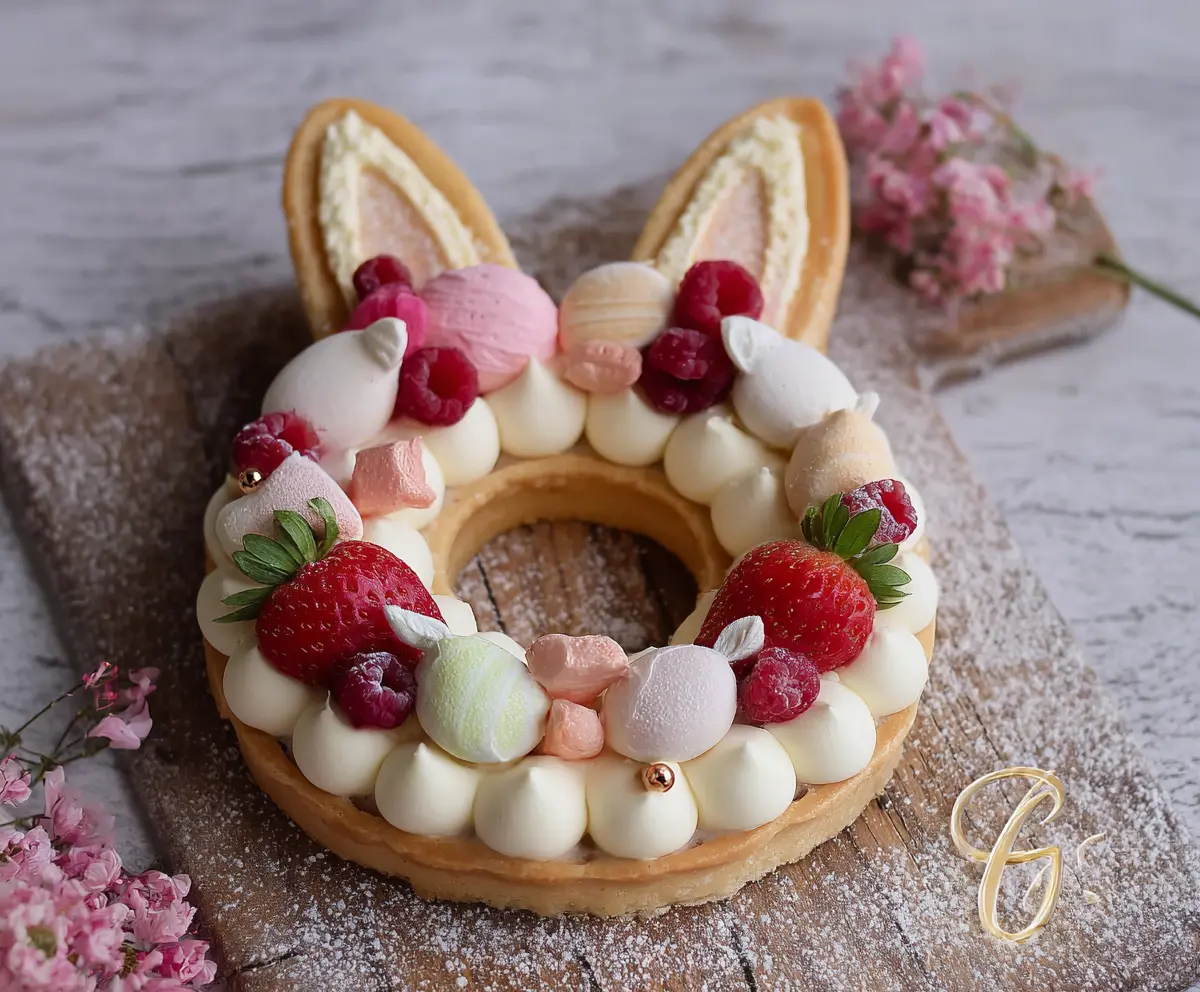
Preheat your oven to 180°C (350°F). On a lightly floured surface, roll out the chilled dough to about 0.5 cm thick. Using a bunny-shaped stencil or template, cut out a bunny shape with a hole in the center (like a ring). Place the cut dough on a baking sheet lined with parchment paper. To prevent puffing, use a fork to prick the base lightly. Bake for 15-20 minutes or until golden brown. Once baked, let the tart base cool completely on a wire rack.
3. Prepare the Cream Filling:
While the tart base is cooling, whip the heavy cream in a mixing bowl until you achieve soft peaks. In another bowl, mix the mascarpone cheese, powdered sugar, and vanilla extract until smooth. Gently fold the whipped cream into the mascarpone mixture until everything is fully combined and has a nice smooth texture.
4. Assemble the Tart:
Once the tart base is completely cool, transfer the cream mixture into a piping bag fitted with a large round tip. Pipe dollops of cream evenly around the surface of the tart base, making sure to cover all areas, including the bunny ears.
5. Decorate:
Now for the fun part! Arrange your fresh strawberries, raspberries, blueberries, and mint leaves on top of the cream. Add the marshmallow or meringue shapes to make it look festive—think carrots and hearts! Lastly, lightly dust the entire tart with powdered sugar to give it a magical, snowy finish.
6. Serve:
Chill the tart in the refrigerator until you’re ready to serve. It’s best enjoyed straight from the fridge, so keep it cool if you’re not consuming it immediately. Your adorable Easter Bunny Cream Tart is now ready to impress!
This delightful treat combines a crisp, buttery tart base with smooth and fluffy mascarpone cream, adorned with fresh berries and playful marshmallow shapes, making it a charming and festive dessert for your holiday celebrations!
Can I Use a Different Type of Cheese for the Cream Filling?
Yes! While mascarpone gives a rich and creamy texture, you can substitute it with cream cheese for a tangier flavor or ricotta for a lighter option. Just mix it well to ensure a smooth filling!
What Can I Use If I Don’t Have Bunny-Shaped Cookie Cutters?
No problem! You can create your own bunny shape using any template (like drawing one on paper) or simply use a round cutter. The tart will still look delightful with a different shape!
How Do I Store Leftovers?
Store any leftover tart in an airtight container in the refrigerator for up to 3 days. It’s best enjoyed cold, but you can let it sit at room temperature for about 10-15 minutes before serving for the best flavor.
Can I Make This Tart in Advance?
Absolutely! You can prepare the tart base and filling a day ahead. Just assemble and decorate it on the day you plan to serve to keep the cream fresh and the toppings vibrant!