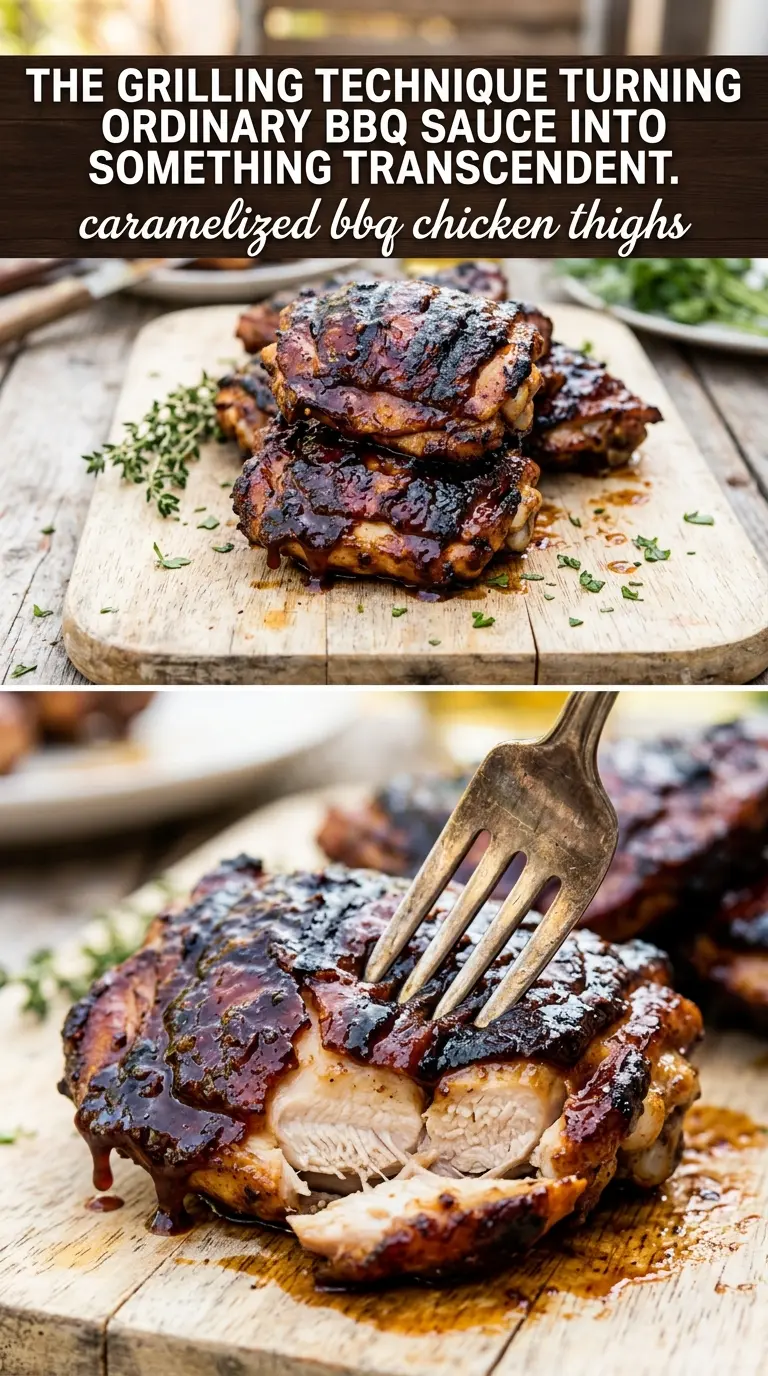
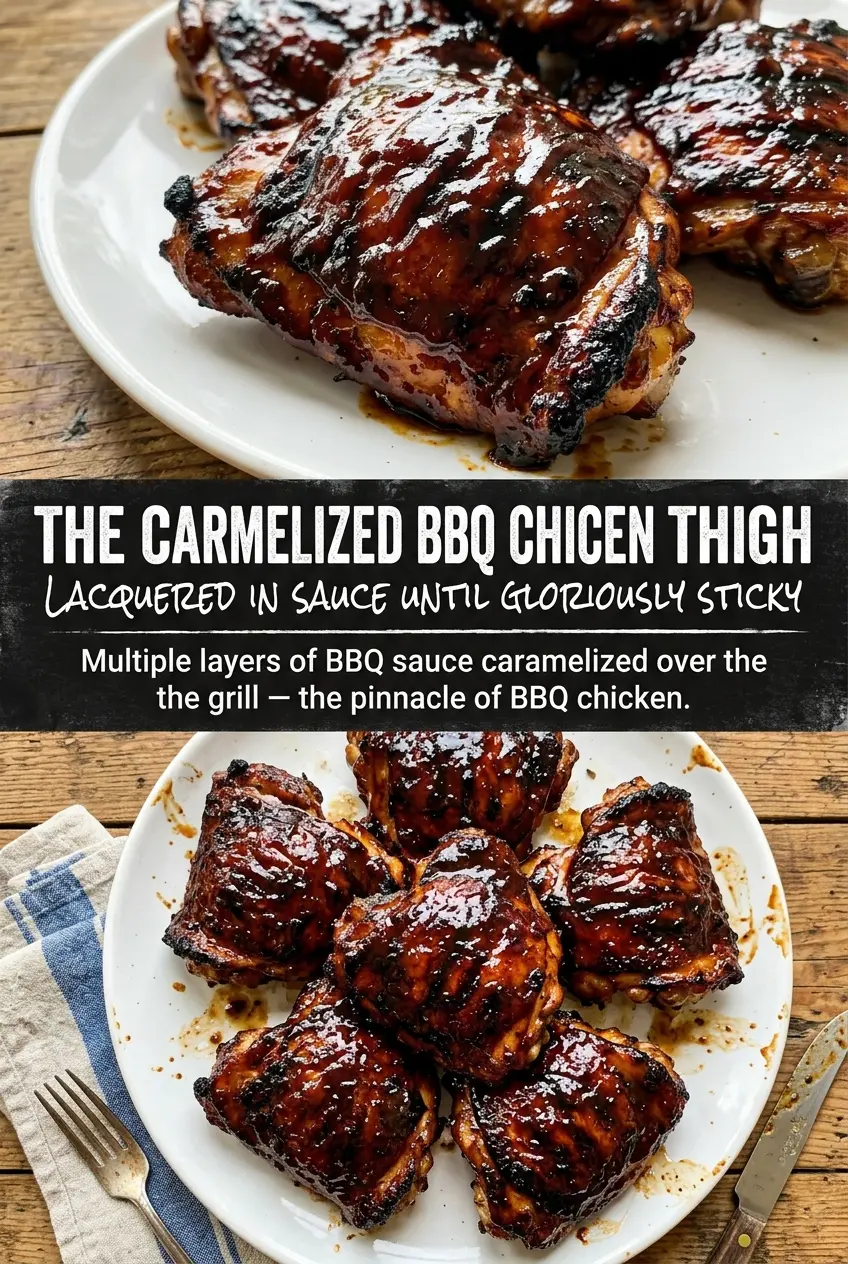
Caramelized BBQ chicken thighs are all about contrast: crackly, rendered skin on the outside and sticky, smoky sauce that clings in a shiny lacquer. Bone-in thighs are the right cut here because they stay juicy long enough to take on real color, and the sauce gets a chance to tighten up instead of sliding right off the meat.
The trick is waiting until the skin has already crisped before you brush on the sauce. BBQ sauce has sugar, and sugar burns fast over direct heat, so the first part of the cook is about building a sturdy base. Once the thighs have good color and some fat has rendered, the sauce can caramelize instead of scorching.
Below, I’m walking through the timing that keeps the chicken juicy, the moment when the glaze goes on, and the small ingredient swap that helps the sauce taste deeper without turning it cloying.
The skin got crisp before the sauce went on, and the glaze thickened up into that sticky, caramelized finish I never get when I add it too early. My husband kept picking pieces straight off the platter.
Save these caramelized BBQ chicken thighs for the nights when you want sticky sauce, crispy skin, and barely any cleanup.
The Skin Has to Crisp Before the Sauce Goes Near It
Most people lose this recipe in the first 10 minutes because they rush the glazing. If the sauce goes on before the skin has rendered and tightened, you get soft chicken with a burnt coating instead of glossy, sticky thighs. The first grill stage is about patience: let the skin face the heat until it turns deep golden and releases without tearing.
Bone-in, skin-on thighs are the right choice because they hold up to direct heat better than breast meat and stay tender even if you take a minute longer to finish them. The grill should be medium, not ripping hot. You want enough heat to crisp the skin and set the surface, but not so much that the sugar in the sauce turns bitter before the chicken is cooked through.
What the Brown Sugar and Vinegar Are Doing in the Glaze
The BBQ sauce brings the main body of the glaze, but the brown sugar gives it that lacquered finish and the cider vinegar keeps it from tasting flat or heavy. Smoked paprika adds a quiet layer of smoke if your grill doesn’t have much char, and it deepens the color as the sauce tightens on the thighs.
- BBQ sauce — Use a sauce you already like on a spoon, because once it cooks down, its flavor gets louder, not softer. A thinner sauce works fine here, but very watery sauces need a little extra time on the grill to cling properly.
- Brown sugar — This is what pushes the glaze toward caramel instead of just barbecue-coated. Don’t skip it unless your sauce is already very sweet; if it is, reduce the amount so the glaze doesn’t turn sticky in a sugary, one-note way.
- Apple cider vinegar — A small amount wakes up the sauce and keeps the sugar from tasting heavy. Lemon juice can stand in if needed, but it’s sharper and less rounded.
- Smoked paprika — It adds color and a dry-smoke note that reads as grilled even before the chicken picks up real char. Regular paprika works in a pinch, but you’ll lose some depth.
- Chicken thighs — Bone-in, skin-on thighs stay juicy while the skin crisps. Boneless thighs will cook faster, but they won’t give you the same texture or the same stay-put skin.
Building the Char, Then Locking In the Glaze
Seasoning and Preheating
Start by coating the thighs with salt, pepper, and olive oil so the skin can brown evenly and the seasoning sticks. Preheat the grill to medium heat and give it time to stabilize; if the grates are barely warm, the skin will stick, and if they’re screaming hot, the sugar in the sauce will scorch later. Set the chicken down skin-side first and leave it alone long enough to develop color.
Crisping the Skin
Cook the thighs skin-side down for 8 to 10 minutes, watching for rendered fat around the edges and a deepening golden crust. If they stick when you try to turn them, give them another minute instead of forcing it. Properly crisped skin releases more cleanly and gives you a better base for the glaze.
Turning and Finishing the Chicken
Flip the thighs and cook the second side until the meat starts to feel firm but still springy, another 8 to 10 minutes. At this stage, the chicken should be mostly cooked before the sauce goes on. If the thighs are still pale and floppy, the glaze will finish before the meat does.
Glazing to a Sticky Finish
Brush the sauce on generously and keep turning and basting for the last 5 minutes per side. You’re looking for a shiny coat that bubbles at the edges and clings instead of running off. Pull the chicken at 165°F in the thickest part near the bone, and let the sauce set for a minute before serving so it stays on the skin instead of sliding away.
How to Change This Without Losing the Sticky Finish
Oven-Broiled Version for Rainy Nights
If grilling isn’t an option, bake the thighs on a rack until the skin is rendered and mostly crisp, then finish under the broiler with the glaze. The broiler gives you the caramelized edges that a standard oven won’t, but you need to watch closely because the sugar in the sauce can go from glossy to burnt in a minute.
Lower-Sugar BBQ Chicken Thighs
Use a no-sugar-added BBQ sauce and cut the brown sugar back to 1 tablespoon. The glaze will be less shiny and a little less sticky, but it will still caramelize if you give it enough heat at the end. This version keeps the smoky-sweet balance without the extra sweetness on top.
Gluten-Free and Dairy-Free as Written
This recipe already fits both of those needs as long as your BBQ sauce is certified gluten-free and doesn’t contain dairy-based thickeners. The cooking method doesn’t change at all, which is a nice bonus with grilled chicken because the texture stays the same.
Using Boneless Thighs
Boneless thighs work if that’s what you have, but they cook faster and need less time before the glaze goes on. They won’t give you the same crispy-skin payoff, so this is a texture change as much as a substitution. Watch the internal temperature closely so they stay juicy.
Storage and Reheating
- Refrigerator: Store leftovers in an airtight container for up to 4 days. The skin will soften, but the flavor holds up well.
- Freezer: Freeze for up to 2 months, tightly wrapped and sealed. The sauce freezes better than the skin, so expect a softer texture after thawing.
- Reheating: Warm in a 325°F oven, covered loosely at first, then uncover for the last few minutes to help the surface re-crisp. Microwaving will make the skin rubbery and push the sauce into the chicken instead of keeping it on top.
Questions I Get Asked About This Recipe
Caramelized BBQ Chicken Thighs
Ingredients
Equipment
Method
- Season chicken thighs with salt, black pepper, and olive oil until evenly coated.
- Mix BBQ sauce, brown sugar, apple cider vinegar, and smoked paprika until smooth and pourable.
- Preheat grill to medium heat and let grates heat up.
- Grill chicken skin-side down for 8-10 minutes until the skin is deeply golden and crisp, with visible grill marks forming.
- Flip and grill for another 8-10 minutes, continuing to crisp the second side.
- Brush generously with BBQ sauce and grill for 5 more minutes per side, basting frequently so the surface turns sticky and caramel-brown.
- Continue cooking until internal temperature reaches 165°F and the sauce is caramelized, glossy, and slightly thickened.