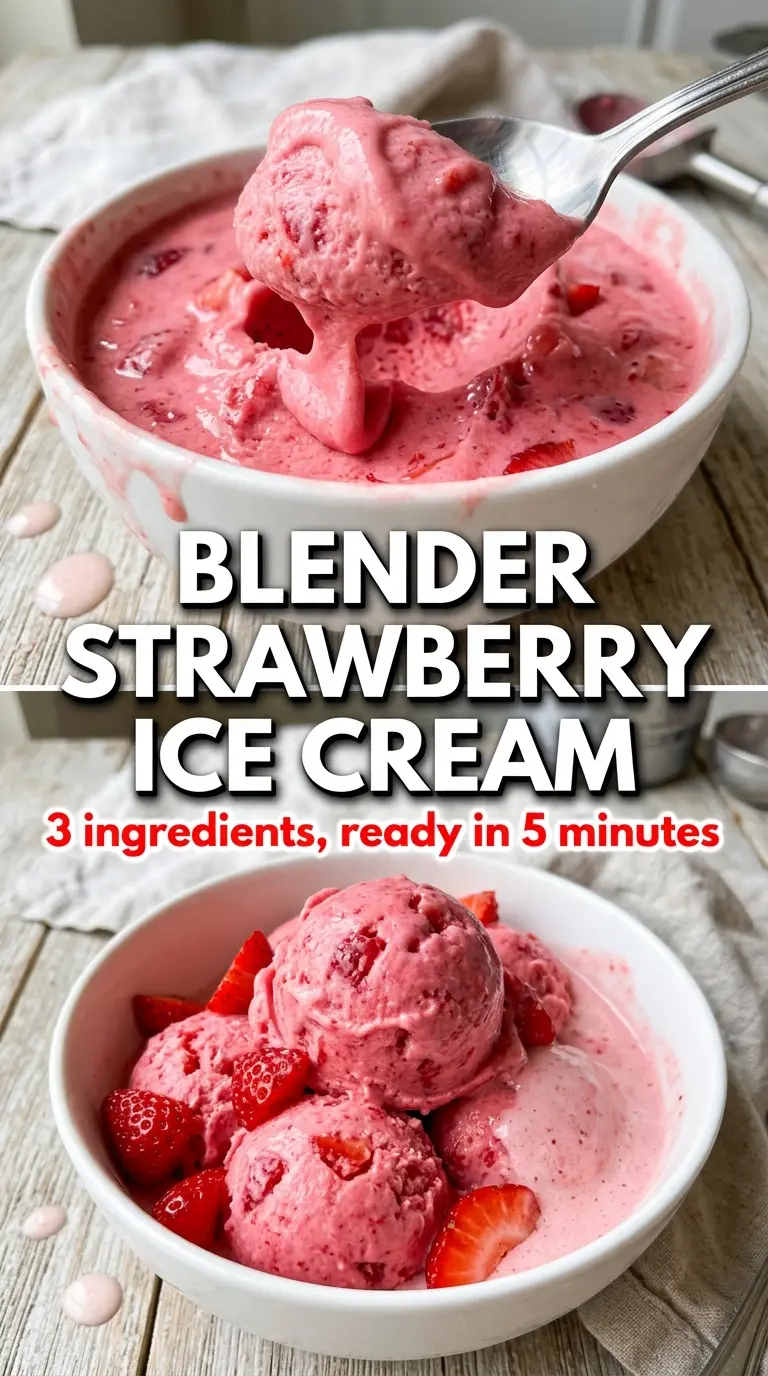
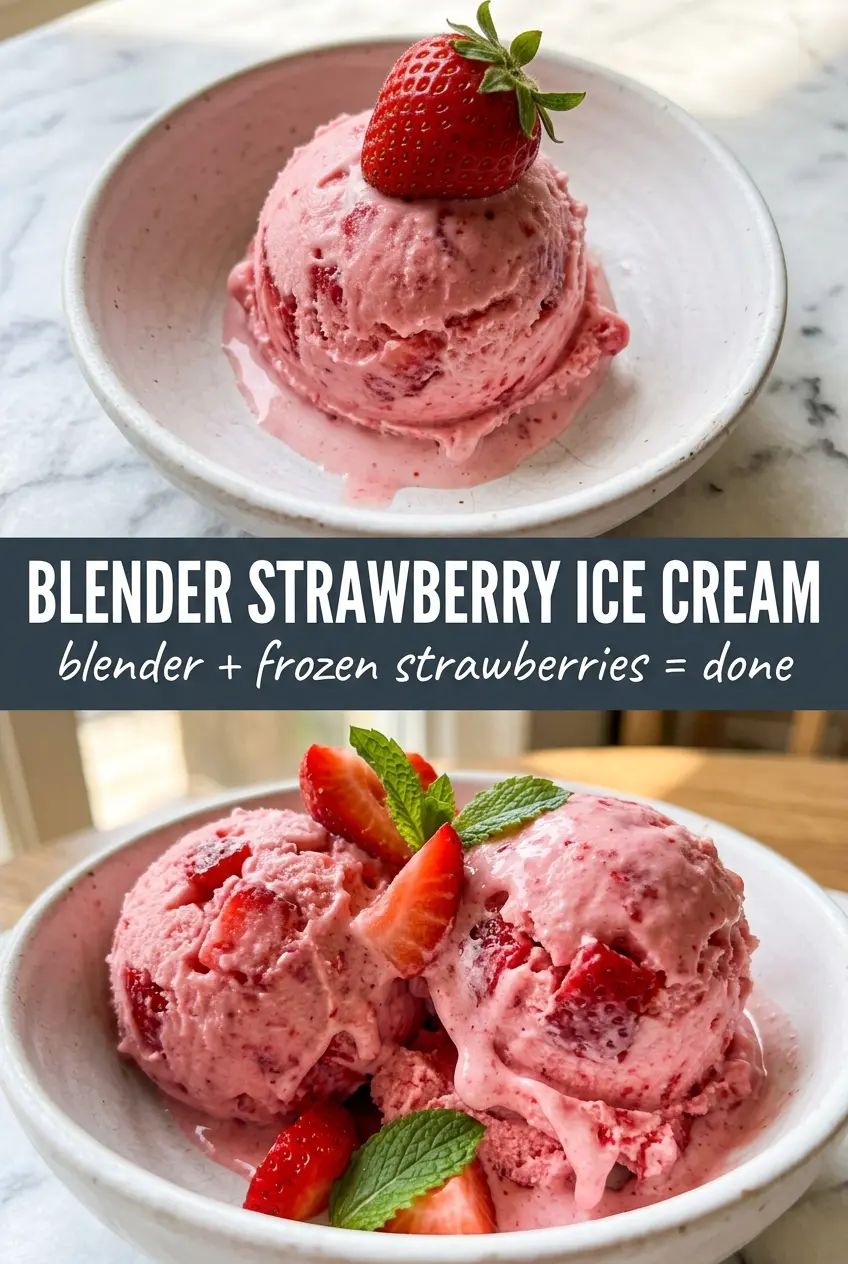
Blender strawberry ice cream comes out thick, creamy, and bright enough to taste like fresh-picked berries in a bowl. The frozen strawberries give it that loud strawberry flavor, the banana brings body, and the cream keeps the texture from turning icy or brittle. What you get is somewhere between soft serve and scooped ice cream, with the kind of smooth finish that makes it hard to believe it started with fruit in the freezer.
The trick is to let the fruit soften just enough before blending. If everything goes in rock-hard, the blender stalls and the texture turns uneven. A little thaw time gives the blades room to catch and pull the mixture together, and the small amount of honey or maple syrup helps the final blend stay glossy instead of dull and chalky.
Below, I’ll show you how to keep the mixture moving in the blender, how to get the texture you want straight away, and what to change if you want a dairy-free version or a firmer scoop later on.
I let the berries sit for a few minutes like you said and the blender actually caught everything instead of just spinning the fruit around. It came out thick, creamy, and tasted like strawberry ice cream, not a smoothie.
Like this? Save blender strawberry ice cream for the days when you want a creamy frozen dessert with just fruit, a blender, and a few minutes.
The Reason This Blender Ice Cream Stays Creamy Instead of Turning Icy
The biggest mistake with fruit-based ice cream is using too much liquid too early. The blender needs just enough help to start moving, but if you pour in extra cream or syrup to force it along, the mixture turns loose and loses that dense, scoopable body. Frozen strawberries already release a little moisture as they blend, and that natural fruit water is part of what keeps the texture light without turning icy.
The banana matters here too. It gives the mixture softness and a custard-like feel without needing eggs or an ice cream machine. If your banana is underripe, the flavor will be flat and the blend will feel more tart; if it’s overripe, it can overpower the strawberries. Aim for one that’s ripe enough to be sweet, but not brown and mushy.
What Each Ingredient Is Actually Doing Here
- Frozen strawberries — These are the backbone of the recipe. Fresh berries won’t give you the same cold, thick texture, and the result will taste more like a smoothie than ice cream.
- Frozen banana — This is what gives the dessert body and makes it creamy without eggs. If you need a swap, frozen mango can work, but it tastes less like classic strawberry ice cream and more tropical.
- Heavy cream or coconut cream — This smooths out the fruit and keeps the blend from getting sandy. Heavy cream gives the richest finish, while coconut cream is the best dairy-free swap and adds a light coconut note.
- Honey or maple syrup — You may not need much if your berries are sweet, but a little added sweetener helps the flavor read like ice cream instead of frozen fruit. Honey gives a rounder taste; maple syrup keeps it plant-based.
- Vanilla extract — Vanilla softens the sharp edges of the berries and makes the whole bowl taste more like dessert. Don’t skip it unless you want a brighter, more fruit-forward finish.
- Salt — Just a pinch lifts the strawberry flavor and keeps the sweetness from tasting one-note.
How to Get It Smooth Before the Blender Starts Fighting You
Let the Fruit Loosen Slightly
Set the frozen strawberries and banana out for about 5 minutes before blending. That tiny bit of thawing keeps the blades from spinning air around a frozen block. If the fruit is still rock-hard, stop and scrape the sides several times instead of dumping in more liquid, because extra liquid is what makes the final texture thin.
Start on High, Then Scrape Fast
Add everything to a high-powered blender and blend on high until the mixture starts moving in a thick wave. The first minute can look wrong; it may seem too dry and stubborn. Use the tamper if you have one, or stop the blender and scrape the sides down, then keep going until the color turns uniform and the mixture looks glossy.
Serve Soft or Freeze Briefly
Spoon it straight from the blender if you want a soft-serve texture. For scoopable ice cream, pack it into a freezer container and freeze for 1 to 2 hours. If you leave it much longer, it can harden around the edges, so let it sit on the counter for a few minutes before scooping.
Three Ways to Adjust It Without Losing the Creamy Texture
Dairy-Free Coconut Version
Use coconut cream instead of heavy cream and keep the rest the same. The texture stays rich, but the flavor picks up a faint coconut note that works well with strawberries. If your coconut cream is very thick, let it soften at room temperature for a few minutes so it blends evenly.
No Banana Version
Swap the banana for 1/2 cup frozen strawberries plus 1/2 avocado if you want a milder fruit flavor and extra creaminess. The avocado disappears into the background, but the color gets a little deeper and less bright. If you want the strawberry flavor to stay front and center, add a little extra vanilla.
Low-Sugar Bowl
Skip the honey or maple syrup if your strawberries are very sweet and the banana is ripe. The texture still works, but the flavor will be a little less like classic ice cream and a little more like frozen fruit. A tiny extra pinch of salt helps keep it from tasting flat.
Storage and Reheating
- Refrigerator: This dessert doesn’t hold well in the fridge; it melts into a thick strawberry cream and loses the frozen texture.
- Freezer: Freeze in a sealed container for up to 1 week. It will firm up a lot, and the edges may get icy if the container isn’t packed tightly.
- Reheating: There’s no reheating here. Let it sit at room temperature for 5 to 10 minutes, then scoop with a spoon warmed under hot water if it gets too hard.
Answers to the Questions Worth Asking
Blender Strawberry Ice Cream
Ingredients
Equipment
Method
- Let frozen strawberries and banana sit at room temperature for 5 minutes to soften slightly, then prepare to blend while still cold.
- Add strawberries, banana, cream, honey, vanilla, and salt to a high-powered blender and blend on high for 2 minutes, scraping down the sides as needed, until completely smooth and creamy.
- Serve immediately as soft serve for a spoonable texture, with a vivid pink swirl in the bowl.
- For scoopable texture, transfer to a freezer container and freeze 1-2 hours, until firm enough to scoop.