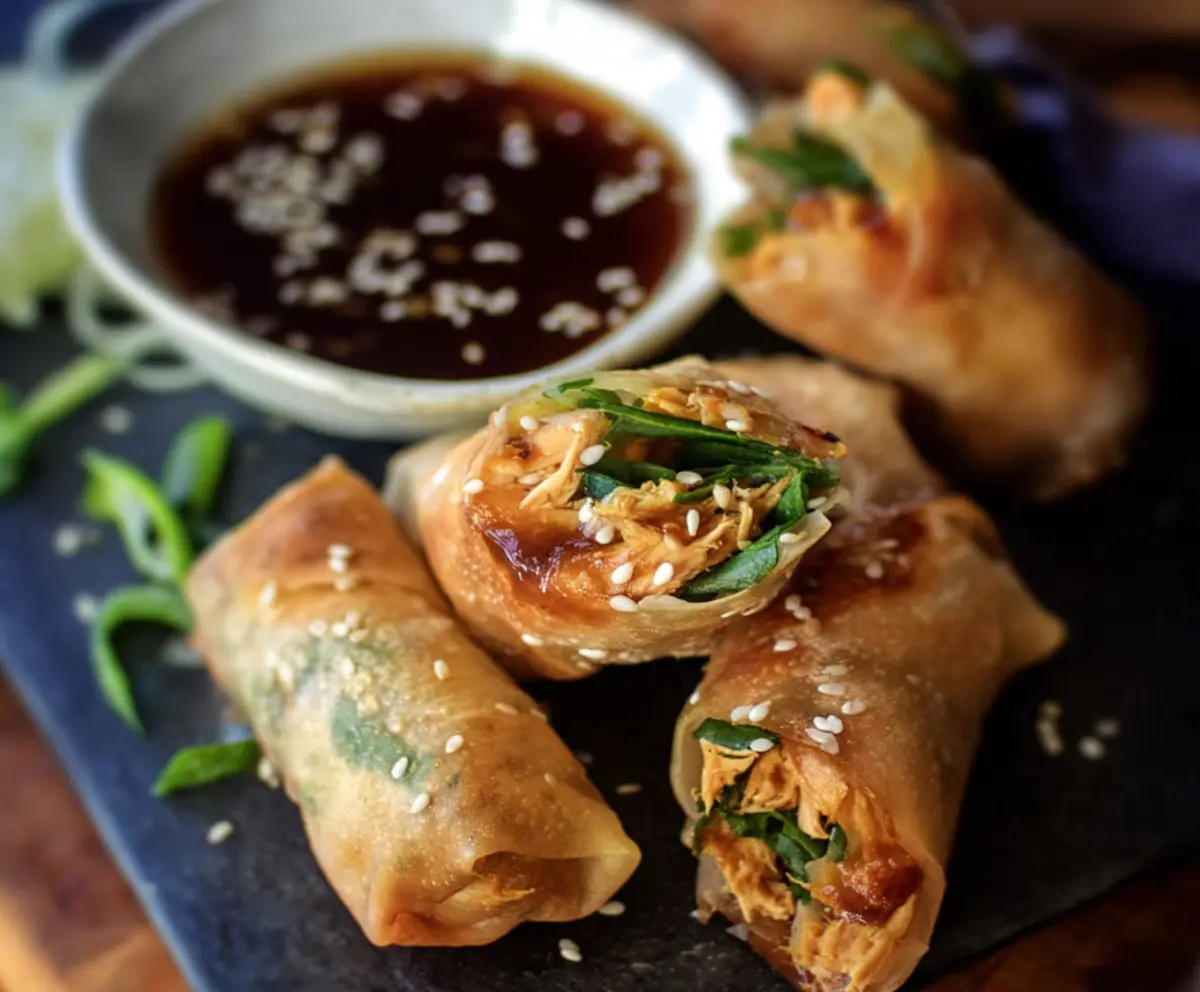
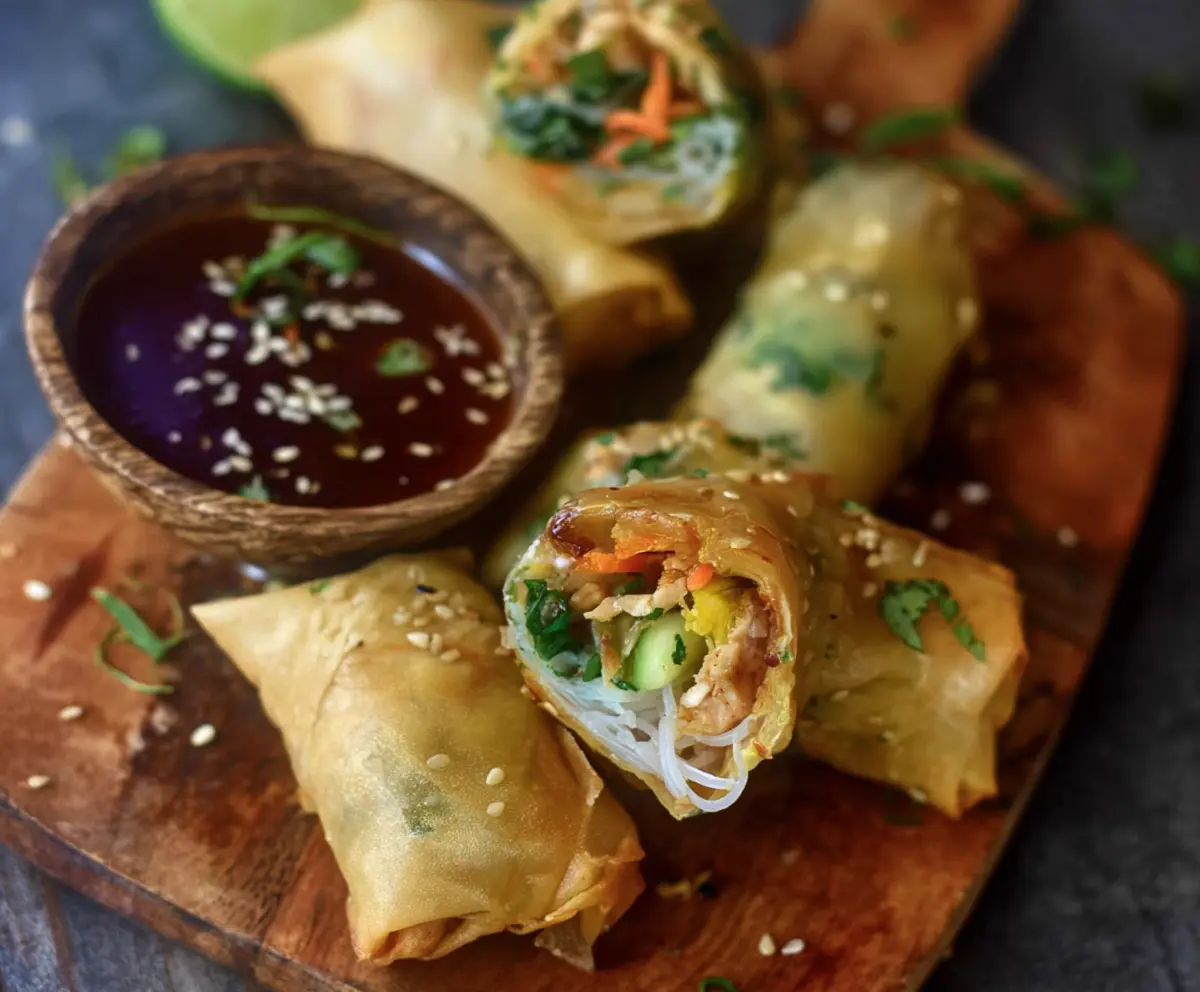
These Turmeric Sesame Chicken Spring Rolls are tasty, crunchy, and super fun to eat! They are filled with juicy chicken and colorful veggies, all wrapped in a light rice paper.
Making them is a great way to impress friends! I love dipping them in a zesty sauce—it just makes everything better. Plus, I feel like a spring roll artist every time I wrap one up! 🎉
Key Ingredients & Substitutions
Chicken: Shredded cooked chicken is key for these spring rolls. You can use rotisserie chicken for convenience or even leftover chicken breast. For a vegetarian option, try shredded tofu or tempeh as a protein substitute.
Turmeric: This spice gives a lovely color and earthy flavor. If you don’t have turmeric, try a mix of curry powder or saffron for a different twist, keeping in mind the flavor profiles change.
Sesame oil: This adds a rich, nutty flavor. If you’re out, use olive oil but add a teaspoon of sesame seeds for that toasty taste. Alternatively, toasted sesame oil really amps up the flavor, if you have it!
Spring roll wrappers: These are essential for the rolls. If you can’t find them, use rice paper or even tortillas for a fusion twist! Just make sure to adjust your cooking times if using a different kind.
Dipping sauce: Soy sauce is a must for flavor, but you can substitute with tamari for a gluten-free option. Add a splash of lime juice for a tangy kick if you don’t have rice vinegar.
How Can I Fold Spring Rolls Like a Pro?
Folding spring rolls can seem tricky at first, but practice makes perfect! Start by laying the wrapper down in a diamond shape. Here’s how to get that tight roll:
- Spoon the filling near the corner closest to you, leaving space on the sides.
- Fold the bottom corner over the filling snugly.
- Bring in the side corners and press them tightly against the filling.
- Roll it towards the top corner, sealing with water. The key is to be gentle but firm!
As you roll, don’t feel too much pressure! If any wrapper tears, just patch it with a little extra wrapper or place it seam-side down while frying to keep it closed. Happy rolling!
How to Make Turmeric Sesame Chicken Spring Rolls
Ingredients You’ll Need:
For the Filling:
- 2 cups cooked chicken breast, shredded
- 1 tablespoon turmeric powder
- 2 teaspoons sesame oil
- 1 tablespoon soy sauce
- 1 tablespoon oyster sauce (optional)
- 1 teaspoon grated ginger
- 2 cloves garlic, minced
- 1 cup fresh spinach or other leafy greens, chopped
- 1/4 cup green onions, chopped
- 1 tablespoon toasted sesame seeds (plus extra for garnish)
For the Wrappers:
- 10-12 spring roll wrappers
- Vegetable oil, for frying
For the Dipping Sauce:
- 1/4 cup soy sauce
- 1 teaspoon rice vinegar
- 1 teaspoon honey or sugar
- 1 teaspoon toasted sesame seeds
- Optional: chili flakes or garlic for heat
How Much Time Will You Need?
This recipe will take about 30 minutes of preparation and cooking time. You’ll spend a little time mixing the filling, rolling the spring rolls, and frying them to crispy perfection—perfect for a tasty appetizer or snack!
Step-by-Step Instructions:
1. Prepare the Filling:
In a mixing bowl, add your shredded cooked chicken. Sprinkle in the turmeric powder and pour in the sesame oil, soy sauce, oyster sauce (if you’re using it), grated ginger, and minced garlic. Mix everything together really well to make sure the chicken is evenly coated with all the flavors.
2. Add Greens and Seeds:
Next, toss in the chopped spinach and green onions into the chicken mixture. Don’t forget the toasted sesame seeds! Stir everything together until it’s well blended. This will give your spring rolls a delicious crunch and flavor.
3. Roll the Spring Rolls:
On a clean surface, take one spring roll wrapper and place it so that one corner is pointing toward you, making a diamond shape. Spoon about 2-3 tablespoons of the chicken mixture near the corner closest to you. Fold that corner over the filling, then tuck in the two side corners tightly. Roll it up towards the top corner, sealing the edge with a touch of water to keep it closed. Repeat this until you’ve used up all the filling and wrappers.
4. Fry the Rolls:
Now it’s time to fry! Heat about 1-2 inches of vegetable oil in a deep skillet or wok over medium-high heat. Once the oil is hot, carefully add your spring rolls in batches. Fry them for about 3-4 minutes on each side until they turn golden brown and crispy. Keep an eye on them so they don’t overcook!
5. Drain and Prepare the Dipping Sauce:
Once the spring rolls are cooked, remove them from the oil and place them on paper towels to drain off the excess oil. For your dipping sauce, mix together the soy sauce, rice vinegar, honey (or sugar), and toasted sesame seeds in a small bowl. Add chili flakes or minced garlic if you like a bit of heat!
6. Serve and Enjoy:
Your Turmeric Sesame Chicken Spring Rolls are ready to serve! Plate them up while they’re warm, sprinkle with some extra sesame seeds, and serve alongside your delicious dipping sauce. Enjoy!
Can I Use Raw Chicken Instead?
For this recipe, it’s best to use cooked chicken since the rolls are only fried briefly. If you prefer using raw chicken, you would need to cook it first—either boil, bake, or sauté it until fully cooked, then shred it before mixing with the other ingredients.
What Can I Substitute for Oyster Sauce?
If you don’t have oyster sauce or prefer not to use it, you can substitute it with additional soy sauce or a little hoisin sauce for a sweeter flavor. There’s no need to worry; your spring rolls will still be delicious!
How Do I Store Leftover Spring Rolls?
Any leftover spring rolls can be stored in an airtight container in the refrigerator for up to 3 days. To reheat, place them in a preheated oven at 350°F (175°C) for about 10-15 minutes to ensure they stay crispy!
Can I Make These Spring Rolls Ahead of Time?
Absolutely! You can prepare the filling and roll them up in advance, then store them in the fridge until you’re ready to fry. Just make sure to keep a damp towel over the wraps to prevent them from drying out.