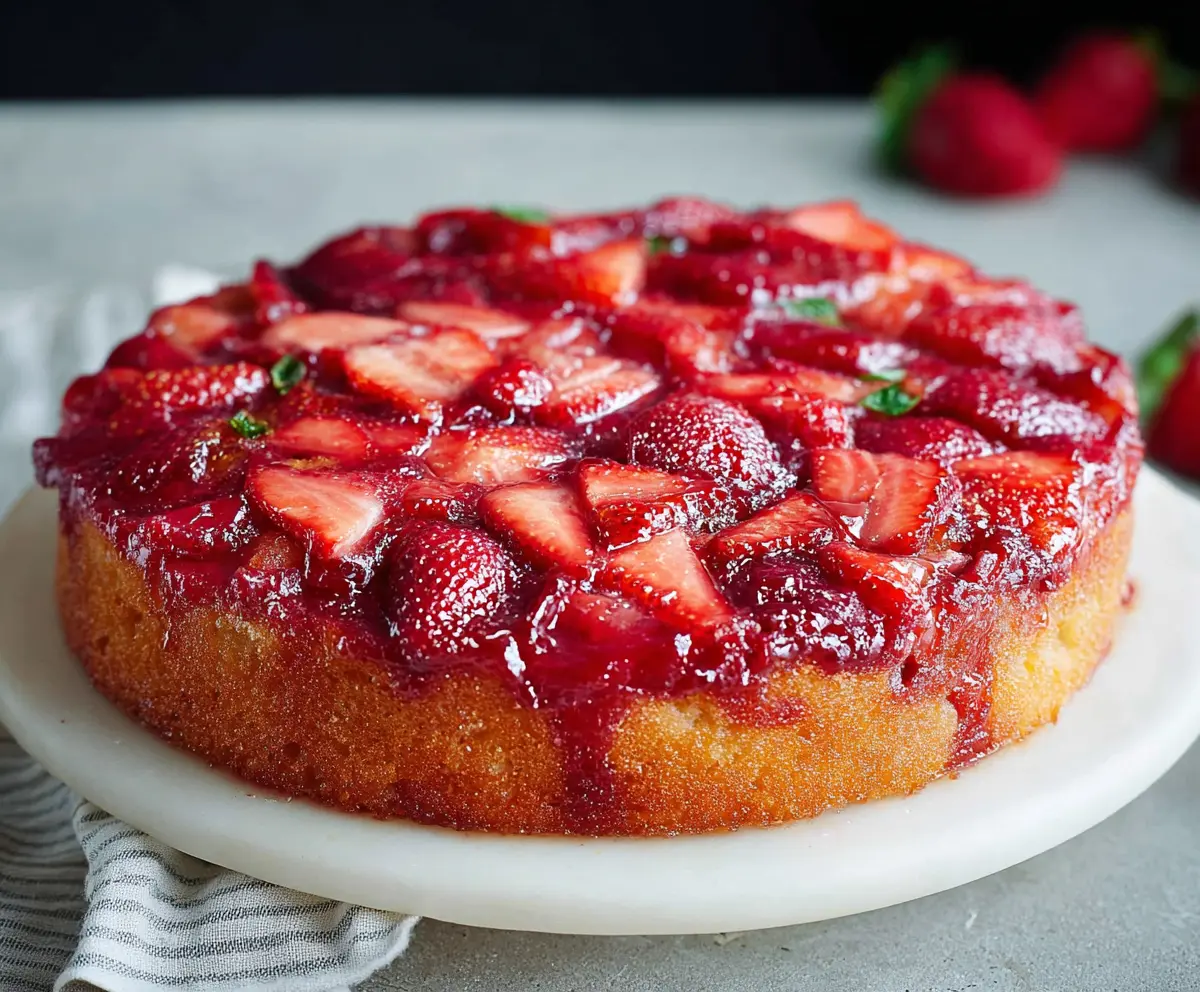
This Strawberry Upside Down Cake is a fun twist on the classic dessert! Sweet strawberries sit on top of a moist, fluffy cake, making it look as good as it tastes.
What’s better than turning a cake upside down? I love how the strawberries caramelize, creating a delicious topping. Perfect for sharing with friends or just treating myself! 🍓
Key Ingredients & Substitutions
Strawberries: Fresh strawberries are best for this cake as they provide natural sweetness and moisture. If strawberries are not in season, you can use frozen ones—just make sure to thaw and drain them first.
Unsalted Butter: This recipe calls for unsalted butter for both the topping and the batter. This allows you to control the saltiness. If you only have salted butter, reduce the added salt in the batter to 1/8 teaspoon.
Sugar: Granulated sugar is essential for sweetness and texture. For a healthier twist, you can substitute half of it with coconut sugar or even honey, though you may need to adjust the liquid ingredients if using honey.
Milk: Whole milk adds richness to the cake. If you’re lactose intolerant or wish for a dairy-free option, almond milk or coconut milk works great as replacements.
How Do You Get a Perfectly Luscious Topping?
The key to a great upside-down cake is the caramelized fruit topping. Start by melting the butter and sprinkling sugar evenly over it in the cake pan. This mixture caramelizes as it bakes, creating a delicious glaze.
- Melt 1/4 cup butter in a saucepan on low heat. Pour into the greased pan.
- Sprinkle 3/4 cup granulated sugar evenly over the butter. This helps in forming that delicious caramel layer.
- Arrange the sliced strawberries on top, ensuring they are evenly distributed for presentation.
Be careful when inverting the cake after baking to preserve the beautiful topping. Let it cool in the pan for a bit to set before flipping it onto a plate.

Delicious Strawberry Upside Down Cake
Ingredients You’ll Need:
For The Topping:
- 1/4 cup unsalted butter
- 3/4 cup granulated sugar
- 2 cups fresh strawberries, hulled and sliced
For The Cake Batter:
- 1 1/2 cups all-purpose flour
- 1 1/2 teaspoons baking powder
- 1/4 teaspoon salt
- 1/2 cup unsalted butter, softened
- 1 cup granulated sugar
- 2 large eggs
- 1 teaspoon vanilla extract
- 1/2 cup whole milk
How Much Time Will You Need?
This delightful cake takes about 15 minutes to prepare and 40-45 minutes to bake. You’ll want to allow an additional 10 minutes for cooling before serving, which means you can have this amazing strawberry upside down cake ready in under an hour!
Step-by-Step Instructions:
1. Preheat and Prepare the Pan:
Start by preheating your oven to 350°F (175°C). Grease a 9-inch round cake pan well to ensure easy removal later. This step is super important so that your cake doesn’t stick!
2. Make the Topping Mixture:
In a small saucepan, melt 1/4 cup of unsalted butter over low heat. Once it’s melted, carefully pour it into the prepared cake pan. Then, evenly sprinkle 3/4 cup of granulated sugar over the melted butter. This combination will create a lovely caramelized topping!
3. Arrange the Strawberries:
Next, take your sliced strawberries and arrange them over the sugar butter mixture in the pan. Try to place them evenly so every slice has strawberries on top. Set the pan aside while you make the batter.
4. Prepare the Cake Batter:
In a medium bowl, whisk together the all-purpose flour, baking powder, and salt. This will ensure all the dry ingredients are well mixed. In a large bowl, use a mixer to beat the softened butter (1/2 cup) and granulated sugar (1 cup) together until the mixture is light and fluffy—about 2-3 minutes.
5. Add the Eggs and Vanilla:
Crack the eggs into the butter and sugar mixture one at a time, beating well after each addition. This helps to incorporate air into the batter. Finally, mix in the vanilla extract to add a wonderful flavor!
6. Combine Dry and Wet Ingredients:
Now, gradually add the flour mixture to your wet ingredients, alternating with the milk. Start and finish with the flour mixture. Mix until everything is just combined. Be careful not to overmix; we want a nice tender cake!
7. Pour the Batter:
Pour the cake batter evenly over the arranged strawberries in the cake pan, spreading it gently with a spatula if needed to ensure even coverage.
8. Bake the Cake:
Place the cake in the preheated oven and bake for about 40 to 45 minutes. You’ll know it’s done when a toothpick inserted into the center comes out clean. Keep a close eye on it towards the end!
9. Cool and Invert:
Once baked, remove the cake from the oven and let it cool in the pan for about 10 minutes. After cooling, carefully invert the cake onto a serving plate, allowing the delicious strawberries to be on top. It might be a little tricky, but take your time!
10. Serve and Enjoy:
Let your cake cool slightly before serving. This beautiful strawberry upside down cake is perfect for any occasion. Enjoy it plain, or add some whipped cream for an extra treat!
Can I Use Frozen Strawberries Instead of Fresh?
Yes, you can use frozen strawberries! Just make sure to thaw them completely and drain any excess moisture before arranging them in the pan. This will help prevent excess liquid in your cake.
What If I Don’t Have Unsalted Butter?
If you only have salted butter, that’s okay! Just reduce the salt in the recipe to 1/8 teaspoon to balance out the flavors without making the cake too salty.
Can I Make This Cake Ahead of Time?
Absolutely! You can prepare the cake a day in advance. Just store it covered at room temperature. If you have leftovers, keep them in an airtight container in the fridge for up to 3 days.
How Can I Tell When the Cake Is Done Baking?
A toothpick inserted into the center of the cake should come out clean or with a few moist crumbs but no wet batter. If you see wet batter, give it a few more minutes in the oven.