
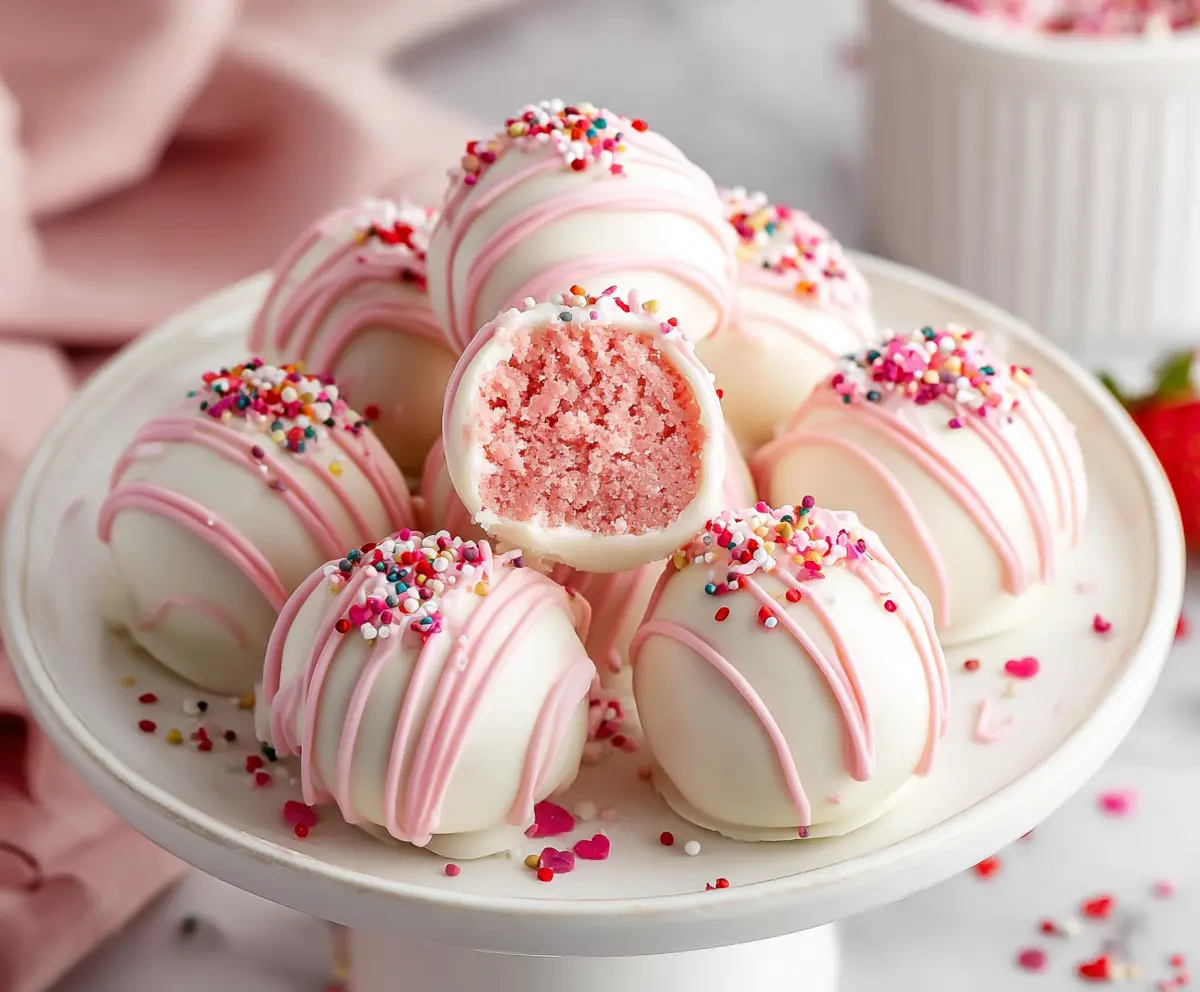
These strawberry cake balls are little bites of joy! They’re made from moist strawberry cake mixed with icing, then rolled into perfect balls and dipped in chocolate.
What makes them special is their bright, fruity flavor—so refreshing! 🍓 I love serving these at parties; they always disappear fast! Simple to make and oh-so-sweet!
Key Ingredients & Substitutions
Cake Mix: A white cake mix is easy to work with and gives good results. If you prefer homemade, substitute with your favorite vanilla cake recipe. Gluten-free cake mix can also be used if needed.
Cream Cheese: This is key for the rich texture in your cake balls. If you’re looking for a lighter option, you can use Greek yogurt or a low-fat cream cheese. For dairy-free, try vegan cream cheese or cashew cream.
Freeze-Dried Strawberries: These give a concentrated strawberry flavor and crunch. If you can’t find them, fresh strawberries chopped finely can work, but they will add moisture. Be sure to adjust your mixture accordingly.
White Chocolate/Candy Melts: I love using real white chocolate for its flavor. If you want a healthier alternative, try yogurt-covered coatings which can be found in stores. For a non-dairy option, look for vegan white chocolate chips.
How Do I Ensure My Cake Balls Hold Together?
Mixing your cake crumbs with cream cheese and strawberries is crucial. Be sure to mix until everything is well combined and the mixture holds together when pressed. If it’s too crumbly, add a touch more cream cheese; too sticky? Add some cake crumbs to balance it out.
- Start with cooled cake, breaking it into fine crumbs.
- Mix in the cream cheese and strawberries slowly until evenly combined.
- Roll into balls using your palms, making sure they’re tightly packed.
Refrigerating them for at least an hour helps them firm up, making dipping easier. Trust me; it’s worth the wait for the perfect bite!
How to Make Strawberry Cake Balls
Ingredients You’ll Need:
For the Cake Balls:
- 1 box (15.25 oz) white cake mix
- Ingredients called for on the cake mix box (usually eggs, oil, water)
- 1 cup (8 oz) cream cheese, softened
- 1/2 cup freeze-dried strawberries, crushed into small pieces
For the Coating:
- 12 oz white chocolate or white candy melts
- Pink candy melts, for drizzling (optional)
For Decoration:
- Freeze-dried strawberries
- Small sprinkles
How Much Time Will You Need?
This delightful recipe will take you about 30 minutes to prepare and bake the cake, plus 1 hour of chilling time for the cake balls. Overall, you’re looking at about 1.5 hours from start to finish before they’re ready to eat. Perfect for a sweet treat any day!
Step-by-Step Instructions:
1. Prepping the Cake:
Start by preheating your oven according to the instructions on the cake mix box. Prepare the cake batter according to the package directions, adding the necessary ingredients like eggs, oil, and water. Once mixed, pour the batter into a greased baking pan and bake as instructed. When it’s done, let it cool completely on a wire rack.
2. Crumbling the Cake:
After the cake has cooled, place it in a large mixing bowl and crumble it into fine crumbs using your hands. You want it to look like sand, so make sure there are no large chunks left.
3. Mixing the Filling:
Add the softened cream cheese and crushed freeze-dried strawberries to the cake crumbs. Mix everything together thoroughly until it’s well combined and holds together when pressed. This is your delicious cake ball mixture!
4. Forming the Cake Balls:
Take small amounts of the mixture and roll them into balls that are about 1 to 1.5 inches in size. Place them onto a baking sheet lined with parchment paper. Once you’ve rolled all the mixture, pop the baking sheet in the refrigerator for at least 1 hour, or until the balls are firm.
5. Dipping in Chocolate:
While the cake balls are chilling, melt the white chocolate or candy melts in the microwave or a double boiler until smooth. Be careful not to overheat! Once melted, take each cake ball and dip it into the white chocolate, letting any excess chocolate drip off before placing it back on the parchment-lined tray.
6. Adding the Pink Drizzle:
If you’re using pink candy melts, melt them now. After dipping, use a spoon to drizzle the melted pink candy over the tops of each cake ball for a beautiful decorative touch.
7. Finishing Touches:
While the pink drizzle is still wet, sprinkle some crushed freeze-dried strawberries and small sprinkles over the top. This adds a lovely pop of color and texture!
8. Letting Them Set:
Finally, allow the coating to set completely either at room temperature or in the refrigerator before serving. Once set, enjoy your creamy, strawberry-studded cake balls coated in smooth white chocolate with a pretty pink drizzle!
Enjoy your yummy Strawberry Cake Balls! They make a perfect treat for any occasion.
Can I Use a Different Flavor of Cake Mix?
Absolutely! While white cake mix works great, you can experiment with other flavors like vanilla or even strawberry cake mix for a unique twist. Just keep in mind that flavors will impact the final taste of your cake balls.
How Can I Store Leftovers?
Store any leftover cake balls in an airtight container in the refrigerator for up to 5 days. If you want to keep them longer, they can be frozen for up to 2 months. Just make sure to let them thaw in the fridge before enjoying!
What If I Don’t Have Freeze-Dried Strawberries?
No worries! You can substitute with fresh strawberries, but be sure to chop them finely. Keep in mind that fresh strawberries will add moisture, so you may need to adjust the amount of cream cheese or cake crumbs to maintain the right consistency.
Can I Use Dark Chocolate Instead?
Yes! Dark chocolate would add a rich flavor to your cake balls. Just melt it following the same method, but remember it will slightly change the overall flavor profile. Enjoy the delicious contrast!