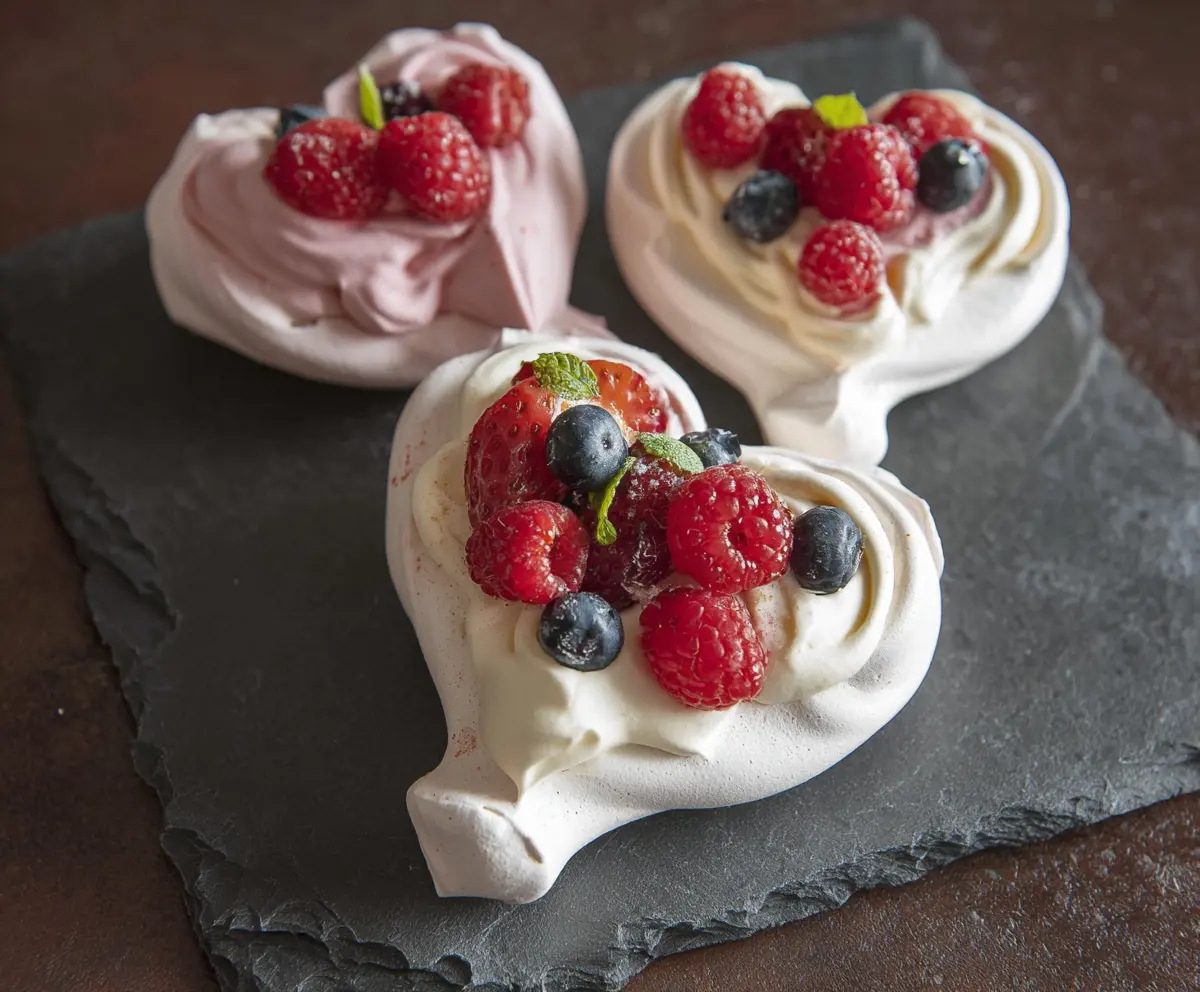
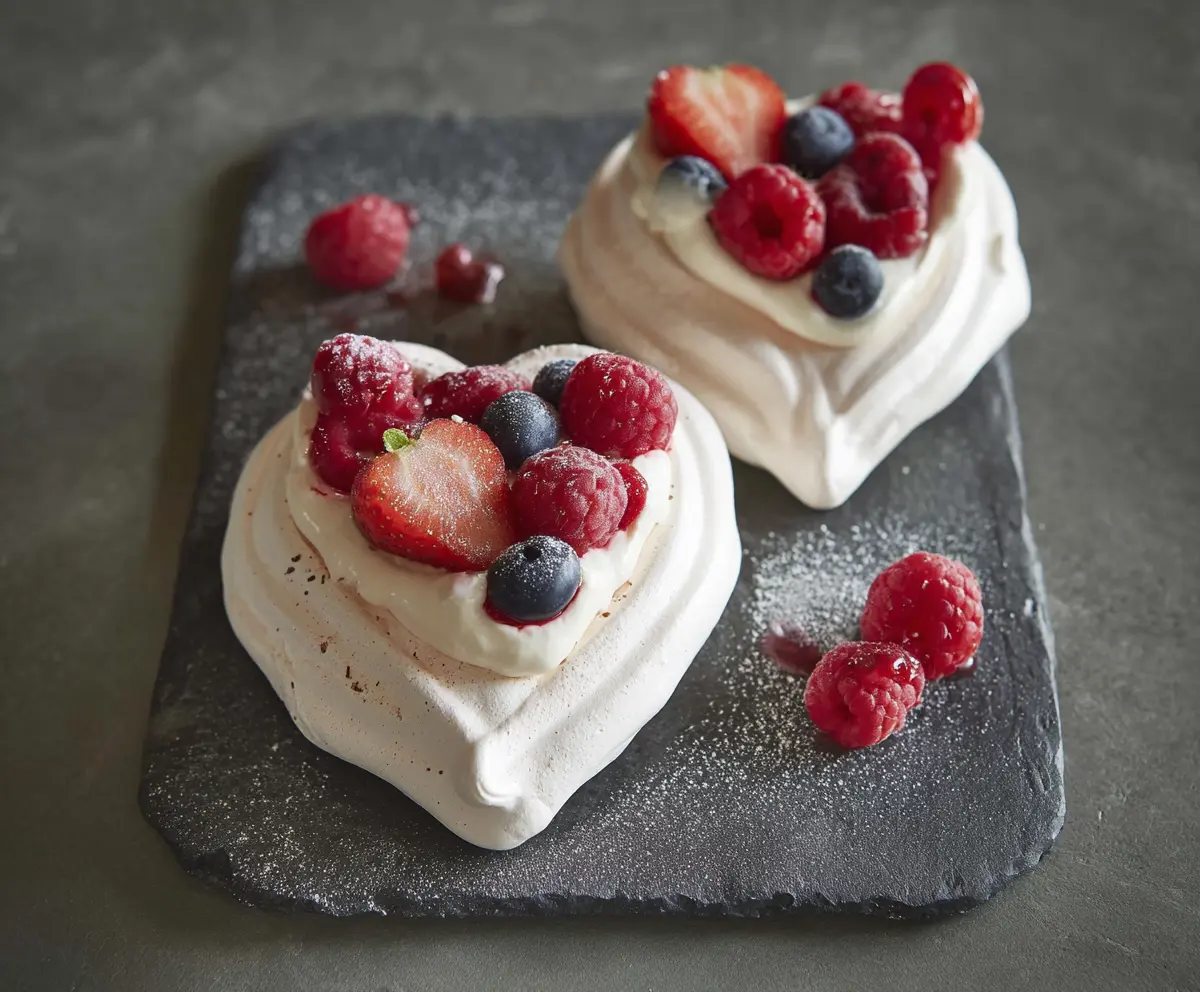
These cute mini heart pavlovas are light, crispy meringues topped with sweet whipped cream and fresh fruit. They’re perfect for any special occasion or a sweet treat at home!
Making these little delights is so much fun! I love how you can dress them up with your favorite fruits. Plus, they make everyone smile—not just because they taste great, but they look adorable too!
Key Ingredients & Substitutions
Egg Whites: Using fresh, room temperature egg whites is important for achieving that perfect volume and texture. If you’re vegan or allergic to eggs, aquafaba (the liquid from canned chickpeas) is a great substitute—use about 3 tablespoons per egg white.
Sugar: Granulated sugar is the standard for meringue. For a twist, you could try superfine sugar if you have it, or even coconut sugar for a slightly caramel touch, though it may alter the color of your pavlovas.
Heavy Cream: This is key for the luscious whipped topping. If you need a lighter option, you can use coconut cream or whipped coconut milk for a dairy-free dessert. Just chill it well before whipping.
Berries: Fresh berries are ideal for topping. While I love raspberries and blueberries, feel free to use whatever seasonal fruit you have—kiwi or peaches can add a lovely twist!
What’s the Best Way to Whip Egg Whites for Meringue?
Whipping egg whites can be tricky, but a few tips help make it easier. Start with a very clean bowl; any fat can hinder the fluffiness. Use an electric mixer for consistency, and ensure your egg whites are at room temperature for better volume.
- Beat on medium until soft peaks form, indicating they’re starting to puff up.
- Gradually add the granulated sugar, one tablespoon at a time, while mixing on high speed. This ensures the sugar dissolves completely.
- Look for glossy, stiff peaks—this means your meringue is ready to be folded with the other ingredients!
How to Make Mini Heart Pavlovas
Ingredients You’ll Need:
For the Meringue:
- 4 large egg whites, at room temperature
- 1 cup (200g) granulated sugar
- 1 tsp white vinegar
- 1 tsp cornstarch
- 1/2 tsp vanilla extract
- 1/4 tsp salt
For the Whipped Cream:
- 1 cup heavy cream, cold
- 2 tbsp powdered sugar
- 1/2 tsp vanilla extract
For Topping:
- Fresh berries (raspberries, blueberries, strawberries)
- Fresh mint leaves for garnish
How Much Time Will You Need?
This recipe will take about 15 minutes to prepare and then about 1 hour and 15 minutes to bake. After that, you’ll let the pavlovas cool for a little while. So, in total, it’s around 1 hour and 30 minutes plus some extra time to whip the cream and decorate them. Perfect for a lovely dessert!
Step-by-Step Instructions:
1. Prepare the Baking Sheet:
First, preheat your oven to 250°F (120°C). Line a baking sheet with parchment paper. Grab a pencil and draw heart shapes that are about 3-4 inches wide. These outlines will guide you when creating the meringue shapes.
2. Beat the Egg Whites:
In a very clean mixing bowl, beat the egg whites with an electric mixer on medium speed. Keep mixing until soft peaks start to form—that means your egg whites are getting fluffy!
3. Add Sugar Gradually:
Now, slowly add the granulated sugar one tablespoon at a time. Make sure to beat on high speed after each addition. Continue until the mixture is glossy and stiff peaks form. You want to ensure the sugar fully dissolves before moving on!
4. Fold in Other Ingredients:
Gently fold in the white vinegar, cornstarch, vanilla extract, and salt with a spatula. Be careful not to deflate the mixture—you want to keep it light and airy!
5. Shape the Meringues:
Spoon or pipe the meringue onto the parchment paper, following the heart outlines you drew. Create a little well in the center of each heart to hold the whipped cream later. This step adds a nice touch to the presentation!
6. Bake the Meringues:
Pop the baking sheet into the preheated oven and bake for about 1 hour and 15 minutes. The meringues should be dry to the touch and easily peel from the parchment paper when done. Patience is key here!
7. Cool the Pavlovas:
Turn off the oven and let the pavlovas cool completely inside the oven with the door slightly ajar. This helps prevent cracks in your beautiful meringue hearts.
8. Whip the Cream:
While the pavlovas are cooling, whip the cold heavy cream with the powdered sugar and vanilla extract until soft peaks form. This will make a delicious topping!
9. Assemble the Pavlovas:
Once the pavlovas have cooled, carefully transfer them to a serving platter. Spoon or pipe the whipped cream onto each pavlova, filling up that little well you created.
10. Decorate:
Top each pavlova with fresh berries—raspberries, blueberries, and sliced strawberries work beautifully. Add some fresh mint leaves to garnish and make them extra special!
11. Serve and Enjoy!
Serve your delightful mini heart pavlovas immediately, or keep them refrigerated until you’re ready to serve. They’re a charming treat for any occasion!
Can I Use Different Sweeteners in This Recipe?
Yes, you can experiment with different sweeteners, but keep in mind that granulated sugar is essential for the meringue texture. If you want to use alternatives like coconut sugar or a sugar substitute, be sure they can dissolve well to achieve the right consistency.
What if My Meringue Cracks During Baking?
If your meringue cracks, don’t worry! It can still taste delicious. Ensure you’re beating the egg whites to stiff peaks without overmixing, and allow them to cool gradually in the oven as the temperature drops to prevent shocks that can cause cracks.
Can I Make These Ahead of Time?
Absolutely! You can prepare the meringues a day ahead and store them in an airtight container at room temperature. Just whip the cream and assemble just before serving to keep everything fresh.
How Should I Store Leftover Pavlovas?
To store leftovers, keep the pavlovas in an airtight container at room temperature for up to one day. If you’ve already added whipped cream and toppings, it’s best to refrigerate them and consume within a day for optimal freshness.