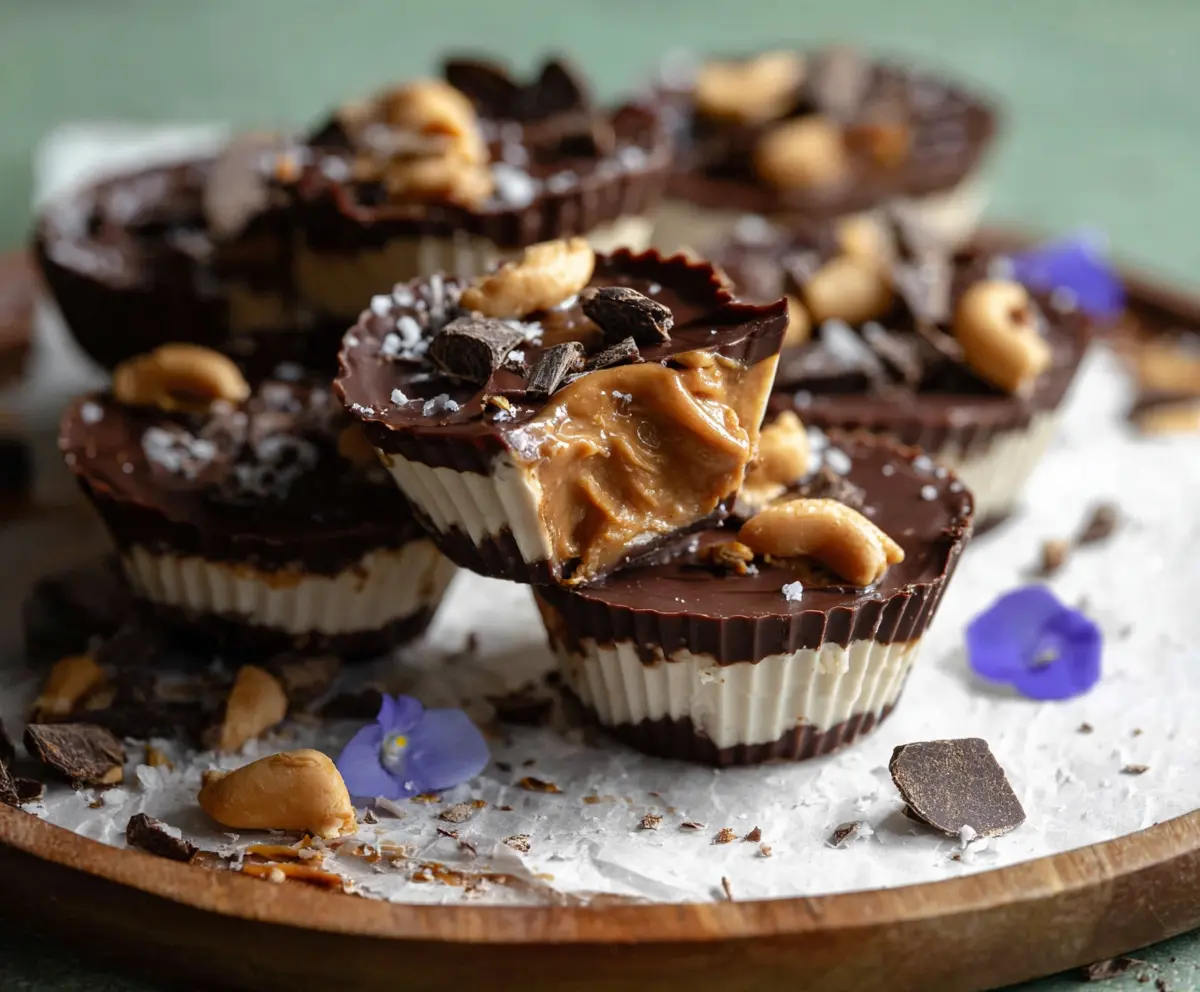
These Healthy Frozen Peanut Butter Greek Yogurt Cups are a treat you can feel good about! Creamy Greek yogurt mixed with yummy peanut butter and a rich chocolate layer on top makes every bite special.
Whenever I need a quick, cool snack, these cups are my go-to! They’re super easy to make and perfect for satisfying that sweet tooth—without the guilt. Enjoy your little frozen delights! 🍫
Key Ingredients & Substitutions
Greek Yogurt: Non-fat plain Greek yogurt gives a creamy texture with added protein. You can substitute it with any unsweetened yogurt, like regular plain yogurt or dairy-free options like coconut or almond yogurt for a lighter version.
Peanut Butter: Natural creamy peanut butter adds great flavor. If you need a nut-free option, sunflower seed butter works well too. For a sweeter taste, you might even use almond butter or cashew butter.
Honey or Maple Syrup: Both sweeteners work, but I usually go with honey for an added richness. If you’re vegan, maple syrup is an excellent substitute. Adjust the amount to your desired sweetness!
Dark Chocolate: I recommend using chocolate that’s at least 70% cacao for a deeper flavor. If dairy-free is a concern, look for vegan chocolate chips. You can also try using cacao powder mixed with a little coconut oil as a healthier option.
How Do I Melt Chocolate Smoothly Without Burning It?
Melted chocolate is a key part of this recipe, and it can be tricky if you’re not careful. Here’s how to do it right!
- Use a microwave-safe bowl. Microwave the chocolate chips and coconut oil in small increments.
- Start with 20 seconds on medium power. Remove and stir the mixture.
- Repeat this process, checking and stirring to ensure it heats evenly. Stop when just a few lumps remain; this will help prevent burning.
Let the residual heat finish melting the chocolate, so it stays smooth and glossy. No need to rush!
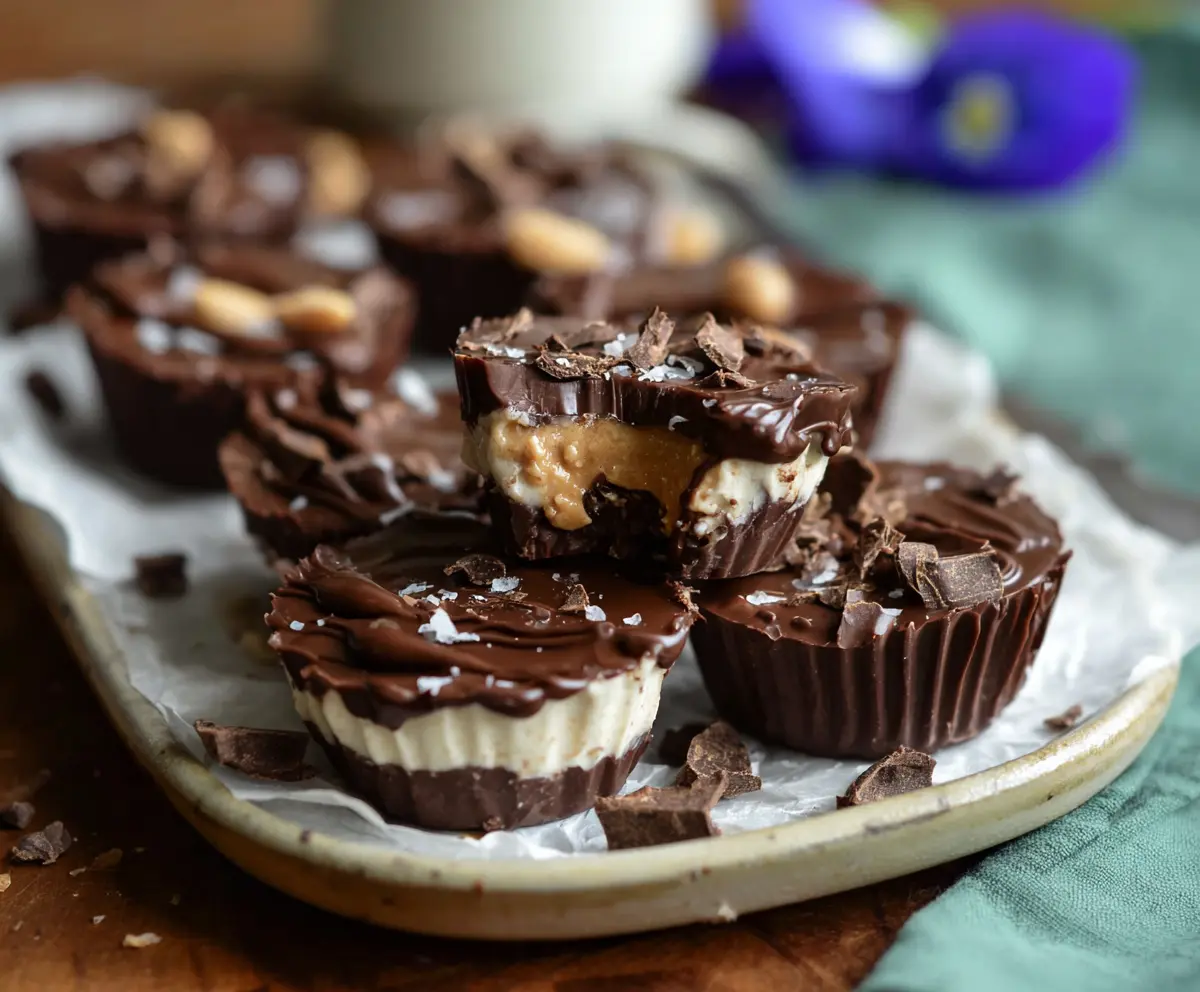
Healthy Frozen Peanut Butter Greek Yogurt Cups With Chocolate Top
Ingredients You’ll Need:
For the Cups:
- 1 cup non-fat plain Greek yogurt
- 1/2 cup natural creamy peanut butter
- 2 tablespoons honey or maple syrup (adjust to taste)
- 1 teaspoon vanilla extract
For the Chocolate Layer:
- 1 cup dark chocolate chips (70% cacao or higher)
- 1 teaspoon coconut oil (optional, for smoother chocolate)
For Toppings (Optional):
- Sea salt for sprinkling
- Cashews or chopped nuts for garnish
- Cocoa nibs or dark chocolate chunks for garnish
How Much Time Will You Need?
This delightful recipe takes about 15 minutes to prepare, plus 2 hours to freeze for complete firmness. It’s a quick and fun process to assemble these cups!
Step-by-Step Instructions:
1. Prepare the Greek Yogurt Mixture:
In a medium bowl, combine the Greek yogurt, honey (or maple syrup), and vanilla extract. Stir until everything is well mixed and smooth. Taste a little mixture—feel free to add more honey if you like it sweeter!
2. Make the Peanut Butter Mixture:
In a separate bowl, mix together the natural creamy peanut butter and a touch of honey if desired. Stir until it’s smooth and creamy. This will be the second layer in your cups!
3. Set Up Your Molds:
Line a muffin tin with paper liners or use silicone cupcake molds. Using silicone molds is great if you want an easy release later!
4. Melt the Chocolate:
In a microwave-safe bowl, melt the dark chocolate chips and coconut oil together. Heat in the microwave for 20-second intervals, stirring in between each time until the mixture is smooth. This prevents the chocolate from burning—keep an eye on it!
5. Create the Chocolate Base:
Pour about 1 tablespoon of the melted chocolate into the bottom of each mold. Use the back of a spoon to spread the chocolate evenly. Place your mold in the freezer for about 10 minutes to let the chocolate firm up.
6. Add the Yogurt Layer:
Once the chocolate is solid, remove the molds from the freezer. Spoon about 1 tablespoon of the Greek yogurt mixture on top of the chocolate layer, smoothing it out evenly.
7. Add the Peanut Butter Layer:
Next, add about 1 tablespoon of the peanut butter mixture over the yogurt layer. If you want a fun swirl, use a toothpick or skewer to gently swirl the peanut butter into the yogurt layer for a lovely blend!
8. Top with More Chocolate:
Pour additional melted chocolate on top of each cup to cover everything completely. Immediately sprinkle a tiny pinch of sea salt and add any nuts or cocoa nibs as toppings if desired for a nice finish.
9. Freeze Until Firm:
Place the finished cups in the freezer for at least 2 hours, or until they are completely frozen and set.
10. Serve and Enjoy:
To enjoy these tasty treats, remove the cups from the molds. Let them sit for 2-3 minutes at room temperature to soften slightly before devouring. Enjoy your healthier frozen dessert! Each cup is packed with creamy goodness!
Can I Substitute Greek Yogurt with Another Type of Yogurt?
Absolutely! You can use any unsweetened yogurt, such as regular plain yogurt or dairy-free options like coconut or almond yogurt if you prefer a non-dairy alternative. Just keep in mind that the flavor and texture might slightly change.
How Do I Store These Frozen Cups?
Store them in an airtight container or in a zip-top bag in the freezer. They’ll stay fresh for up to 2-3 months. Just be sure to separate layers with parchment paper if stacking to prevent sticking!
Can I Use Other Nut Butters Instead of Peanut Butter?
Yes, you can! Almond butter, cashew butter, or sunflower seed butter are all great alternatives. Just keep in mind that they may alter the flavor slightly, but they’ll still be delicious!
What Can I Use if I Don’t Have Coconut Oil?
If you don’t have coconut oil, you can skip it when melting the chocolate; it helps with smoothness but isn’t necessary. Alternatively, you can use a neutral oil like canola or vegetable oil for similar effects.