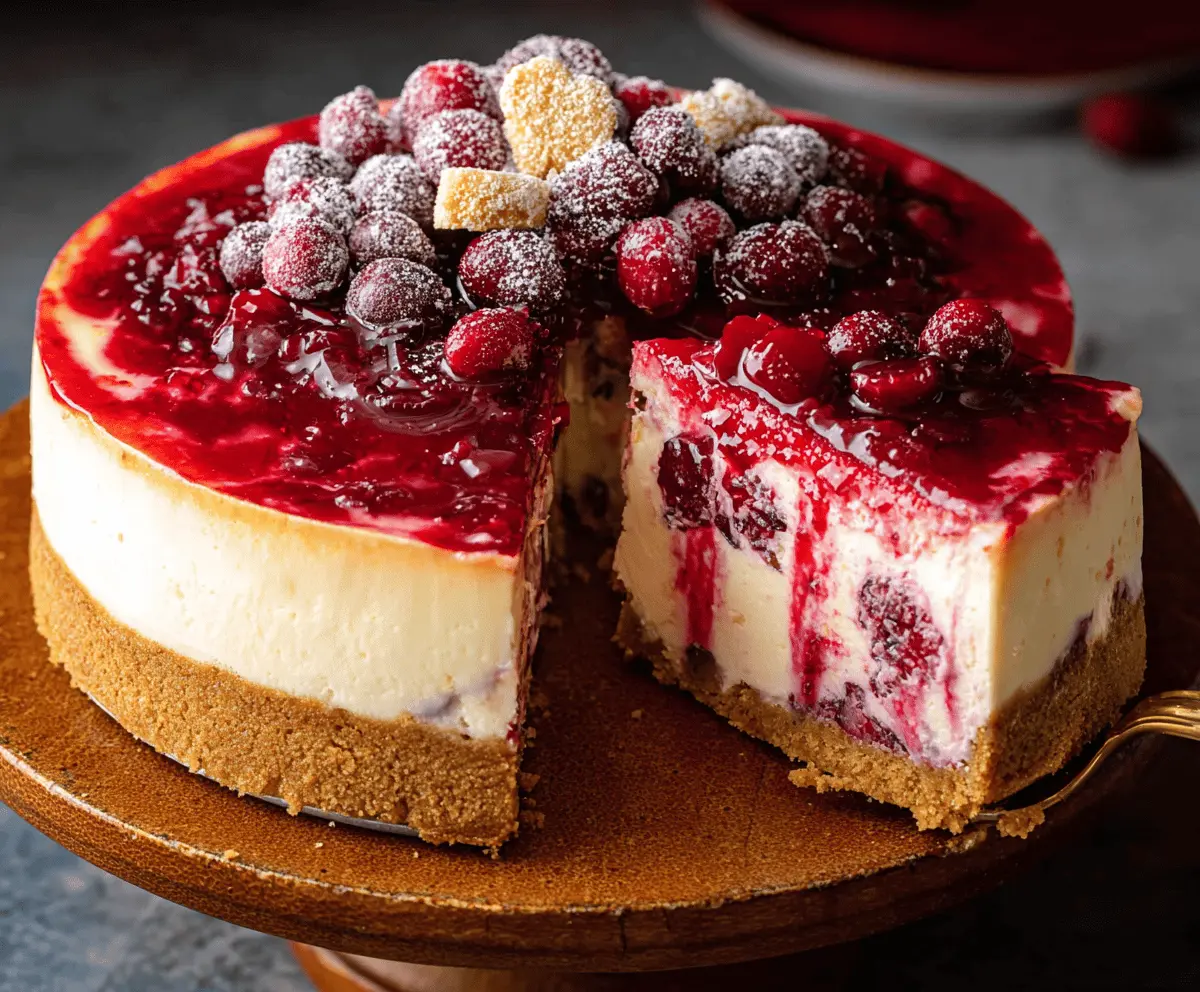
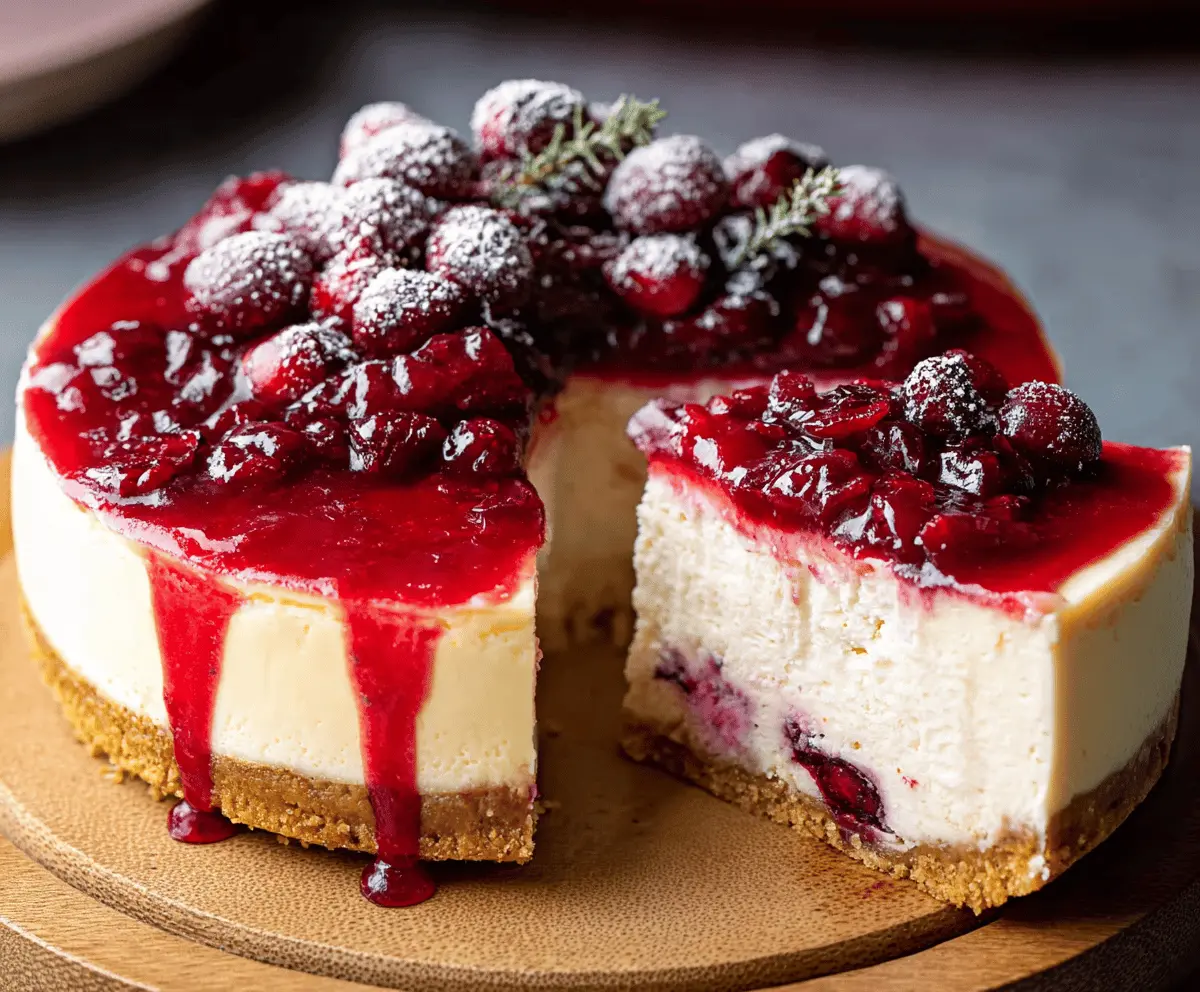
This cranberry cheesecake is a creamy delight with a pop of tartness from the berries. The buttery crust perfectly balances the rich filling, making every bite special!
I love how the bright red cranberries make this cheesecake look festive. It’s the perfect treat for gatherings, and I may or may not add extra cranberries on top just for fun! 😄
Key Ingredients & Substitutions
Graham Cracker Crumbs: These form the buttery base of your cheesecake. If you don’t have graham crackers, try crushed cookies like Oreos, vanilla wafers, or digestive biscuits for a twist on the flavor.
Cream Cheese: This creates the rich and creamy texture. For a lighter option, use Neufchâtel cheese, which has less fat but similar taste. If you need a dairy-free option, consider using vegan cream cheese.
Cranberries: Fresh cranberries give a tart taste that brightens the cheesecake. If out of season, frozen cranberries work well. You can even use cherry or raspberry filling for a different flavor if cranberries aren’t available.
Sour Cream: Adds creaminess and tang. If you prefer, full-fat Greek yogurt can be a suitable substitute, providing a similar texture with added protein.
How Can I Achieve a Smooth and Creamy Cheesecake Filling?
To get that perfect cheesecake texture, focus on these steps:
- Ensure the cream cheese is at room temperature for easy blending. Cold cream cheese can create lumps.
- Mix on a low speed initially to combine without over-aerating, which can crack the cheesecake.
- Add eggs one at a time. This helps maintain a smooth batter and prevents overmixing.
- Mix until just combined after adding sour cream and flour to keep the cheesecake dense and rich.
Trust me, patience is key in achieving that smooth, decadent texture!
Cranberry Cheesecake Recipe
Ingredients You’ll Need:
For the Crust:
- 1 1/2 cups (150g) graham cracker crumbs
- 1/4 cup (50g) granulated sugar
- 1/2 cup (115g) unsalted butter, melted
For the Cheesecake Filling:
- 4 (8 oz) packages cream cheese, softened
- 1 cup (200g) granulated sugar
- 1 tsp vanilla extract
- 4 large eggs
- 1 cup sour cream
- 1/4 cup all-purpose flour
- 1 1/2 cups fresh or thawed cranberries
For the Cranberry Topping:
- 1 1/2 cups fresh or frozen cranberries
- 1/2 cup granulated sugar
- 1/4 cup water
- 1 tbsp lemon juice
For Garnish:
- Fresh cranberries, sugared (optional)
- Powdered sugar for dusting (optional)
How Much Time Will You Need?
You’ll need about 20 minutes for prep time and 60-70 minutes for baking. After baking, the cheesecake needs to cool for about 1 hour in the oven and at least 4 hours in the fridge to set, so plan for a total of around 6 hours. For the best flavor and texture, it’s even better if you can let it chill overnight!
Step-by-Step Instructions:
1. Prepare the Crust:
First, preheat your oven to 325°F (163°C). In a medium bowl, combine the graham cracker crumbs, granulated sugar, and melted butter. Use a fork to mix until everything is well combined. Press this mixture firmly into the bottom of a 9-inch springform pan. Bake in the preheated oven for about 8-10 minutes until it’s lightly golden. Once done, remove it from the oven and let it cool while you prepare the filling.
2. Make the Cheesecake Filling:
In a large mixing bowl, beat the softened cream cheese using an electric mixer until it’s nice and smooth. Gradually add the granulated sugar while mixing until fluffy. Next, stir in the vanilla extract. Then, add the eggs one at a time, mixing lightly after each addition. Finally, fold in the sour cream and flour until everything is just combined.
3. Incorporate Cranberries in Filling:
Carefully fold the fresh or thawed cranberries into the cheesecake batter, ensuring they’re evenly distributed throughout.
4. Bake the Cheesecake:
Pour the cheesecake mixture carefully over the cooled crust in your springform pan. Gently tap the pan on the counter to release any air bubbles trapped in the batter. Bake for 60-70 minutes at 325°F (163°C), or until the edges are set and the center still jiggles a little. Once done, turn off the oven, crack the oven door open, and let the cheesecake cool in there for 1 hour.
5. Prepare the Cranberry Topping:
In a small saucepan, combine the cranberries, granulated sugar, water, and lemon juice. Cook this mixture over medium heat until the cranberries start to burst and the sauce thickens, which should take about 10 minutes. Once cooked, remove it from the heat and allow it to cool.
6. Add Topping and Chill:
Once the cheesecake has cooled to room temperature, pour the cranberry sauce evenly over the top. Cover the cheesecake and refrigerate for at least 4 hours, or preferably overnight, to let it fully set.
7. Garnish and Serve:
When you’re ready to serve, you can top the cheesecake with sugared fresh cranberries and dust it with powdered sugar if you’d like. Carefully remove the sides of the springform pan, slice, and enjoy every creamy, fruity bite of your beautiful cranberry cheesecake!
Can I Use a Different Type of Crust?
Absolutely! If you’re not a fan of graham cracker crust, feel free to use crushed Oreos, vanilla wafers, or even a nut-based crust for a gluten-free option. Just make sure to adjust the butter ratio if needed!
Can I Make This Cheesecake Without Eggs?
Yes, you can. For an egg-free version, try using 1/4 cup of unsweetened applesauce for each egg. Alternatively, commercial egg replacers or silken tofu blended until smooth can work as a great substitute.
How Do I Store Leftovers?
Store any leftover cheesecake in an airtight container in the refrigerator for up to 5 days. If you want to keep it longer, you can freeze individual slices wrapped tightly in plastic wrap and aluminum foil for up to 3 months.
Can I Use Frozen Cranberries?
Yes, frozen cranberries work perfectly! Just be sure to thaw them first and drain any excess moisture before adding them to the cheesecake filling or the topping. They may make the mixture slightly more watery if not properly handled, so draining is key!