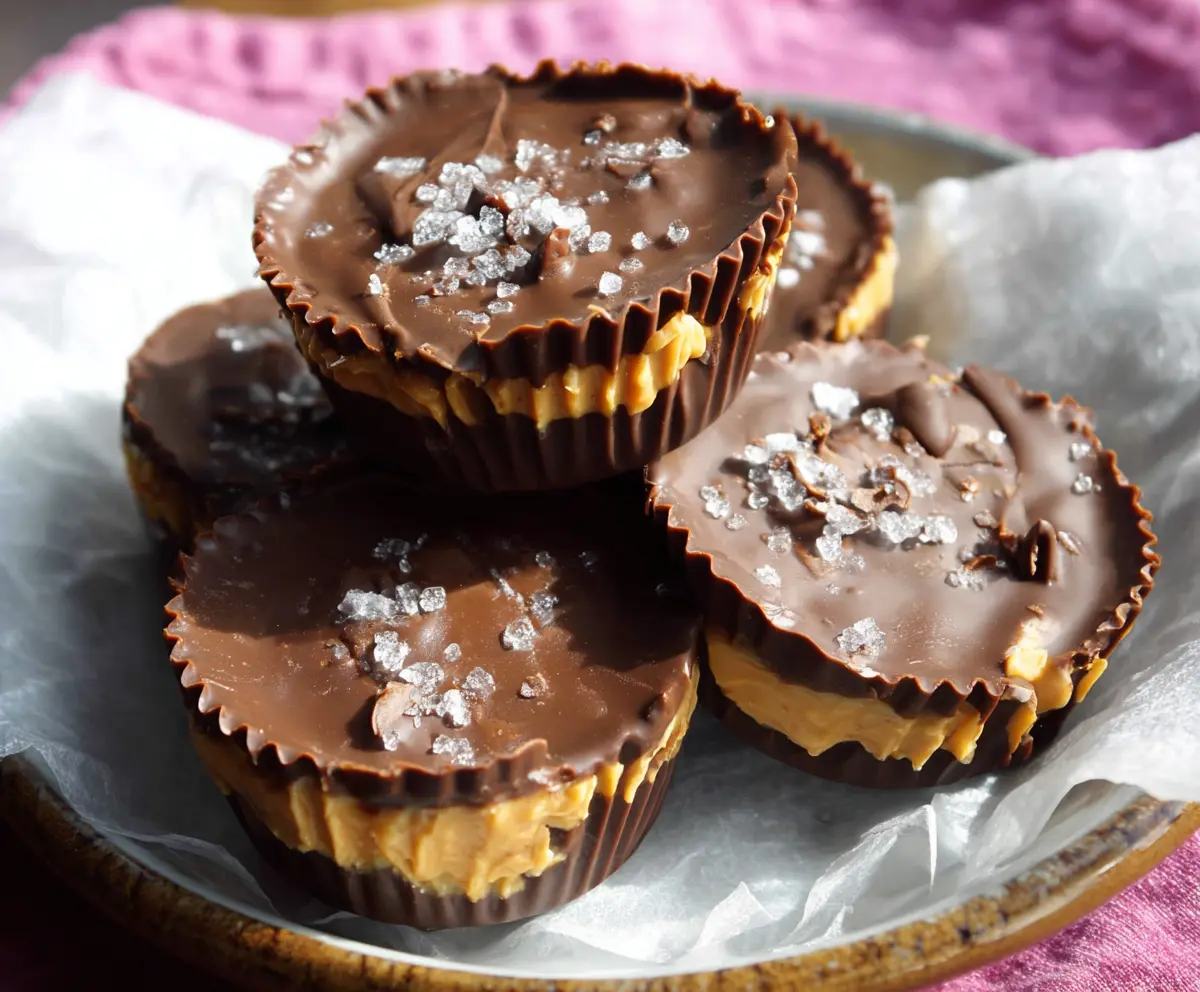
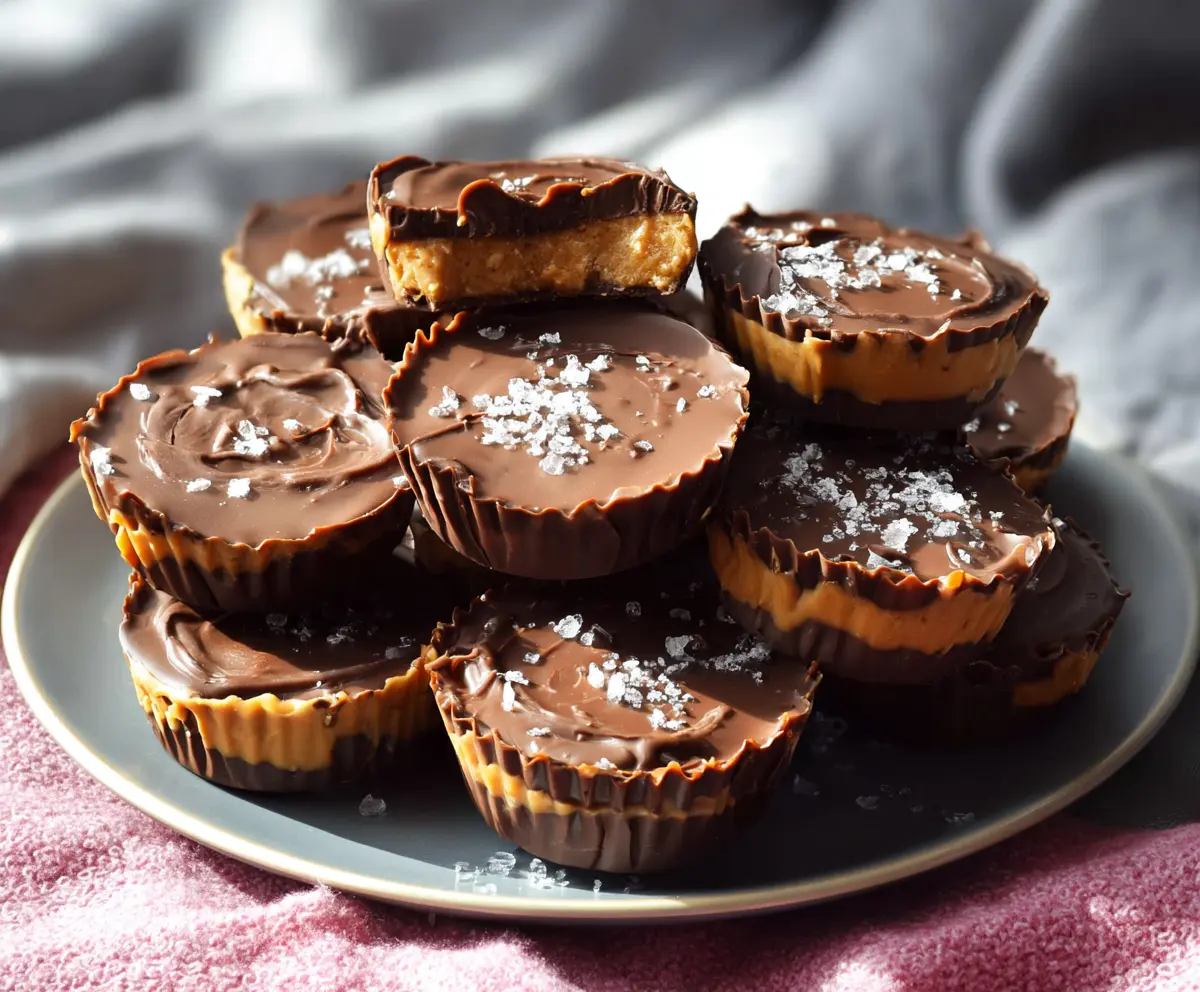
These Chocolate Peanut Butter Cups are a sweet treat bursting with flavor! They combine rich chocolate and creamy peanut butter to make a snack that’s hard to resist.
Honestly, who can say no to chocolate and peanut butter? I love making these when I’m craving something sweet, and they always disappear fast—so watch out for your share! 😋
Key Ingredients & Substitutions
Creamy Peanut Butter: Use creamy peanut butter for smooth texture. If you prefer crunchy, that works too! If you’re looking for a nut-free option, try sunflower seed butter or almond butter.
Unsalted Butter: This adds richness. You can substitute with coconut oil for a dairy-free version, or use margarine if you need a lactose-free alternative.
Powdered Sugar: This sweetens the peanut butter mixture and helps it bind. If you’re watching sugar, consider using a sugar alternative, like powdered erythritol or a low-carb sweetener.
Chocolate Chips: Semi-sweet chips are perfect, but feel free to mix it up! Dark chocolate offers a richer taste, while milk chocolate adds sweetness. You can even use dairy-free chocolate chips if needed.
How Do I Melt Chocolate Without Burning It?
Melted chocolate can seize up if overheated. Here’s how to do it properly:
- Use a microwave-safe bowl. Add chocolate chips and heat in 30-second bursts, stirring in between. This prevents hot spots that burn.
- If you prefer stovetop, use a double boiler. Simmer water in a pot, place a heatproof bowl with chocolate on top, stirring as it melts.
- Always remove it from the heat as soon as it’s almost melted, and stir until smooth. The residual heat will complete the melting without burning.
Take your time melting chocolate and you’ll achieve a perfectly smooth consistency every time!
How to Make Chocolate Peanut Butter Cups
Ingredients You’ll Need:
For the Filling:
- 1 cup creamy peanut butter (unsweetened or lightly salted)
- 1/4 cup unsalted butter, softened
- 1/4 cup powdered sugar
For the Chocolate Layer:
- 1 1/2 cups semi-sweet chocolate chips (or dark/milk chocolate chips as preferred)
- Sea salt flakes (for topping)
How Much Time Will You Need?
This recipe takes about 15 minutes of prep time and at least 1 hour in the refrigerator to set. It’s an easy treat to whip up, and the hardest part is just waiting for them to chill!
Step-by-Step Instructions:
1. Prepare the Muffin Tin:
Begin by lining a muffin tin or small cupcake tray with paper liners. This will help you easily remove the peanut butter cups later.
2. Melt the Chocolate:
In a microwave-safe bowl, melt 3/4 cup of the chocolate chips. Do this in 30-second intervals, stirring between each interval until the chocolate is completely smooth. Keep an eye on it to avoid burning!
3. Create the Bottom Layer:
Take about 1 tablespoon of the melted chocolate and spoon it into each paper liner, spreading it evenly to cover the bottom. Once done, place the tray in the freezer for about 10 minutes to let the chocolate set.
4. Make the Peanut Butter Mixture:
While the chocolate is setting, combine the creamy peanut butter, softened butter, and powdered sugar in a mixing bowl. Mix well until it’s smooth and creamy—this is the delicious filling!
5. Add the Peanut Butter Layer:
Remove the tray from the freezer after the chocolate has set. Add about 1 tablespoon of the peanut butter mixture on top of each chocolate layer. Use the back of a spoon to press it down gently and even it out.
6. Finish Melting the Chocolate:
Now, melt the remaining 3/4 cup of chocolate chips using the same microwave method. Stir until smooth.
7. Top with Chocolate:
Spoon the melted chocolate over the peanut butter filling in each cup, ensuring that you cover the filling completely with chocolate.
8. Add a Touch of Salt:
Sprinkle a pinch of sea salt flakes on top of each cup. This adds a lovely salty crunch that complements the sweetness!
9. Chill the Cups:
Put the tray back in the refrigerator for at least 1 hour or until the chocolate has fully set. Patience is key here!
10. Enjoy Your Treats:
Once set, carefully remove the peanut butter cups from the paper liners. Enjoy them right away or store them in an airtight container in the fridge for a tasty treat later!
These homemade peanut butter cups are sure to impress with their rich chocolate and creamy peanut butter filling. A delightful snack or dessert for any occasion! Enjoy! 🍫🥜
Can I Use Natural Peanut Butter Instead of Creamy Peanut Butter?
Yes! Natural peanut butter works great, but it may be a bit runnier. If you find it too loose, consider adding a little more powdered sugar to help it firm up in the cups.
How Should I Store the Chocolate Peanut Butter Cups?
Store any leftovers in an airtight container in the fridge. They’ll stay fresh for up to a week, although they probably won’t last that long!
Can I Make These Peanut Butter Cups Vegan?
Absolutely! You can use dairy-free chocolate chips and substitute coconut oil for the butter in the peanut butter mixture. This keeps the creaminess while making it vegan-friendly.
What If I Don’t Have a Muffin Tin?
No worries! You can use a silicone mold or even small cupcake liners on a plate. Just make sure they can hold the filling without spilling!