Chicken Sushi Cups are a fun twist on traditional sushi! These tasty little cups are made with crispy chicken, fresh veggies, and sticky rice all packed into a bite-sized shell.
Making these cups is super easy and perfect for sharing at parties. Honestly, I love how they look all colorful and fancy, but they’re as simple as putting together a chicken salad! 🎉
Key Ingredients & Substitutions
Sushi Rice: This short-grain rice is key for its sticky texture when cooked. If sushi rice isn’t available, you can use short-grain brown rice, though the texture will be slightly different. Just remember to rinse it well!
Chicken: Shredded or cubed chicken is ideal, but for a quicker option, a store-bought rotisserie chicken works perfectly. You could even use tofu for a vegetarian twist or cooked shrimp for a seafood version.
Avocado: Ripe avocado adds creaminess. If you’re avoiding avocados, consider using a dollop of Greek yogurt for creaminess or a mix of finely chopped cucumber to add a fresh crunch.
Rice Vinegar: This brightens the rice flavor. In a pinch, you can use apple cider vinegar or lemon juice, but adjust the quantity since they are stronger.
Sriracha: This adds a bit of heat! If you want to control the spice level, use mayo with a touch of sriracha or omit it altogether.
How Do I Make Sure the Rice is Perfectly Cooked?
Cooking sushi rice properly is essential for great sushi cups. Here’s how you can ensure it turns out just right:
- Rinse the sushi rice multiple times in cold water until the water runs clear. This removes excess starch for a better texture.
- Use the right water-to-rice ratio (2.25 cups water for every 2 cups rice). Don’t skip this step for sticky rice!
- After cooking, let it sit covered for about 10 minutes—this allows it to steam and finish cooking fully.
- Once cooled, mix the seasoning gently with the rice to avoid squishing the grains.
Following these tips will give you perfect sushi rice every time!

How to Make Chicken Sushi Cups
Ingredients You’ll Need:
- 2 cups sushi rice
- 2 1/4 cups water (for cooking rice)
- 1/4 cup rice vinegar
- 1 tablespoon sugar
- 1 teaspoon salt
- 2 chicken breasts, cooked and shredded or cubed
- 1 ripe avocado, sliced
- 1/2 cup mango or pineapple chunks (optional, for sweetness)
- 2 tablespoons soy sauce or tamari
- 1 tablespoon sriracha or chili sauce (adjust to taste)
- 2 green onions, thinly sliced
- 1 tablespoon toasted sesame seeds
- 1 teaspoon sesame oil
- Optional garnish: fresh cilantro or shredded nori
How Much Time Will You Need?
This delightful dish will take about 40 minutes in total. You’ll need approximately 20 minutes for prep (cooking the rice and chopping the ingredients) and another 20 minutes for assembling the cups and letting everything chill before serving.
Step-by-Step Instructions:
1. Cook the Sushi Rice:
Start by rinsing the sushi rice under cold water until the water runs clear. This step is crucial for removing the excess starch that can make the rice too gooey. Once rinsed, combine the rice and water in a rice cooker or pot. Cook according to package instructions (should take about 15-20 minutes) until the rice is tender and sticky.
2. Season the Rice:
In a small bowl, mix rice vinegar, sugar, and salt together until dissolved. When the rice is cooked, gently fold this mixture into the warm rice using a spatula. This adds flavor and gives the rice that lovely sushi taste. Set the rice aside to cool to room temperature; it should remain sticky but not mushy.
3. Prepare the Chicken:
If your chicken isn’t cooked yet, season the breasts with salt and pepper, then grill or pan-fry until they are fully cooked. Once cooled, shred or cube the chicken into bite-size pieces. Toss the chicken in a bowl with soy sauce, sesame oil, and sriracha to infuse delicious flavors.
4. Prepare Fillings:
Slice the avocado into thin pieces, and if you’re using mango or pineapple, cut them into small, manageable chunks. Don’t forget to slice the green onions thinly for a fresh crunch!
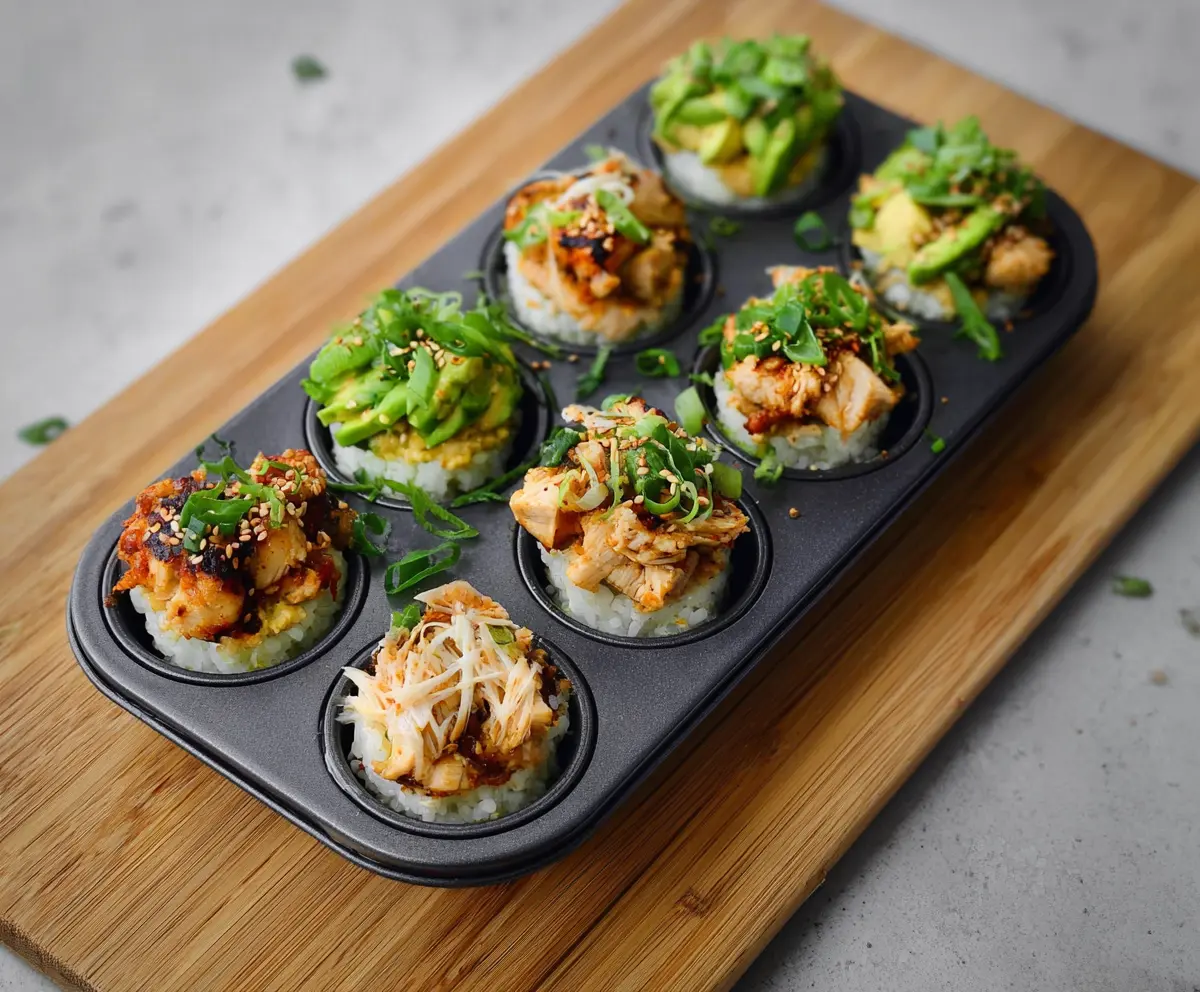
5. Assemble the Sushi Cups:
Lightly oil a muffin tin or use silicone molds for easy removal. Press a small handful of sushi rice firmly into each cup, making a nice compact base.
6. Add Toppings:
On top of each rice cup, add the flavorful chicken pieces, followed by the avocado slices or the optional fruit chunks. Finish each cup with a sprinkle of green onions and toasted sesame seeds for added texture and flavor!
7. Serve:
Carefully remove the sushi cups from the tin by using a small spatula or spoon. If desired, garnish them with fresh cilantro or shredded nori for a beautiful presentation.
8. Optional Dipping Sauce:
For extra flavor, serve your Chicken Sushi Cups with a side of soy sauce, wasabi, or a spicy mayo sauce. Enjoy these flavor-packed, colorful cups as a unique appetizer or a fun party snack!
Can I Use Brown Rice Instead of Sushi Rice?
Yes, you can use short-grain brown rice if sushi rice isn’t available, but it will change the texture a bit. Brown rice requires a longer cooking time and more water, so adjust your cooking instructions accordingly!
How Can I Store Leftover Sushi Cups?
Store any leftover Chicken Sushi Cups in an airtight container in the fridge for up to 2 days. To maintain the best texture, it’s best to eat them fresh, but if you’re storing, try to keep the toppings separate until you’re ready to enjoy them again.
Can I Make These Sushi Cups Vegetarian?
Absolutely! You can substitute the chicken with a mix of sautéed vegetables, tofu, or even avocado and cucumber for a fresh take. Just make sure to swap the soy sauce for a vegetarian alternative if needed!
How Do I Keep the Rice from Being Too Sticky?
Rinse the sushi rice thoroughly to remove excess starch, which helps prevent stickiness. Additionally, once it’s cooked, allow it to cool to room temperature before assembling, and avoid over-mixing when you fold in the seasoning. This will help maintain a good texture!