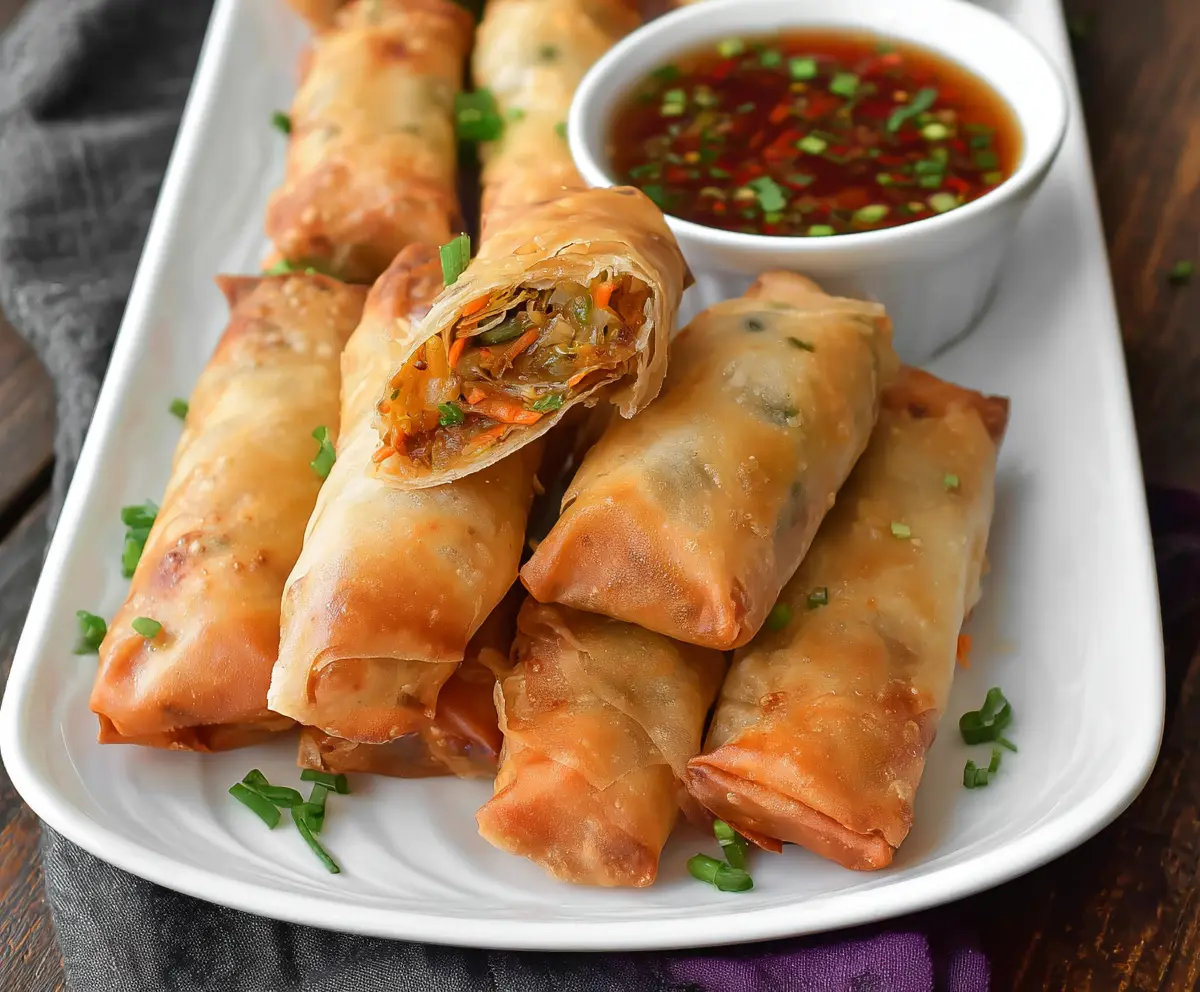
These baked Chinese vegetable spring rolls are crispy on the outside and packed with colorful veggies inside. They make for a tasty snack or appetizer!
I always feel like a master chef when I make these, even though they’re super easy! Plus, baking means less oil, so you can enjoy them guilt-free. Yum!
Key Ingredients & Substitutions
Spring Roll Wrappers: These are essential for the crisp texture. If you can’t find spring roll wrappers, you can use rice paper or even make your own using flour and water.
Cabbage: Green or Napa cabbage works great. If you’re looking for something different, try using bok choy or even spinach. They add a unique flavor and will keep it healthy.
Carrots: Shredded carrots add sweetness and crunch. If you have zucchini or bell peppers, they work too! Just make sure to cut them into thin strips.
Oyster Sauce: This sauce gives a rich flavor. For a vegetarian option, use mushroom sauce or soy sauce. You can even make a homemade stir-fry sauce with soy sauce and a bit of sugar.
Mushrooms: While optional, they add a nice umami flavor. If you don’t have any on hand, you can leave them out or substitute with chopped nuts for extra crunch.
How Do I Get Perfectly Sealed Spring Rolls?
Sealing your spring rolls properly is key to preventing them from opening up while baking. Here’s how to do it right:
- Use the cornstarch slurry as glue. It works really well to seal the edges tightly.
- Don’t overfill! Stick to about 2 tablespoons of filling to make rolling easier.
- When rolling, be gentle but firm. Tuck tightly as you roll to keep the shape together.
Practice makes perfect! Don’t worry if your first few rolls aren’t perfect. Enjoy the process and have fun in the kitchen!

How to Make Baked Chinese Vegetable Spring Rolls
Ingredients You’ll Need:
For the Spring Rolls:
- 1 package (about 12 sheets) spring roll wrappers
- 2 cups shredded cabbage (green or Napa)
- 1 cup shredded carrots
- 1 cup bean sprouts
- 1/2 cup thinly sliced bell pepper (red or green)
- 1/2 cup thinly sliced mushrooms (optional)
- 3 green onions, finely chopped
- 2 cloves garlic, minced
- 1 tablespoon fresh ginger, minced
For the Sauce and Seasoning:
- 2 tablespoons soy sauce
- 1 tablespoon oyster sauce (or vegetarian stir-fry sauce)
- 1 teaspoon sesame oil
- 1/4 teaspoon white pepper or black pepper
- 2 teaspoons cornstarch dissolved in 2 tablespoons water (for sealing rolls)
- Cooking spray or oil for brushing
How Much Time Will You Need?
This recipe takes about 30 minutes to make from start to finish—15 minutes for prep and 15 minutes for baking. You’ll enjoy a crispy and healthier version of spring rolls without the deep-frying hassle!
Step-by-Step Instructions:
1. Preheat and Prepare Your Baking Sheet:
First, turn on your oven and preheat it to 400°F (200°C). While it heats up, get your baking sheet ready by lining it with parchment paper or giving it a light grease with cooking oil. This helps prevent sticking.
2. Cook the Vegetables:
In a large pan or wok, heat a small drizzle of oil over medium-high heat. Once hot, add minced garlic and ginger. Sauté for about 30 seconds until you smell their wonderful aroma. Now, toss in the shredded cabbage, carrots, bean sprouts, bell pepper, mushrooms (if using), and green onions. Stir-fry them for 3-5 minutes until the veggies are tender yet still crunchy. Remove from heat and let it cool a little.
3. Flavor the Filling:
Next, stir in the soy sauce, oyster sauce, sesame oil, and pepper. Mix everything together and let the flavors blend for another minute. After that, set the mixture aside to cool.
4. Wrapping the Spring Rolls:
Now it’s time to work with the spring roll wrappers! Carefully separate the sheets according to the package instructions. Lay one wrapper down on a flat surface like a diamond shape. Scoop about 2 tablespoons of the veggie filling onto the bottom corner of the wrapper.
5. Roll it Up:
Start by folding the bottom corner over the filling. Then fold in the two side corners like you’re wrapping a present. Roll it tightly towards the top corner of the wrapper, so everything is snug inside. To seal the edge, use a little of the cornstarch slurry—just dab it on the edge to keep the roll closed. Place the finished roll seam-side down on your prepared baking sheet.
6. Repeat and Prepare for Baking:
Keep rolling up the rest of your spring rolls until you’ve used up all the filling. Give each roll a light brush or spray with cooking oil to help them get crispy and golden in the oven.
7. Bake to Crispy Perfection:
Pop the baking sheet in the preheated oven and bake for about 15-20 minutes. Be sure to flip the spring rolls halfway through so they brown evenly. Once they are golden brown and crispy, take them out and let them cool for a few minutes.
8. Serve and Enjoy!
Ready for the best part? Serve your baked spring rolls with sweet chili sauce, soy sauce, or your favorite dipping sauce. Enjoy your delicious and healthier baked Chinese vegetable spring rolls!
Can I Use Other Vegetables in This Recipe?
Absolutely! Feel free to get creative with your veggies. Zucchini, broccoli, or even sweet potatoes can be great additions. Just make sure to chop them into thin pieces for even cooking.
Can I Make These Spring Rolls Ahead of Time?
Yes, you can! Prepare the filling and roll up the spring rolls ahead of time. Just keep them in an airtight container in the fridge for up to 24 hours before baking. You may need to add a couple of extra minutes to the baking time if they are cold when you put them in the oven.
How Do I Store Leftover Spring Rolls?
Store any leftover spring rolls in an airtight container in the fridge for up to 3 days. To reheat, place them in a preheated oven at 375°F (190°C) for about 10-15 minutes or until crispy again.
What If My Spring Roll Wraps Are Dry?
If your spring roll wrappers feel dry or brittle, try covering them with a damp paper towel for a few minutes before using. This helps to soften them and makes wrapping easier. Just be careful not to let them sit too long, or they may become too wet!